How To Properly Set Up And Adjust An Easyrig
Master the Easyrig set up and learn how to adjust it correctly so you can shoot for longer and make the most of this awesome tool!
Jamie Harris
Updated 26 Apr 2023
·
7 min read
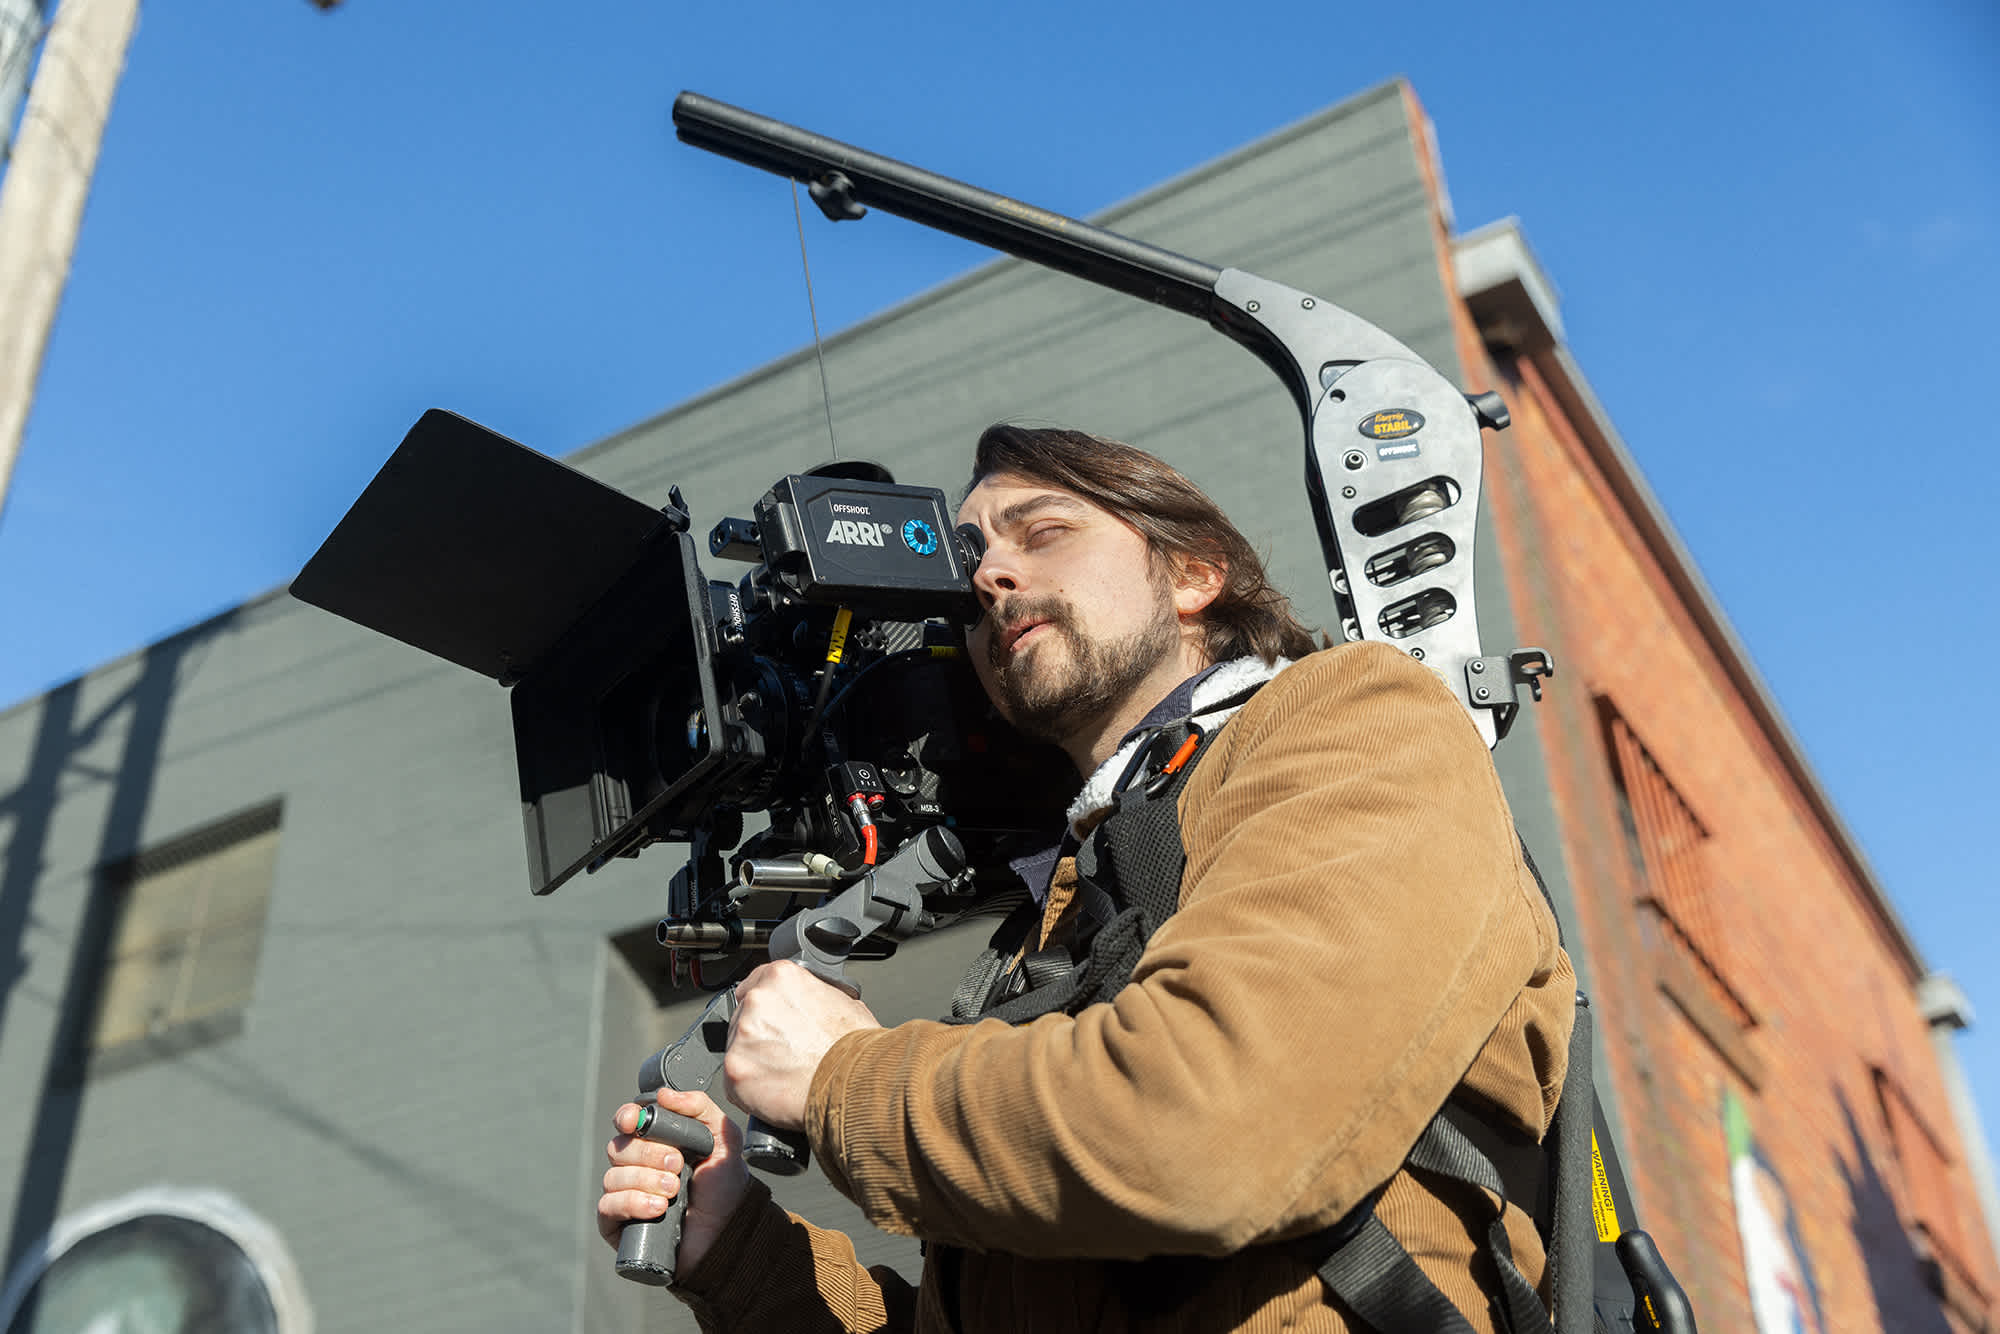
An Easyrig is an extremely useful device for camera operators that takes the weight of a handheld camera from your back and neck and distributes it around your core - meaning you have less fatigue and can operate for longer. However, a poorly configured Easyrig can be cumbersome to work with. So here are some tips for using this great tool well.
Easyrigs come in a variety of configurations with different payload ranges, arm extensions and dampening systems.
Choosing The Right Easyrig
Choosing the right Easyrig for your camera set up is key to getting the best result.
Payload Range
Each Easyrig model is designed to work within a certain weight range. If your camera set up is outside this range then it won't work properly. To work out your camera weight, you need to add together the approximate weight of the camera, lens and any accessories you are using. We include item weight in the Specifications tab for most products stocked at Offshoot, making it very easy to work out the total weight of your set up during the planning stages.
If the camera is too heavy for the Easyrig then you will still be supporting much of the weight yourself. If your camera is too light, you will be fighting against the Easyrig to hold the camera down.
Of course, you can sometimes make it work with an Easyrig that's outside the ideal range by adding or removing accessories from the camera, but it's far better if you choose the correct payload from the outset.
The payload range for all Easyrigs stocked by Offshoot can be found in the Specifications tab. You can also call us to discuss your particular set up if you are unsure.
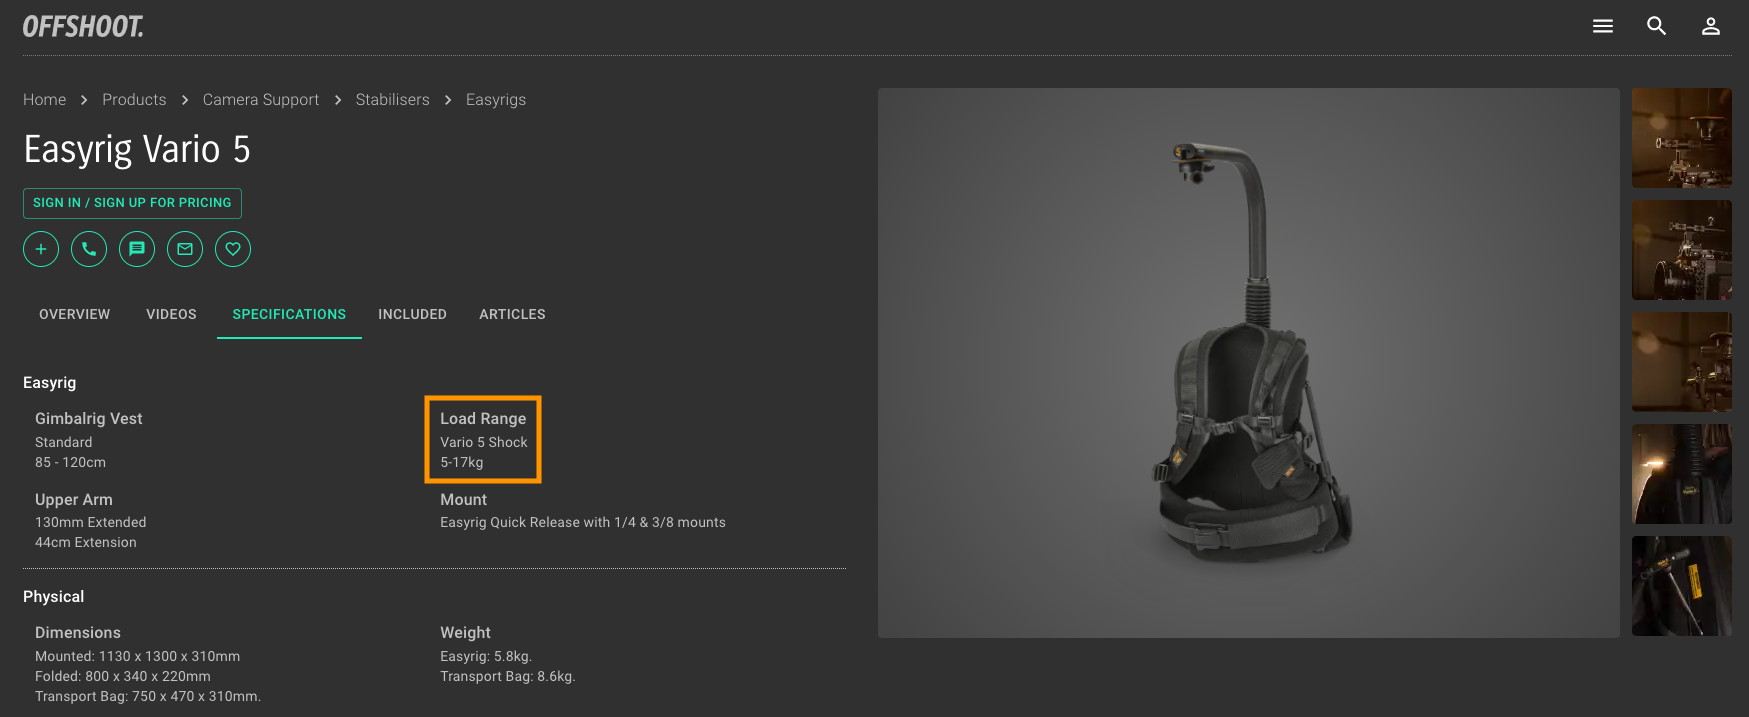
The Easyrig Vario 5 is a very versatile option as it has a large payload range.
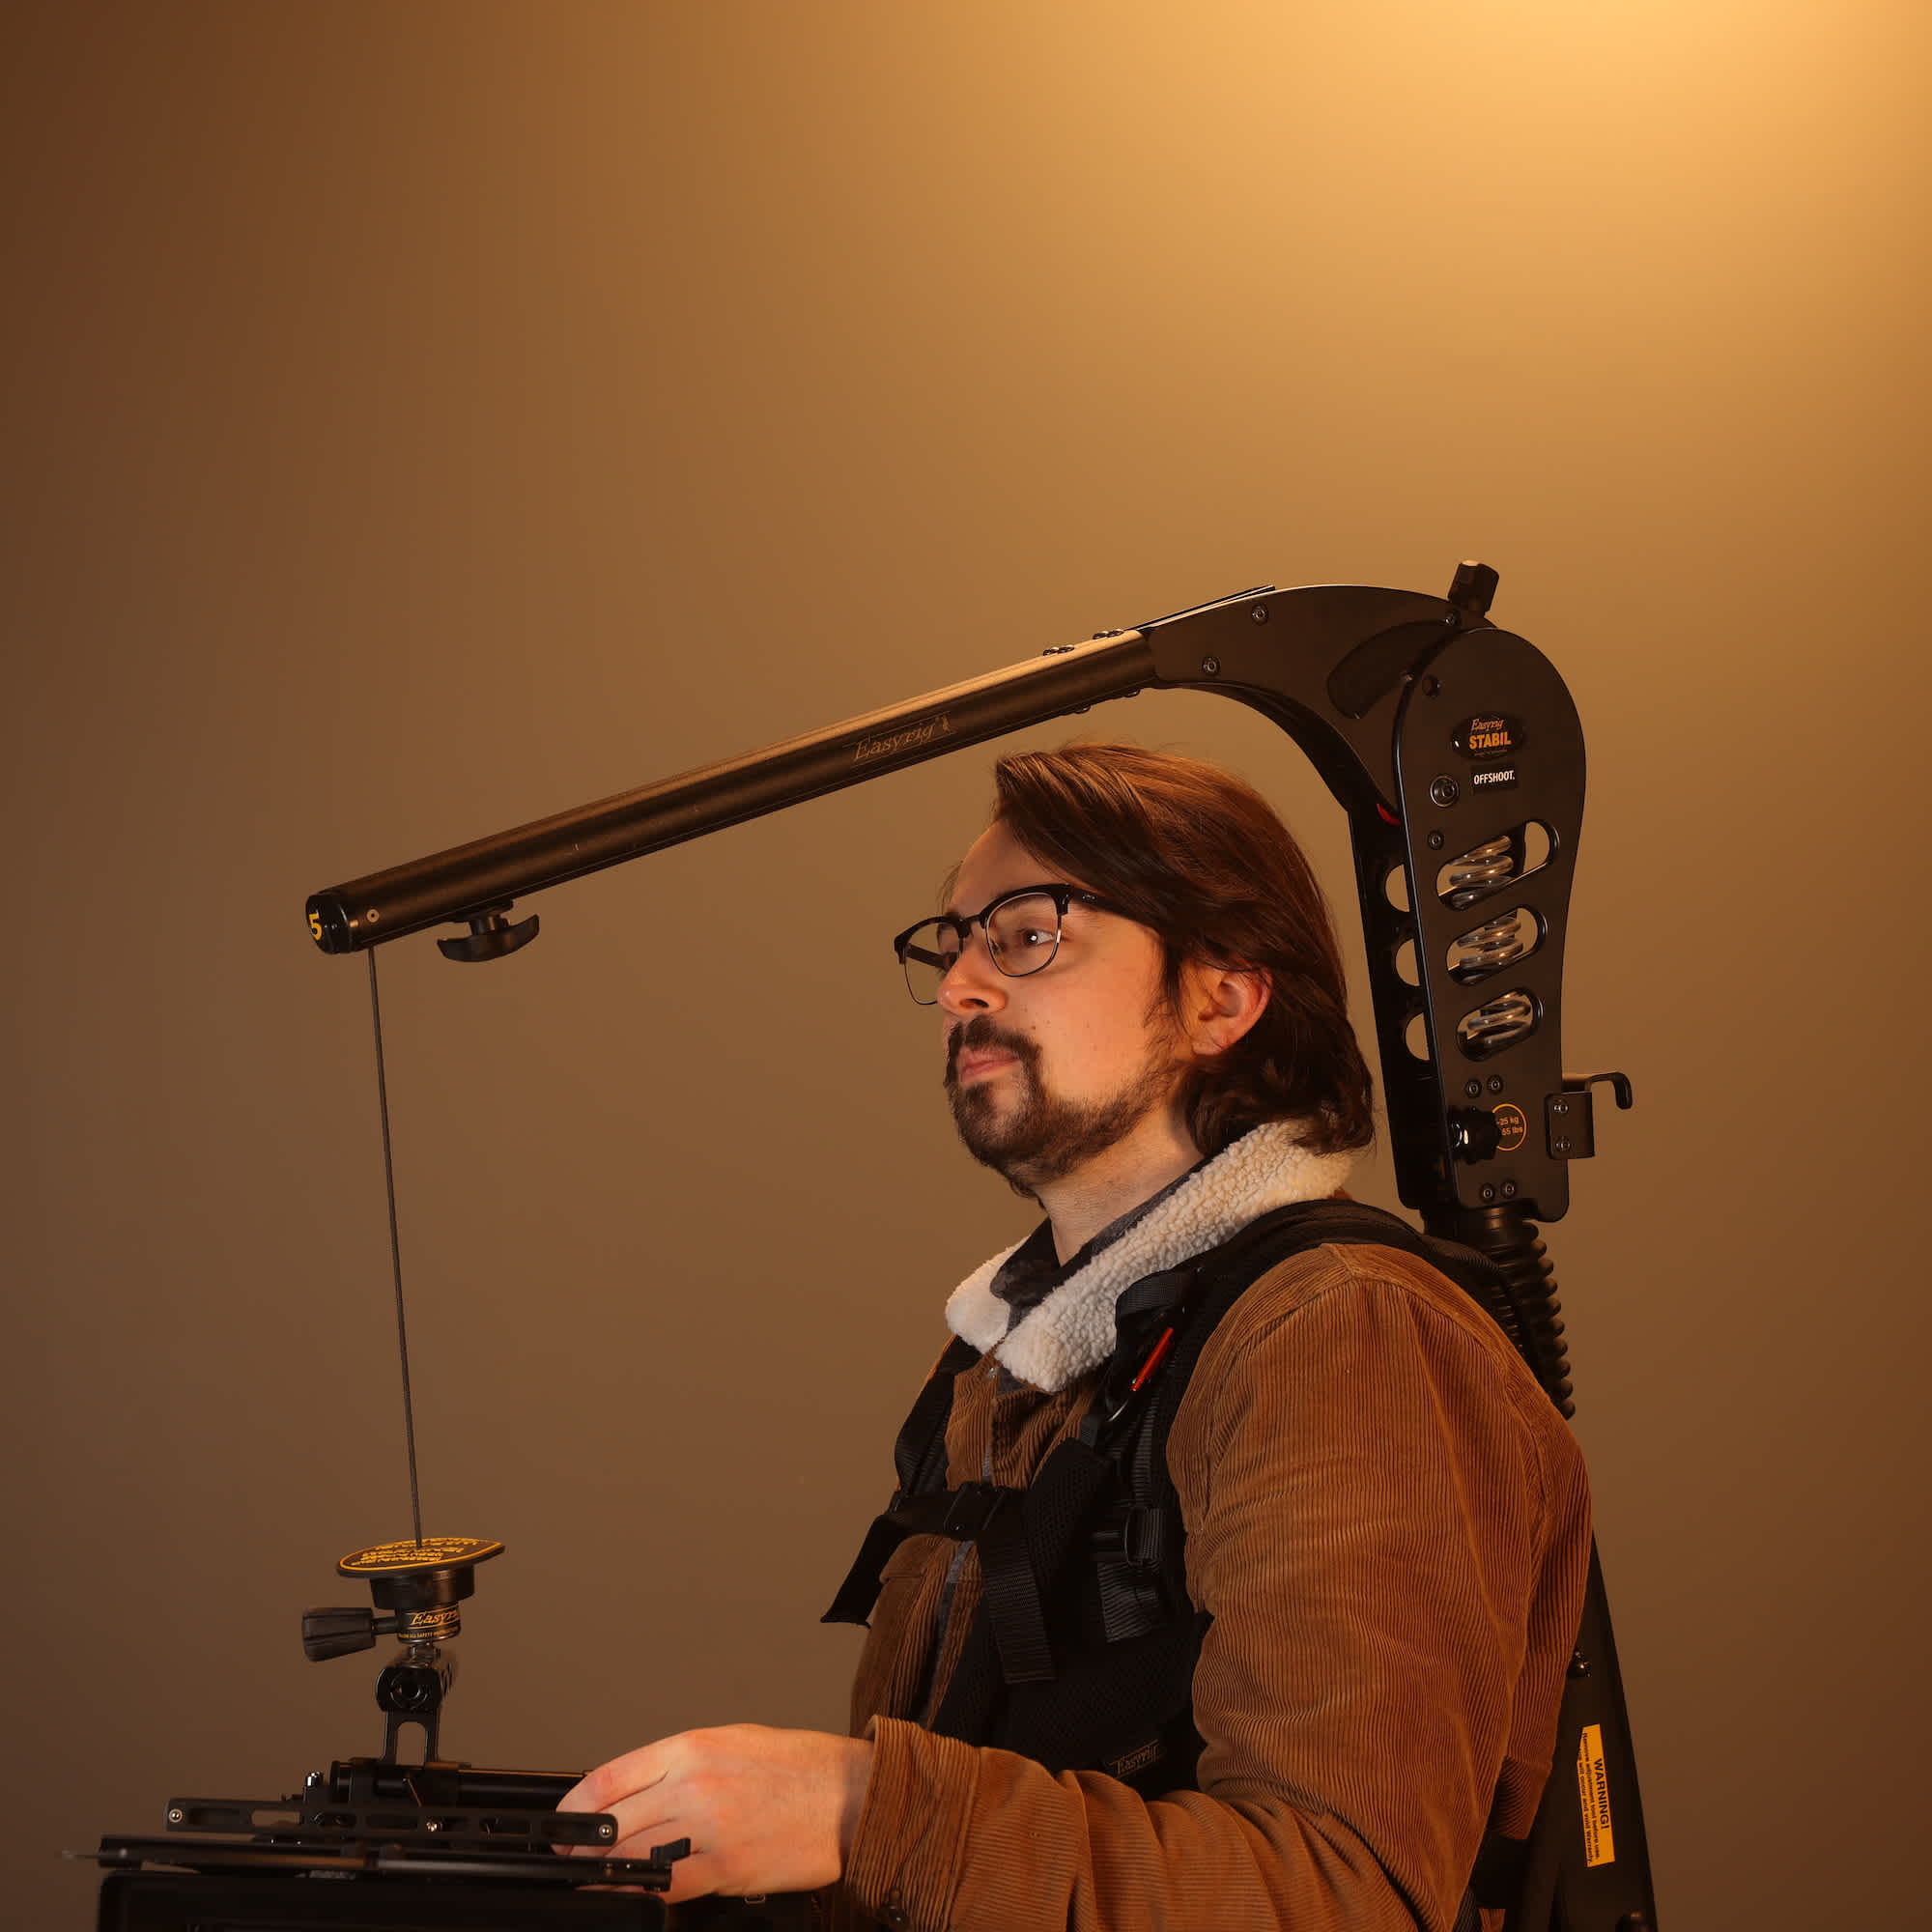
Stabiliser Arm
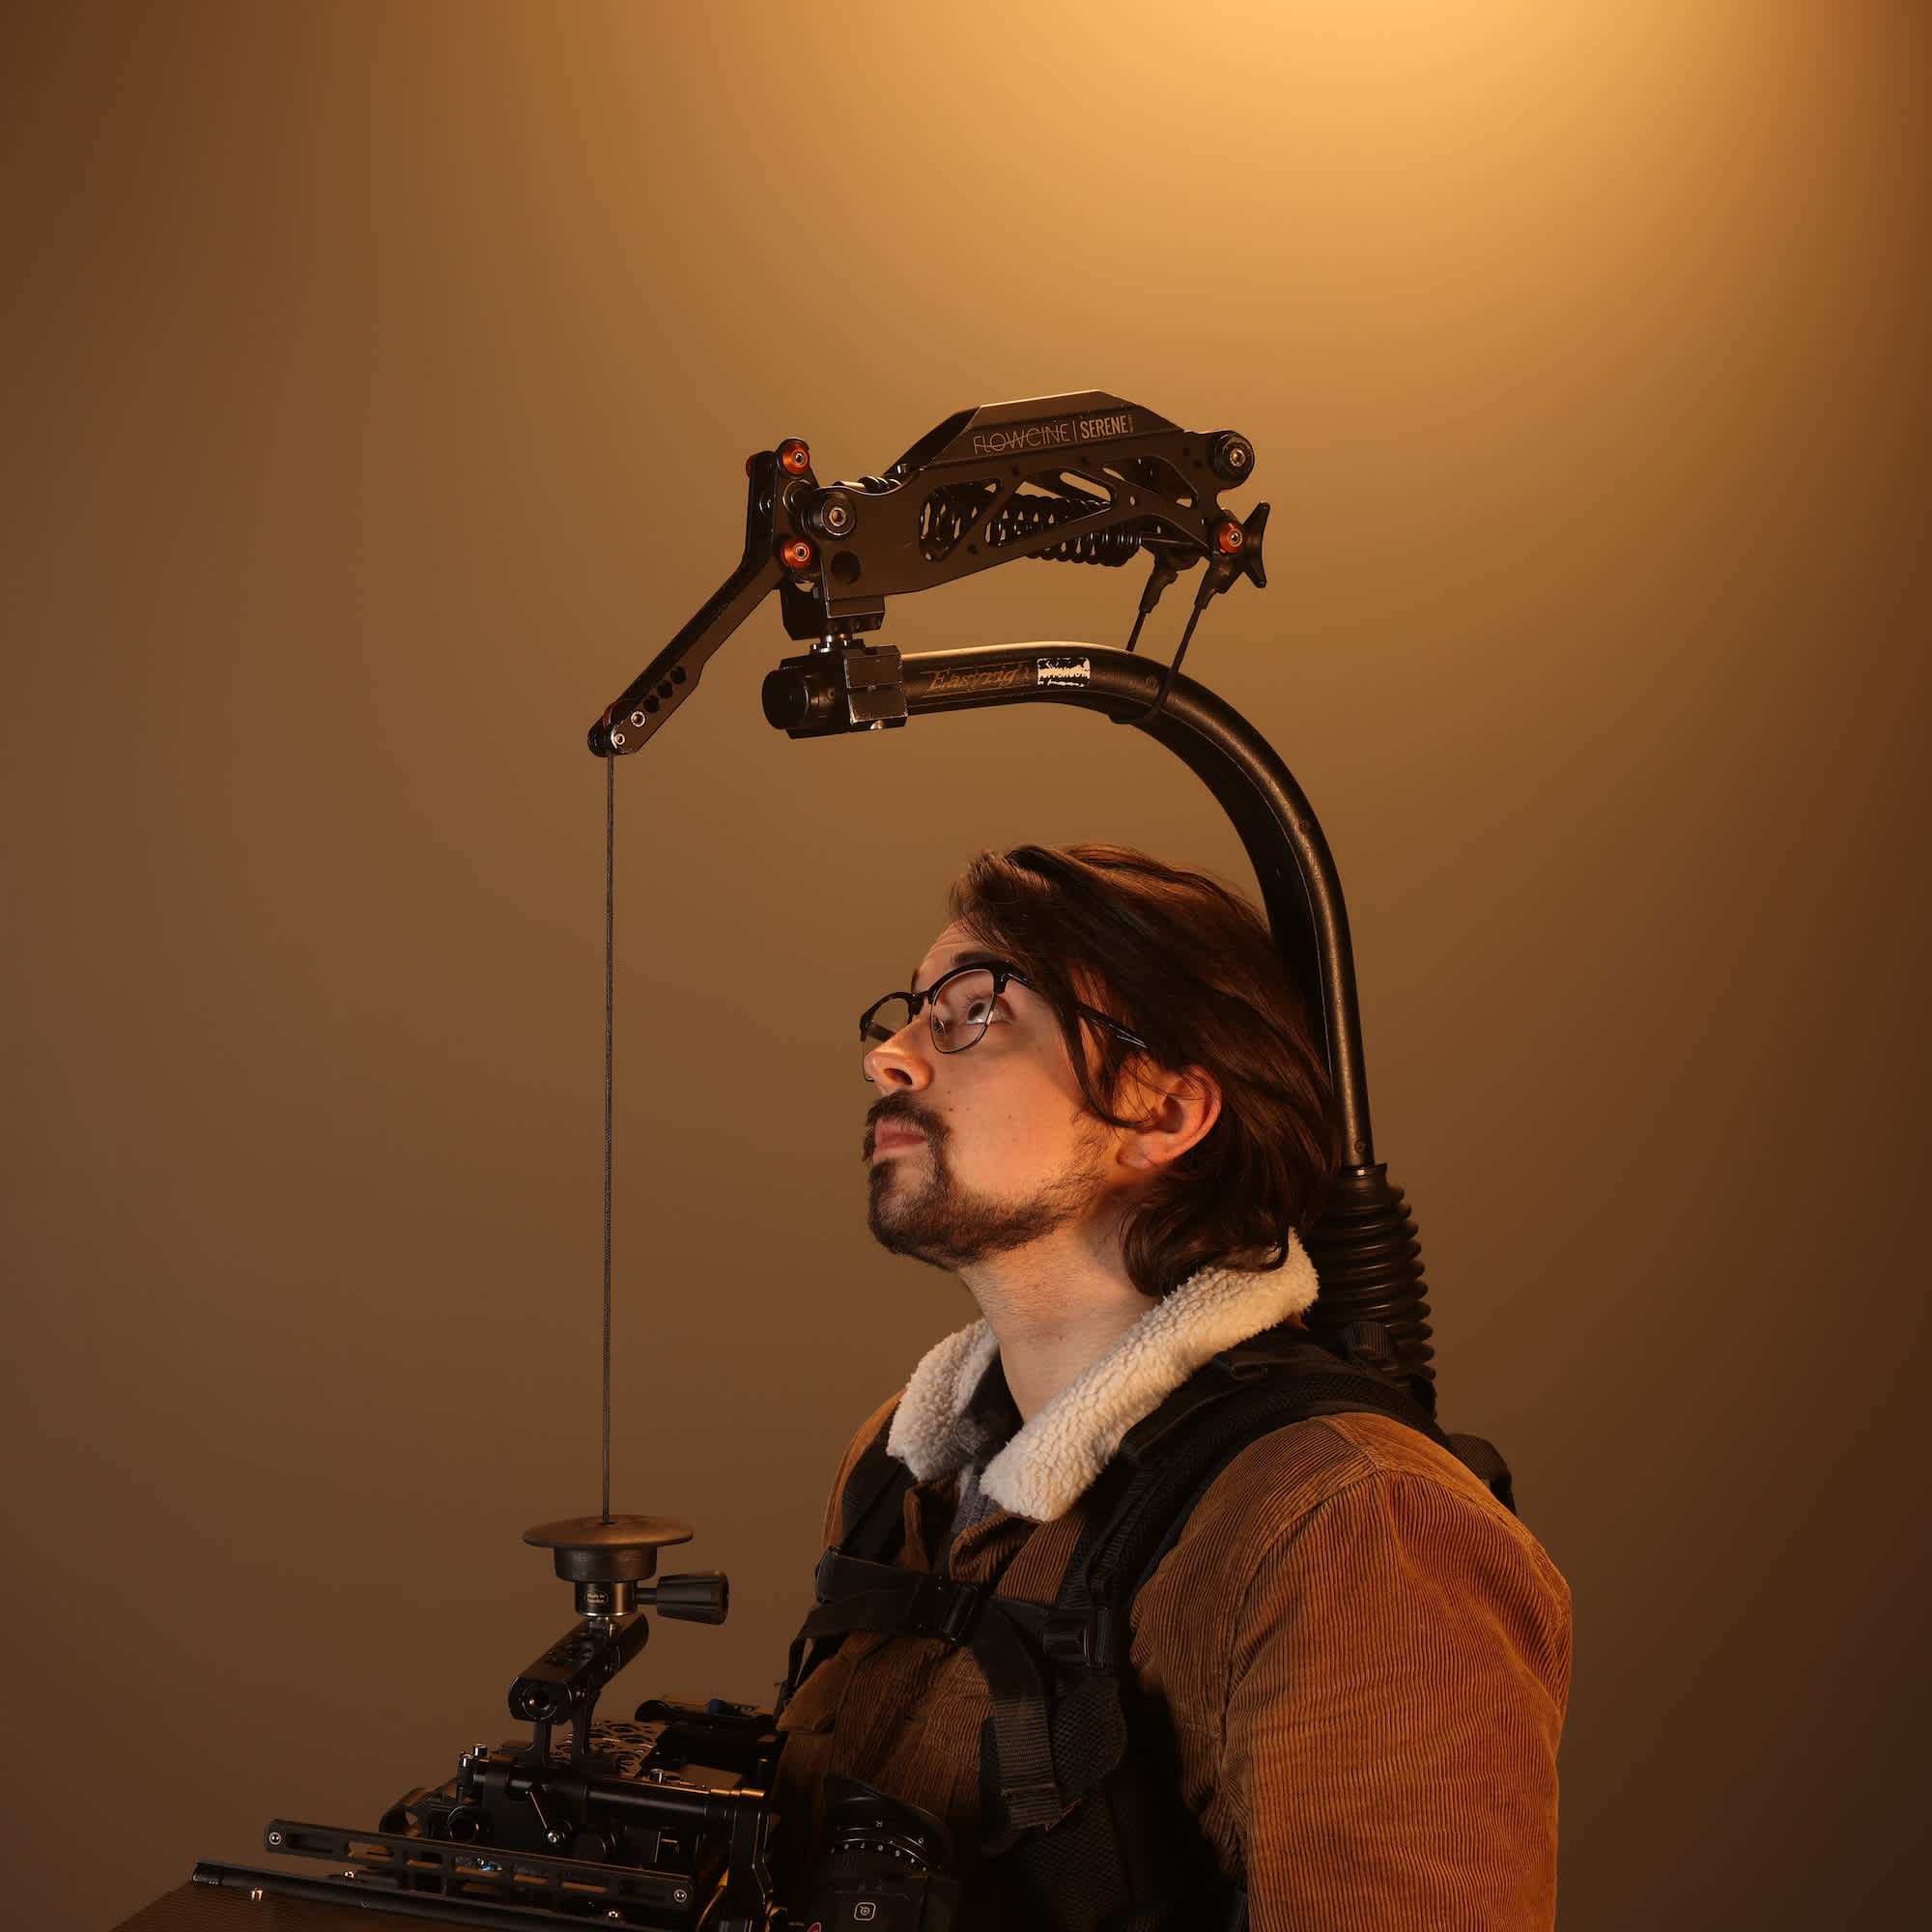
A stabiliser arm will dampen both vertical and lateral movement to reduce camera shake. We have two options for stabilising arms, the Easyrig Stabil G2 and the Flowcine Serene. The Serene is the original two axis spring arm introduced in 2014 by Flowcine and the Stabil G2 is a more recent release from Easyrig that does a very similar job but with a few tweaks, such as the ability to lock the arm if you don't want to dampen it.
These arms are fixed to the Easyrigs and cannot be removed.
Setting Up The Easyrig
Adjusting the Easyrig is a simple process, but it's a lot easier if you have someone to help you.
The instructions described below are for a 2 person setup but it is possible to set it up on your own if you need to.
There are four parts to setting up and adjusting an Easyrig:
- Setting the Arm
- Adjusting the Vest
- Adjusting the Shock
- Adjusting the Stabiliser Arm
1. Setting The Easyrig Arm
Easyrigs fold down to fit a bag for compact transport.
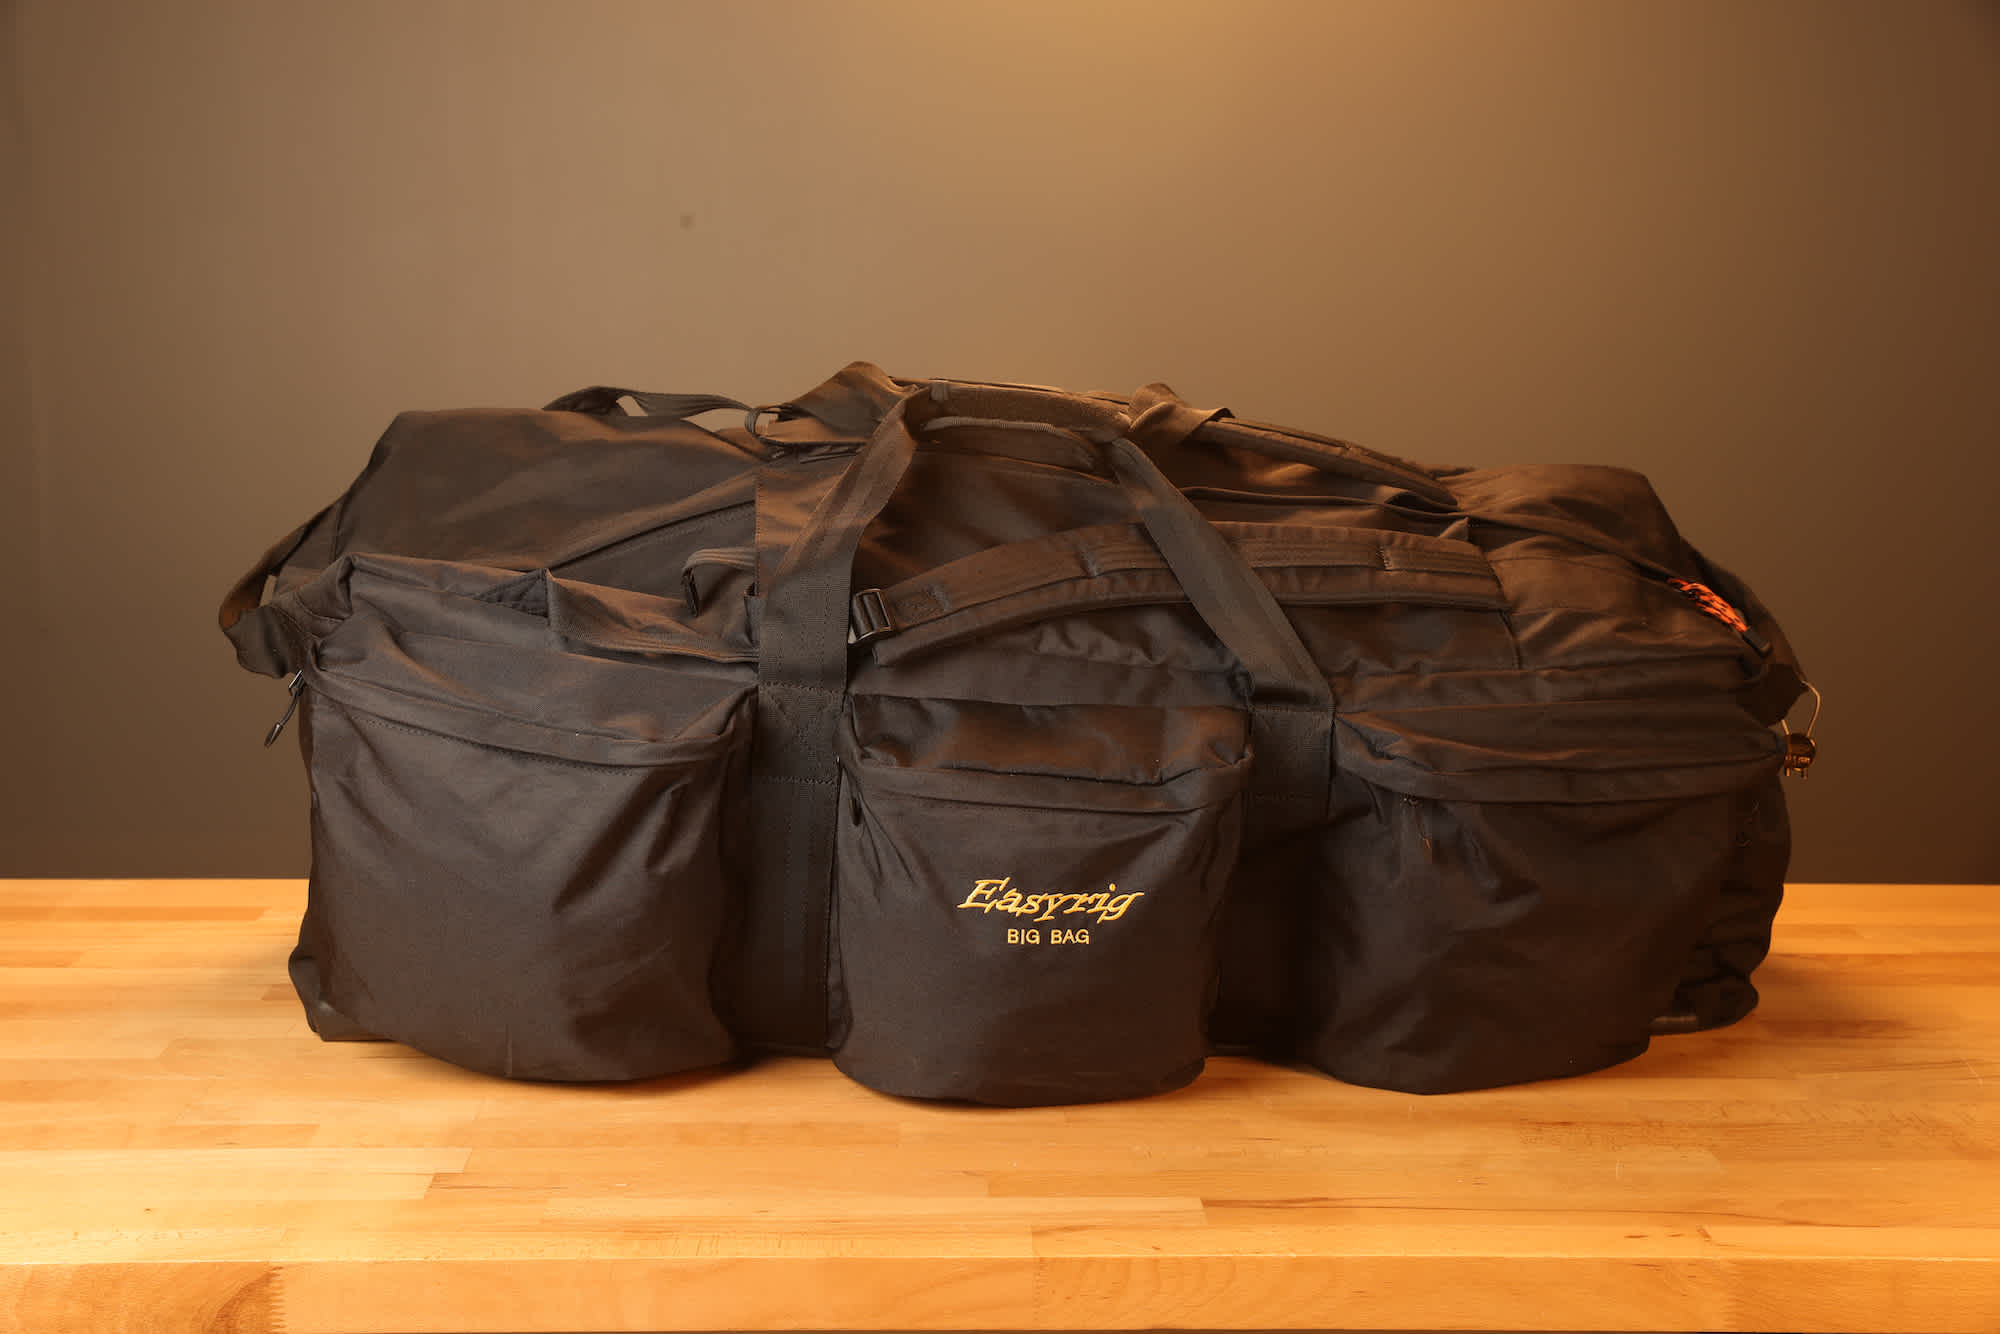
Easyrig in its transport bag.
To set the arm up, first unbuckle the Easyrig to release the arm.
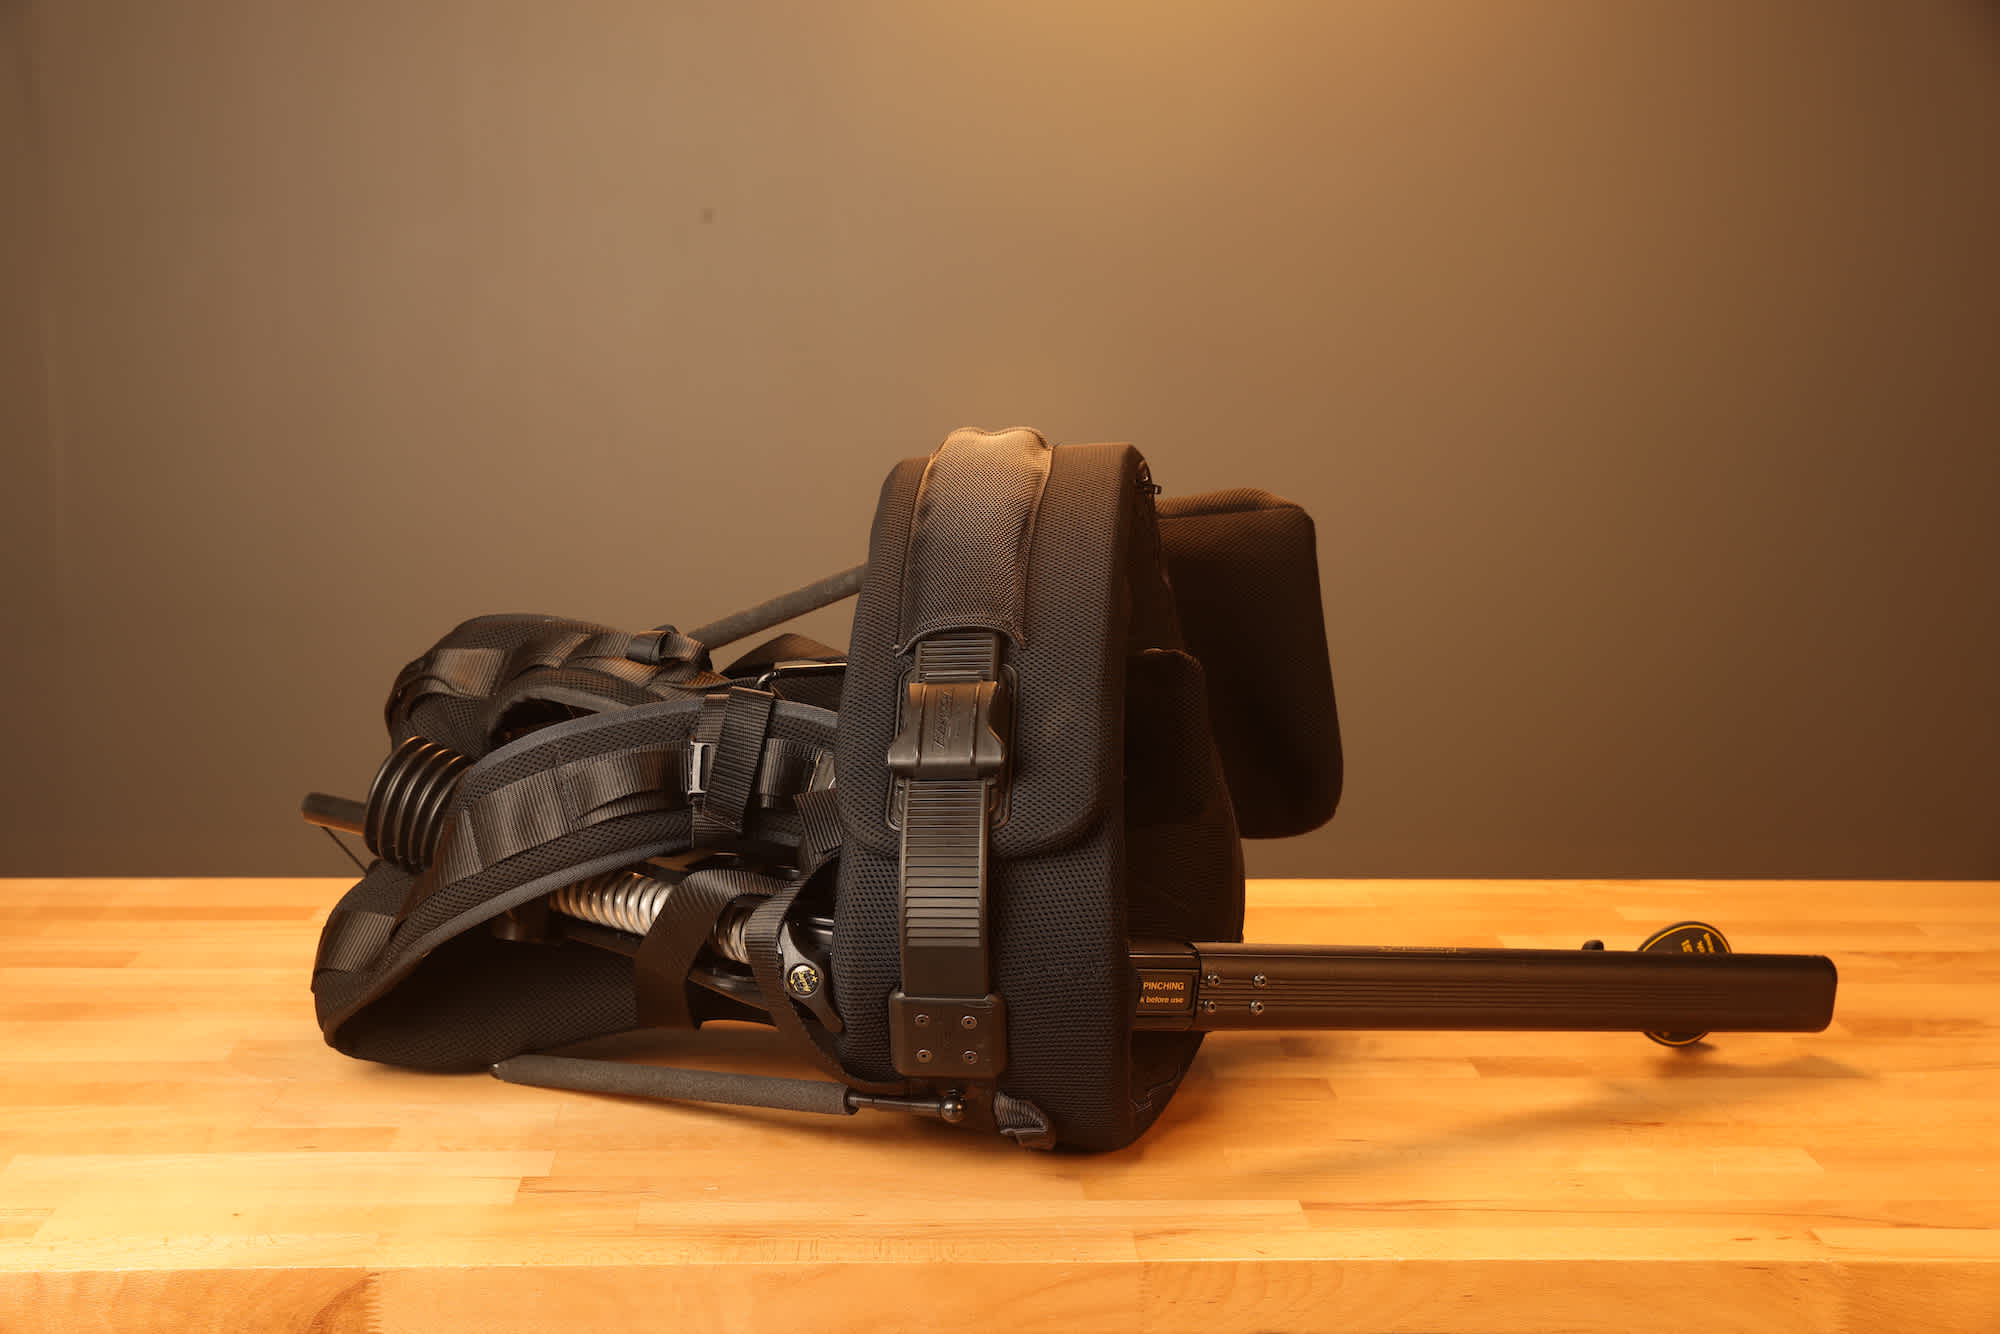
Easyrig folded down for compact transport.
Then unfold the arm so it is at the top of the vest and insert the support arm slide into the lower tube section. Pull the bellows down around it.
2. Adjusting The Easyrig Vest
Adjusting the vest is very important to ensure the Easyrig is sitting correctly, has its full range of motions and, most importantly, is comfortable.
There are 6 adjustment points: 3 on the chest, 2 under each arm and 1 around the waist. Before putting the Easyrig on for the first time, extend all of the buckle adjustments to their longest length.

-
Put the vest on, taking care to avoid hitting anyone with the arm as it swings around a lot in this stage! Having an extra person to support the arm is very useful during this step.
-
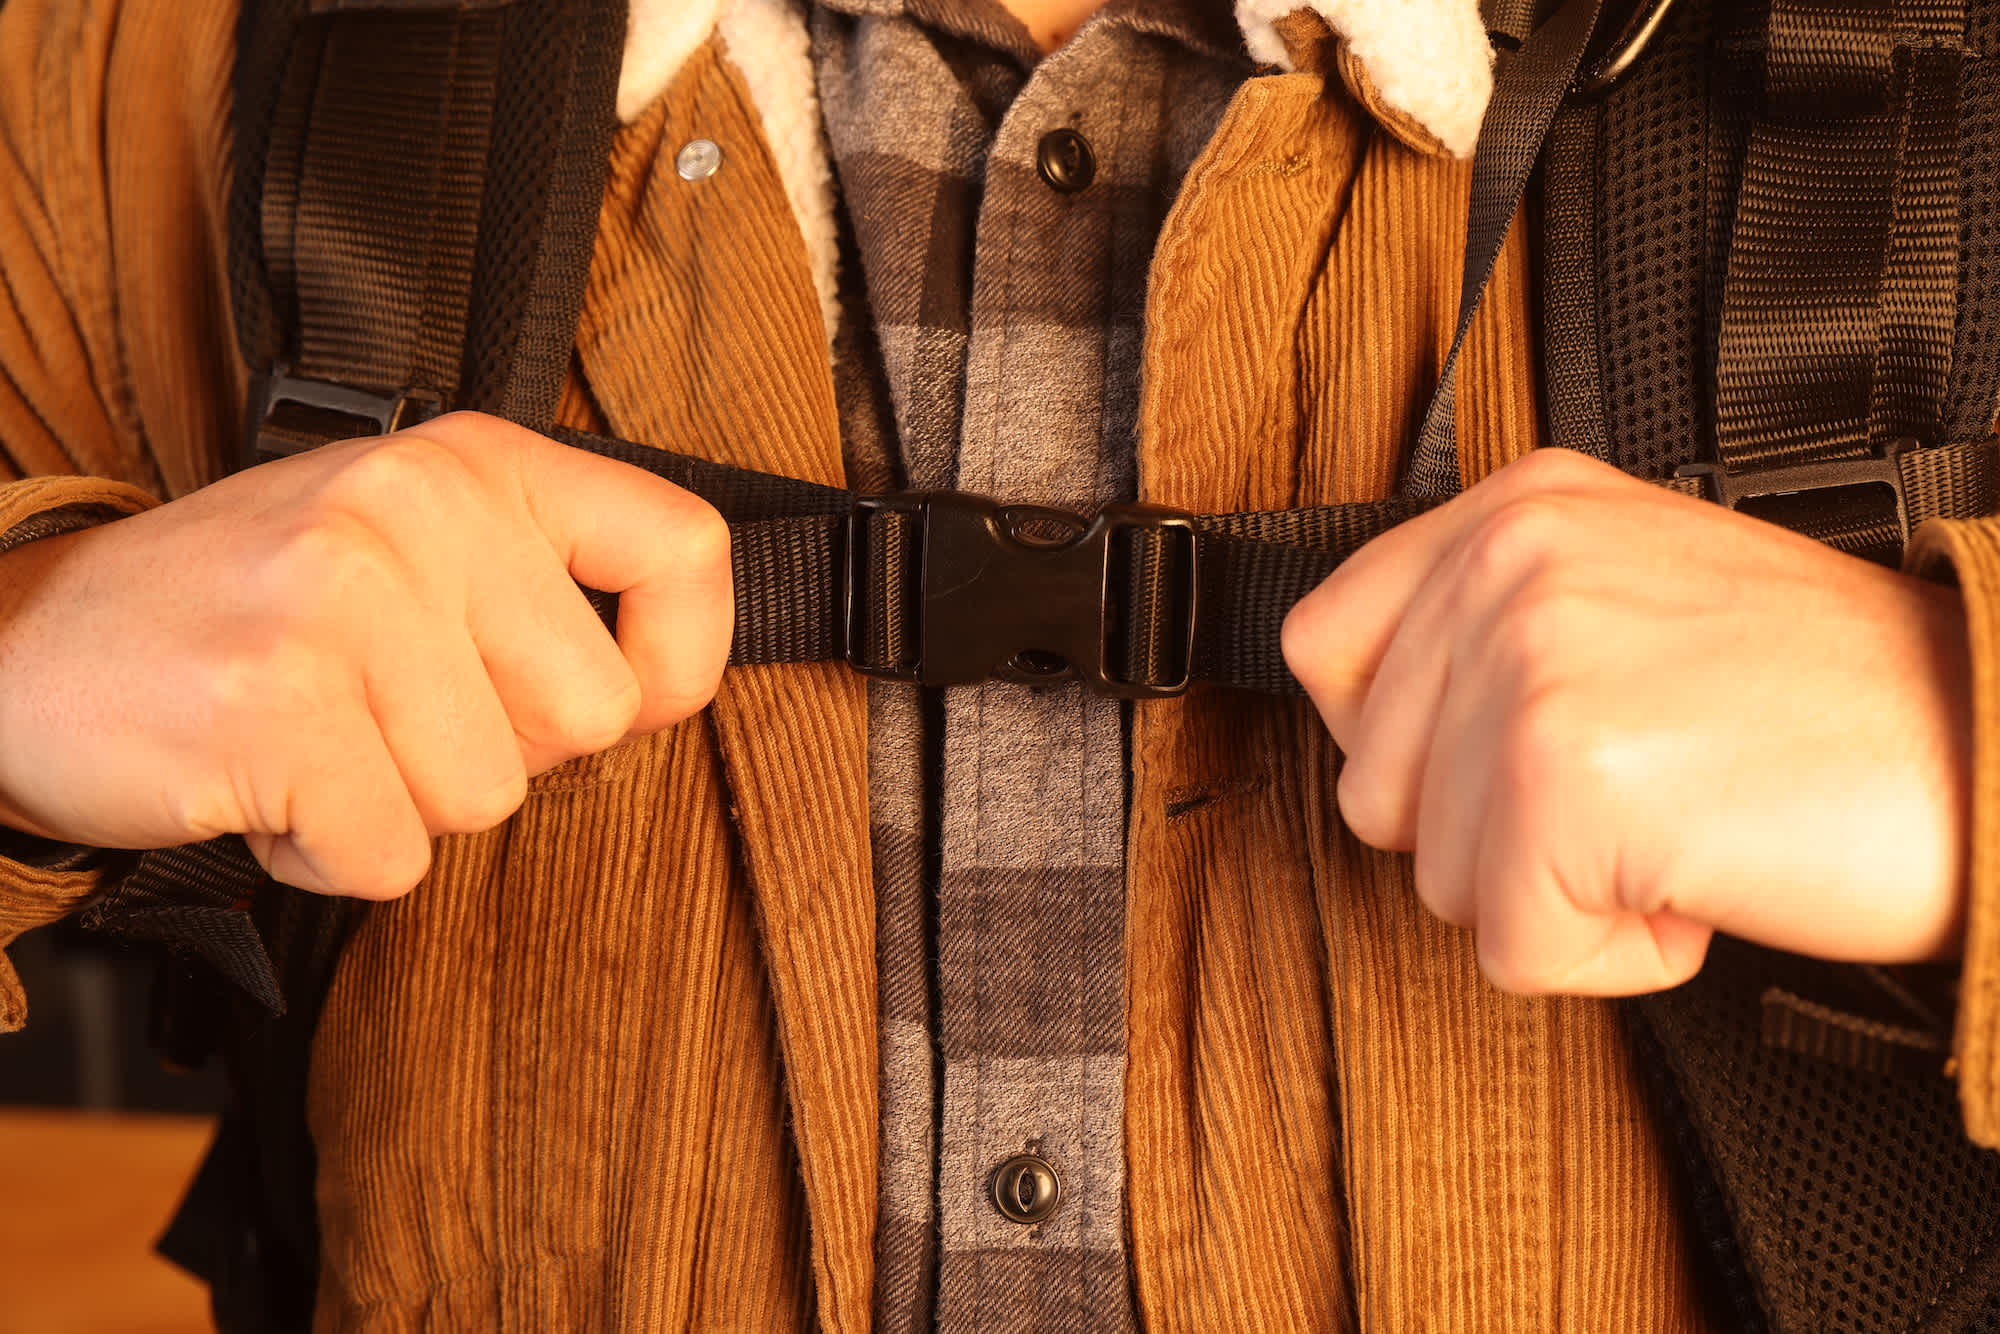
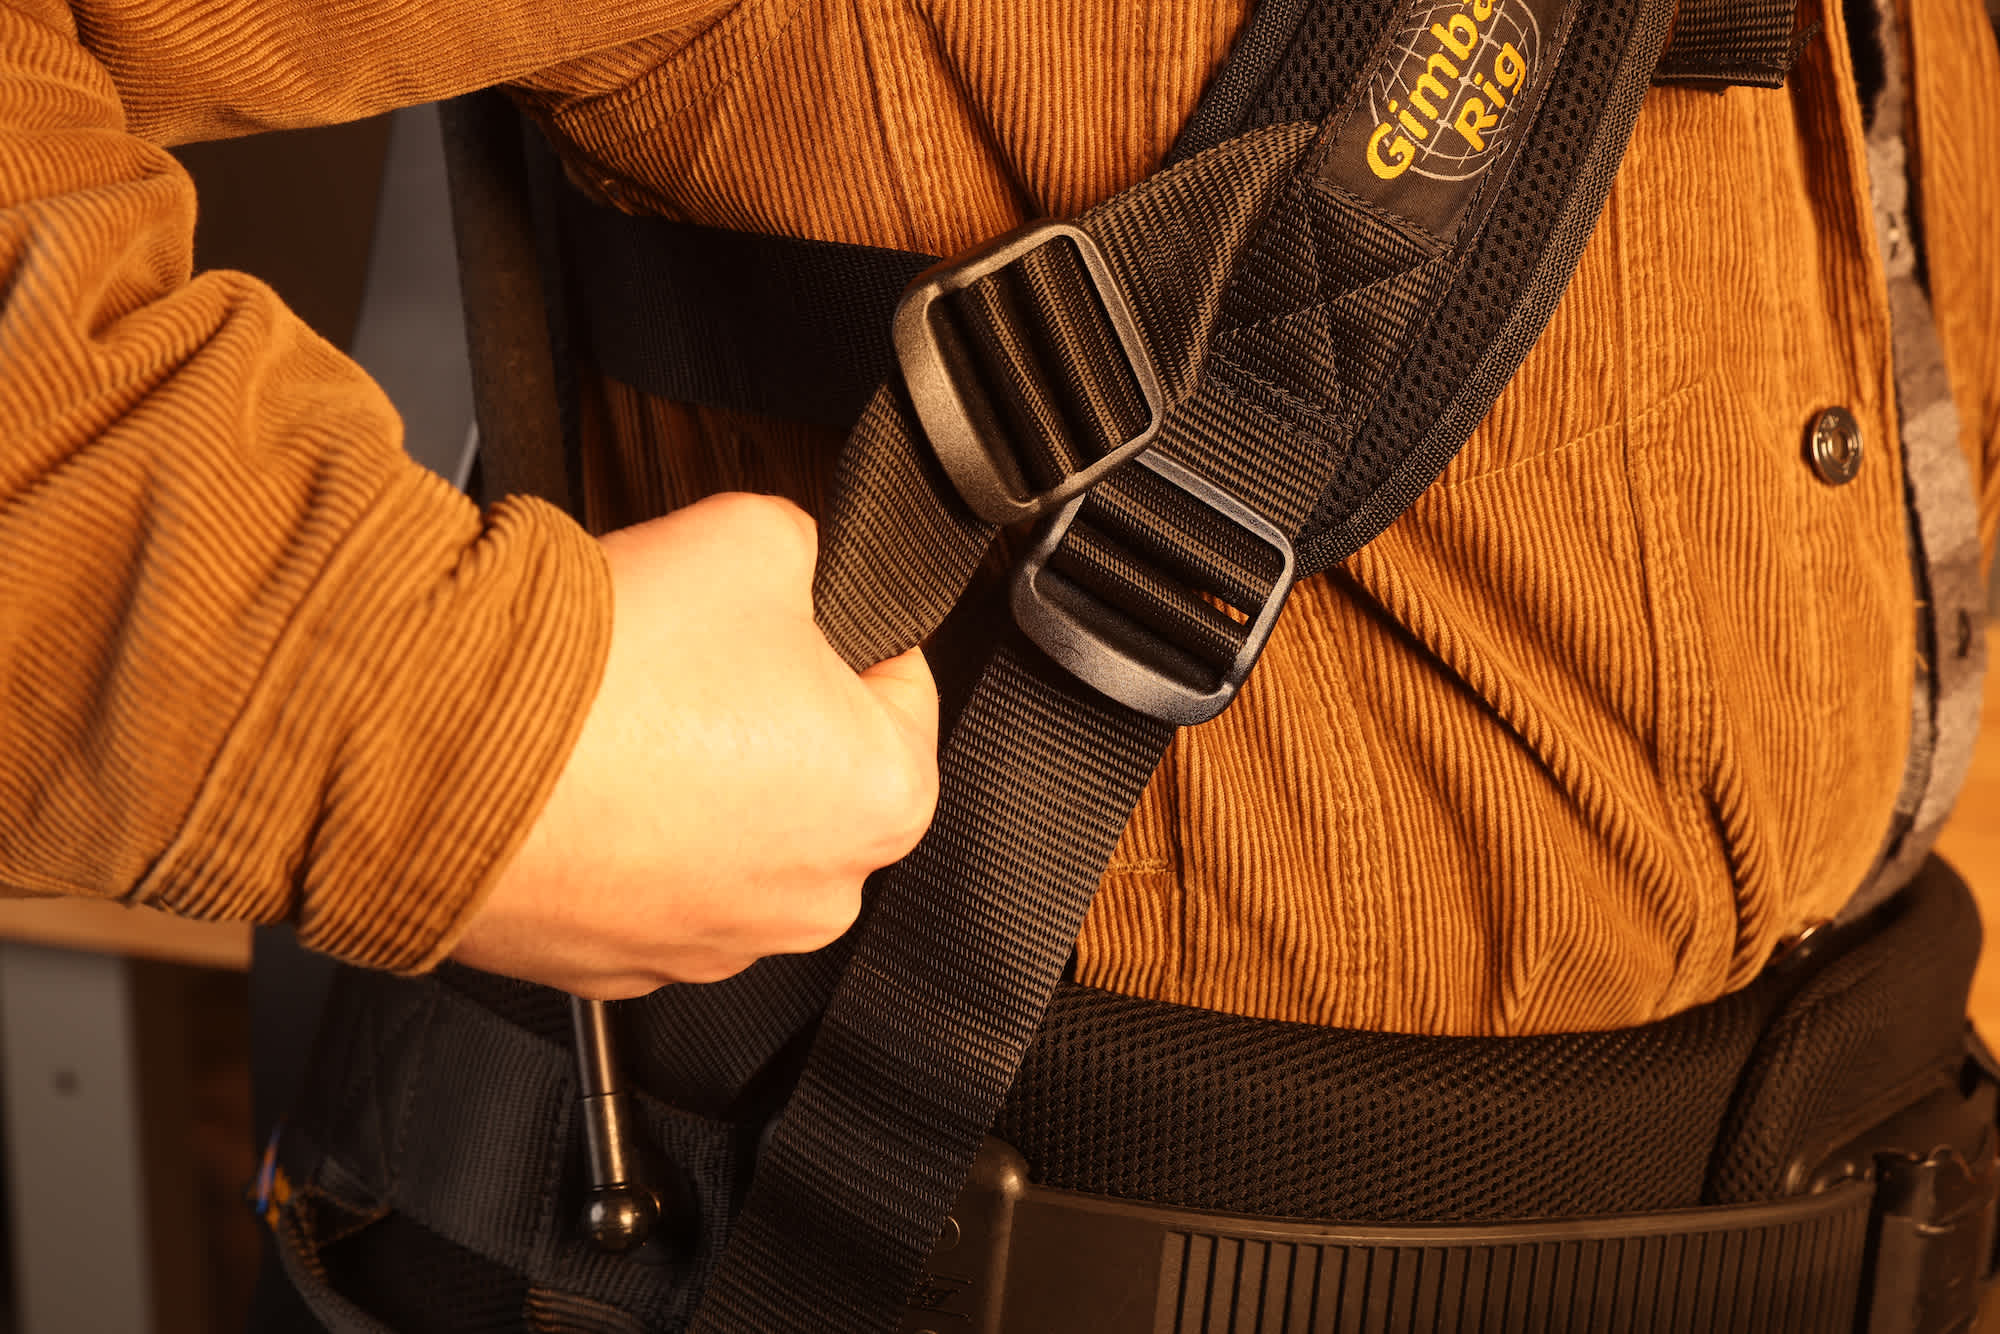
Fasten the chest buckle
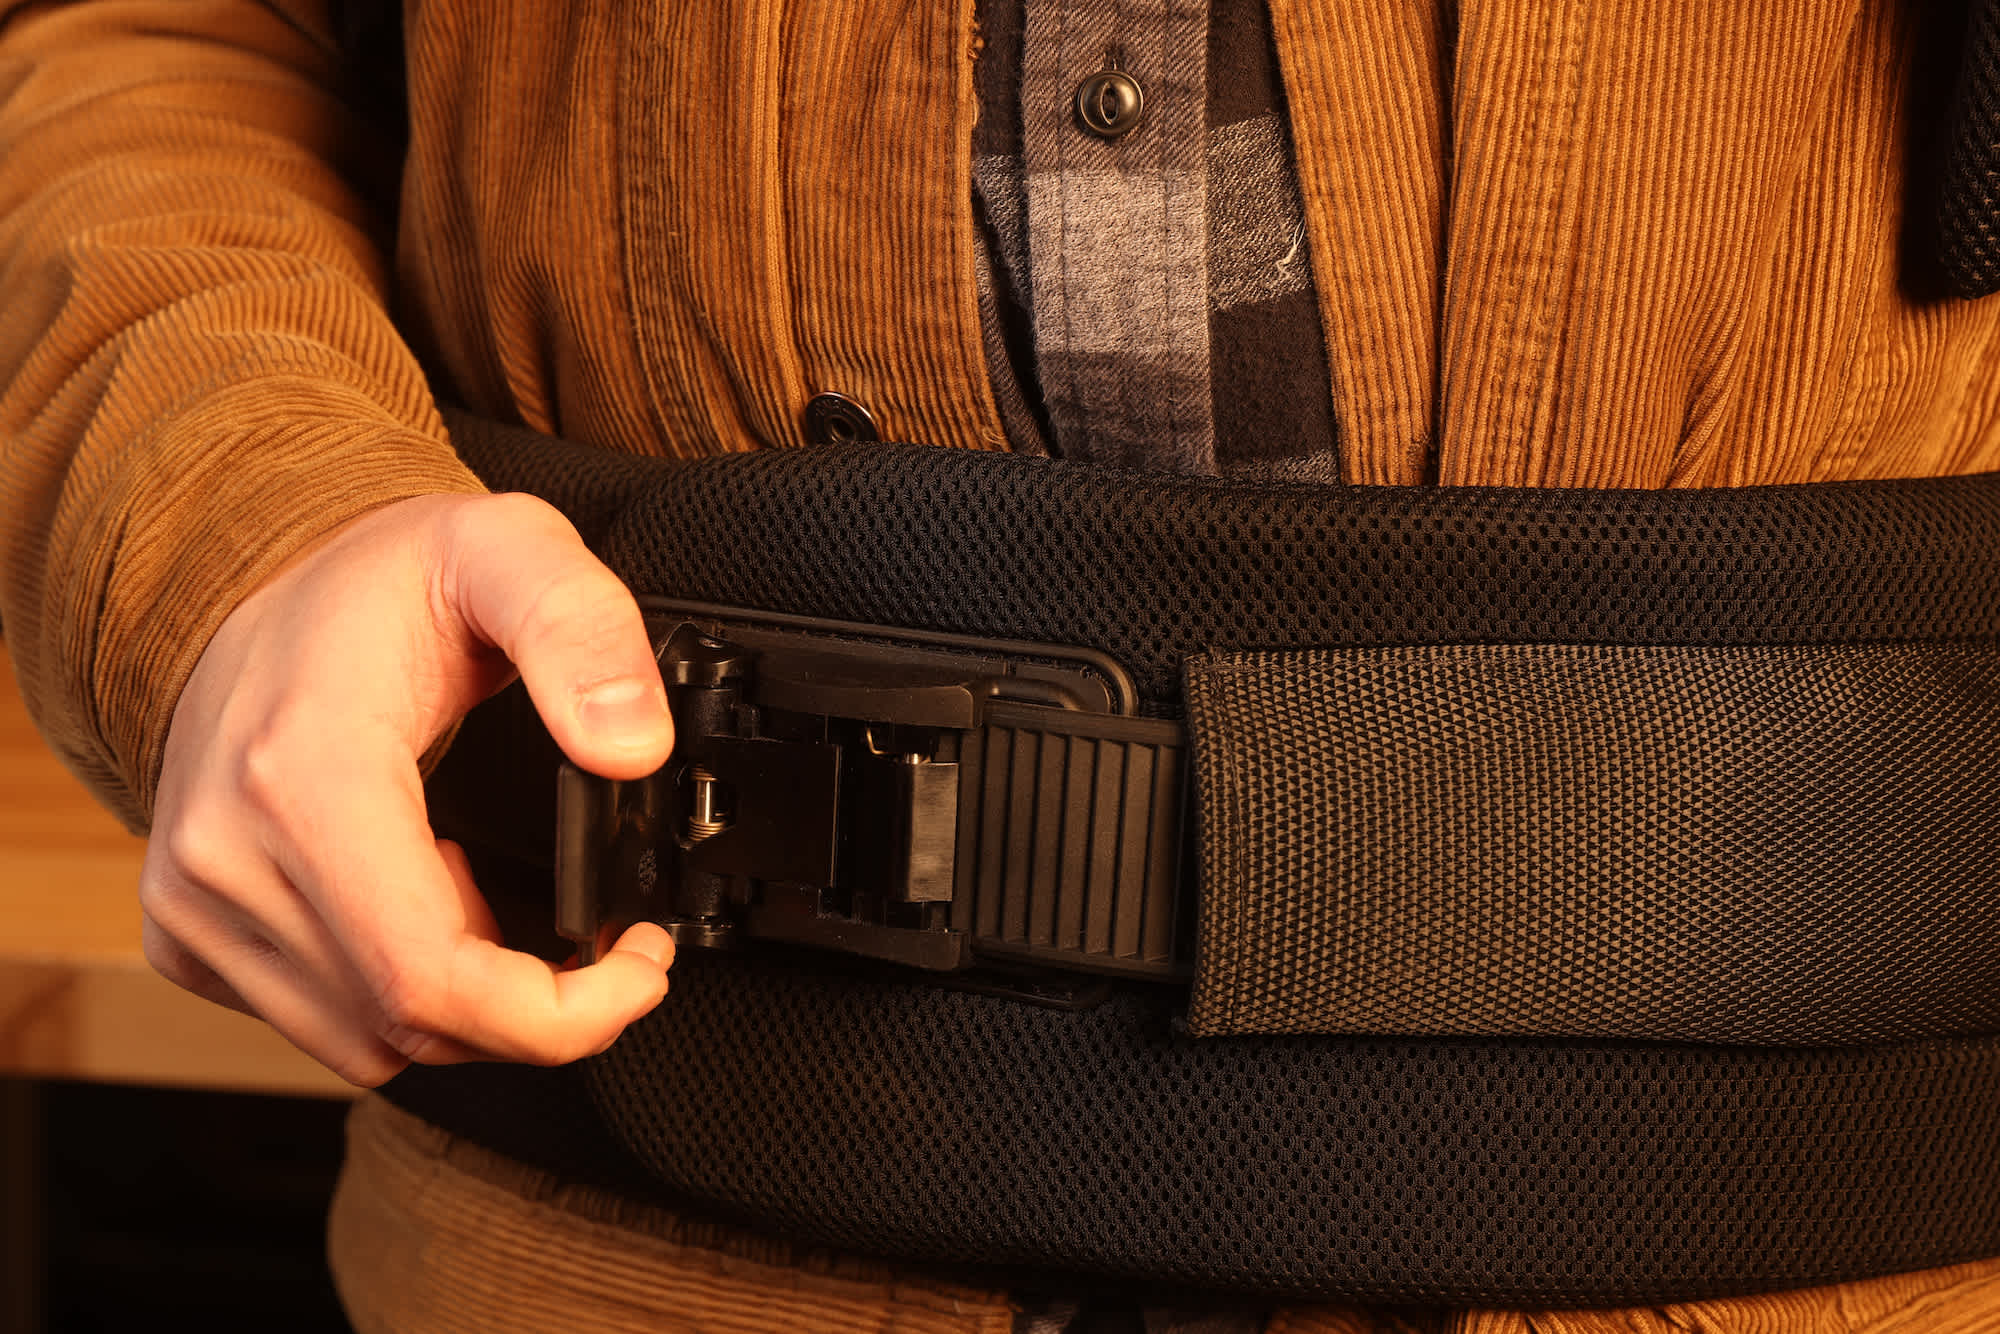
- Fasten the waist buckle. Some Easyrigs have a standard clip buckle on the waist and some have a ratcheting buckle.

Ratchet buckle.
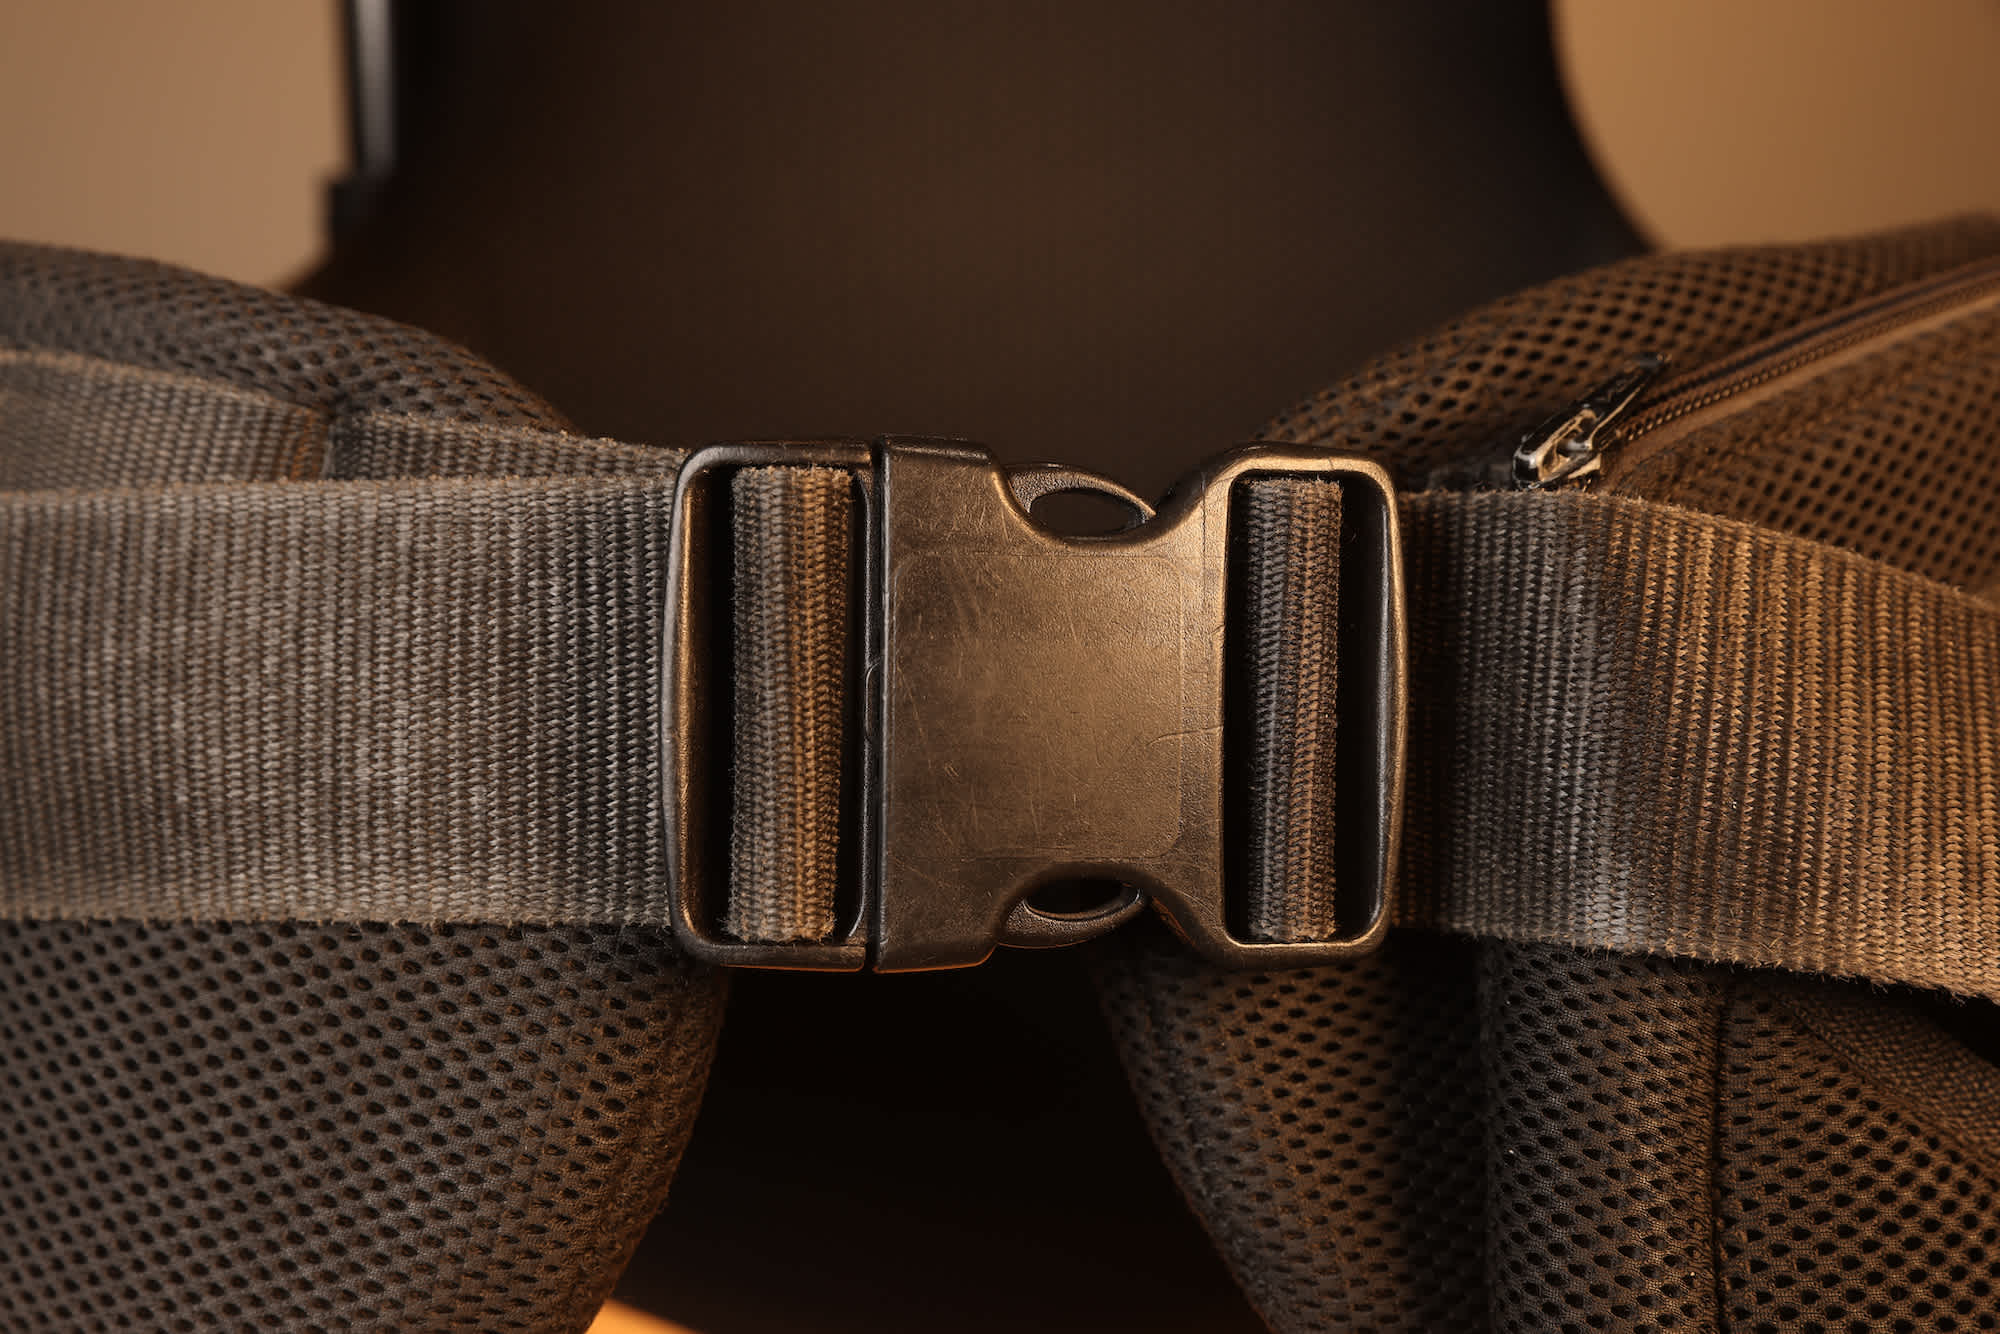
Standard buckle.
- Start by sinching down the two shoulder straps. You want to adjust these until the arm has the desired clearance above your head. Ideally you want the waist belt sitting just above your hips.
- Adjust the straps on the centre chest buckle so they are sitting in a comfortable position.

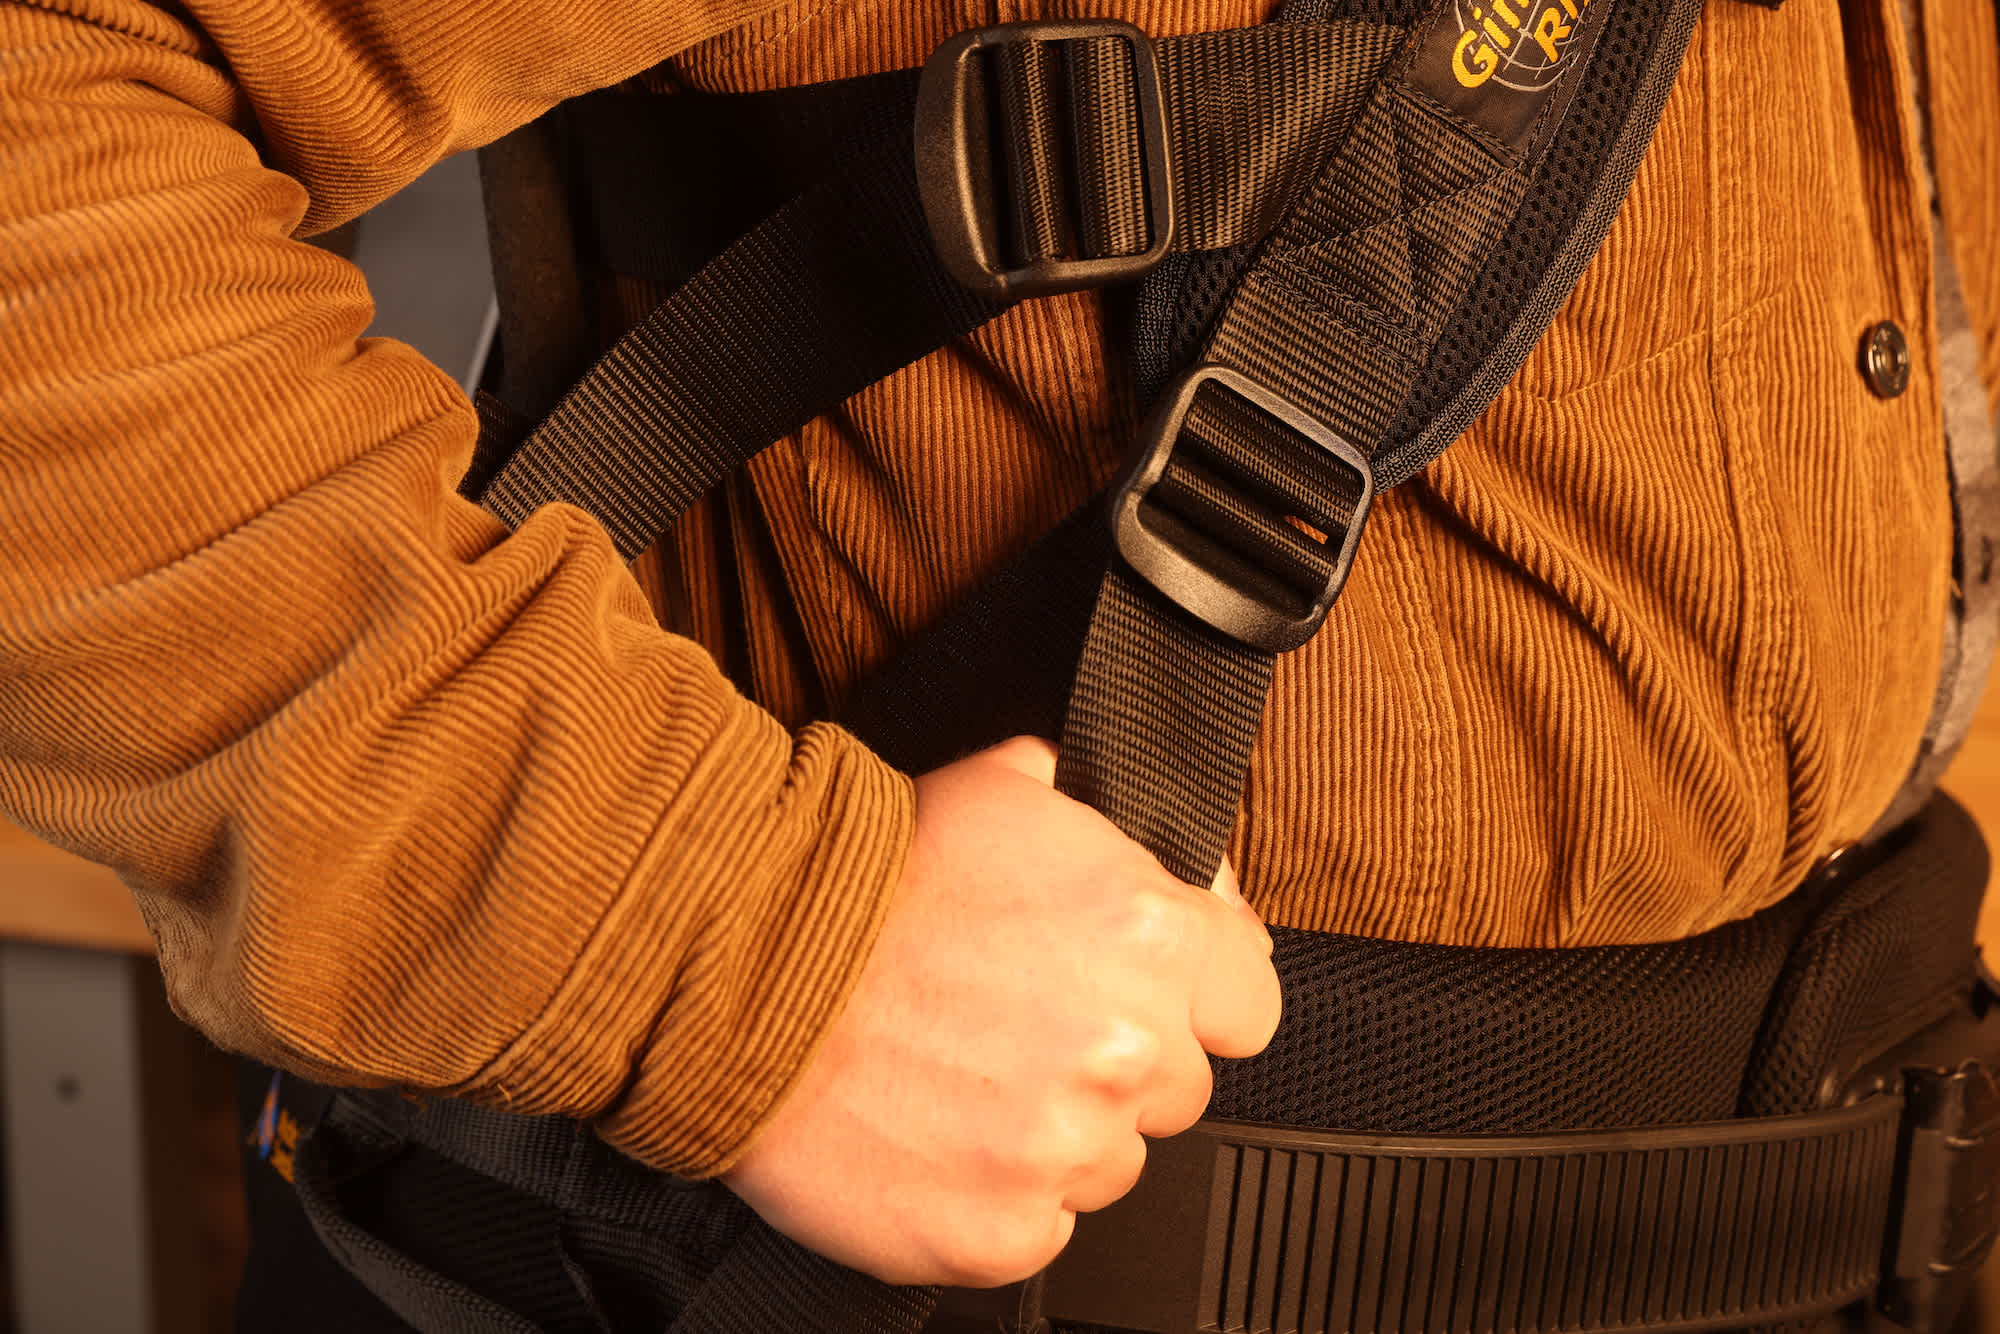
- Adjust the underarm straps to take up any remaining slack in the shoulder straps.
- Finally, tighten down the waist strap until it is firm but comfortable.
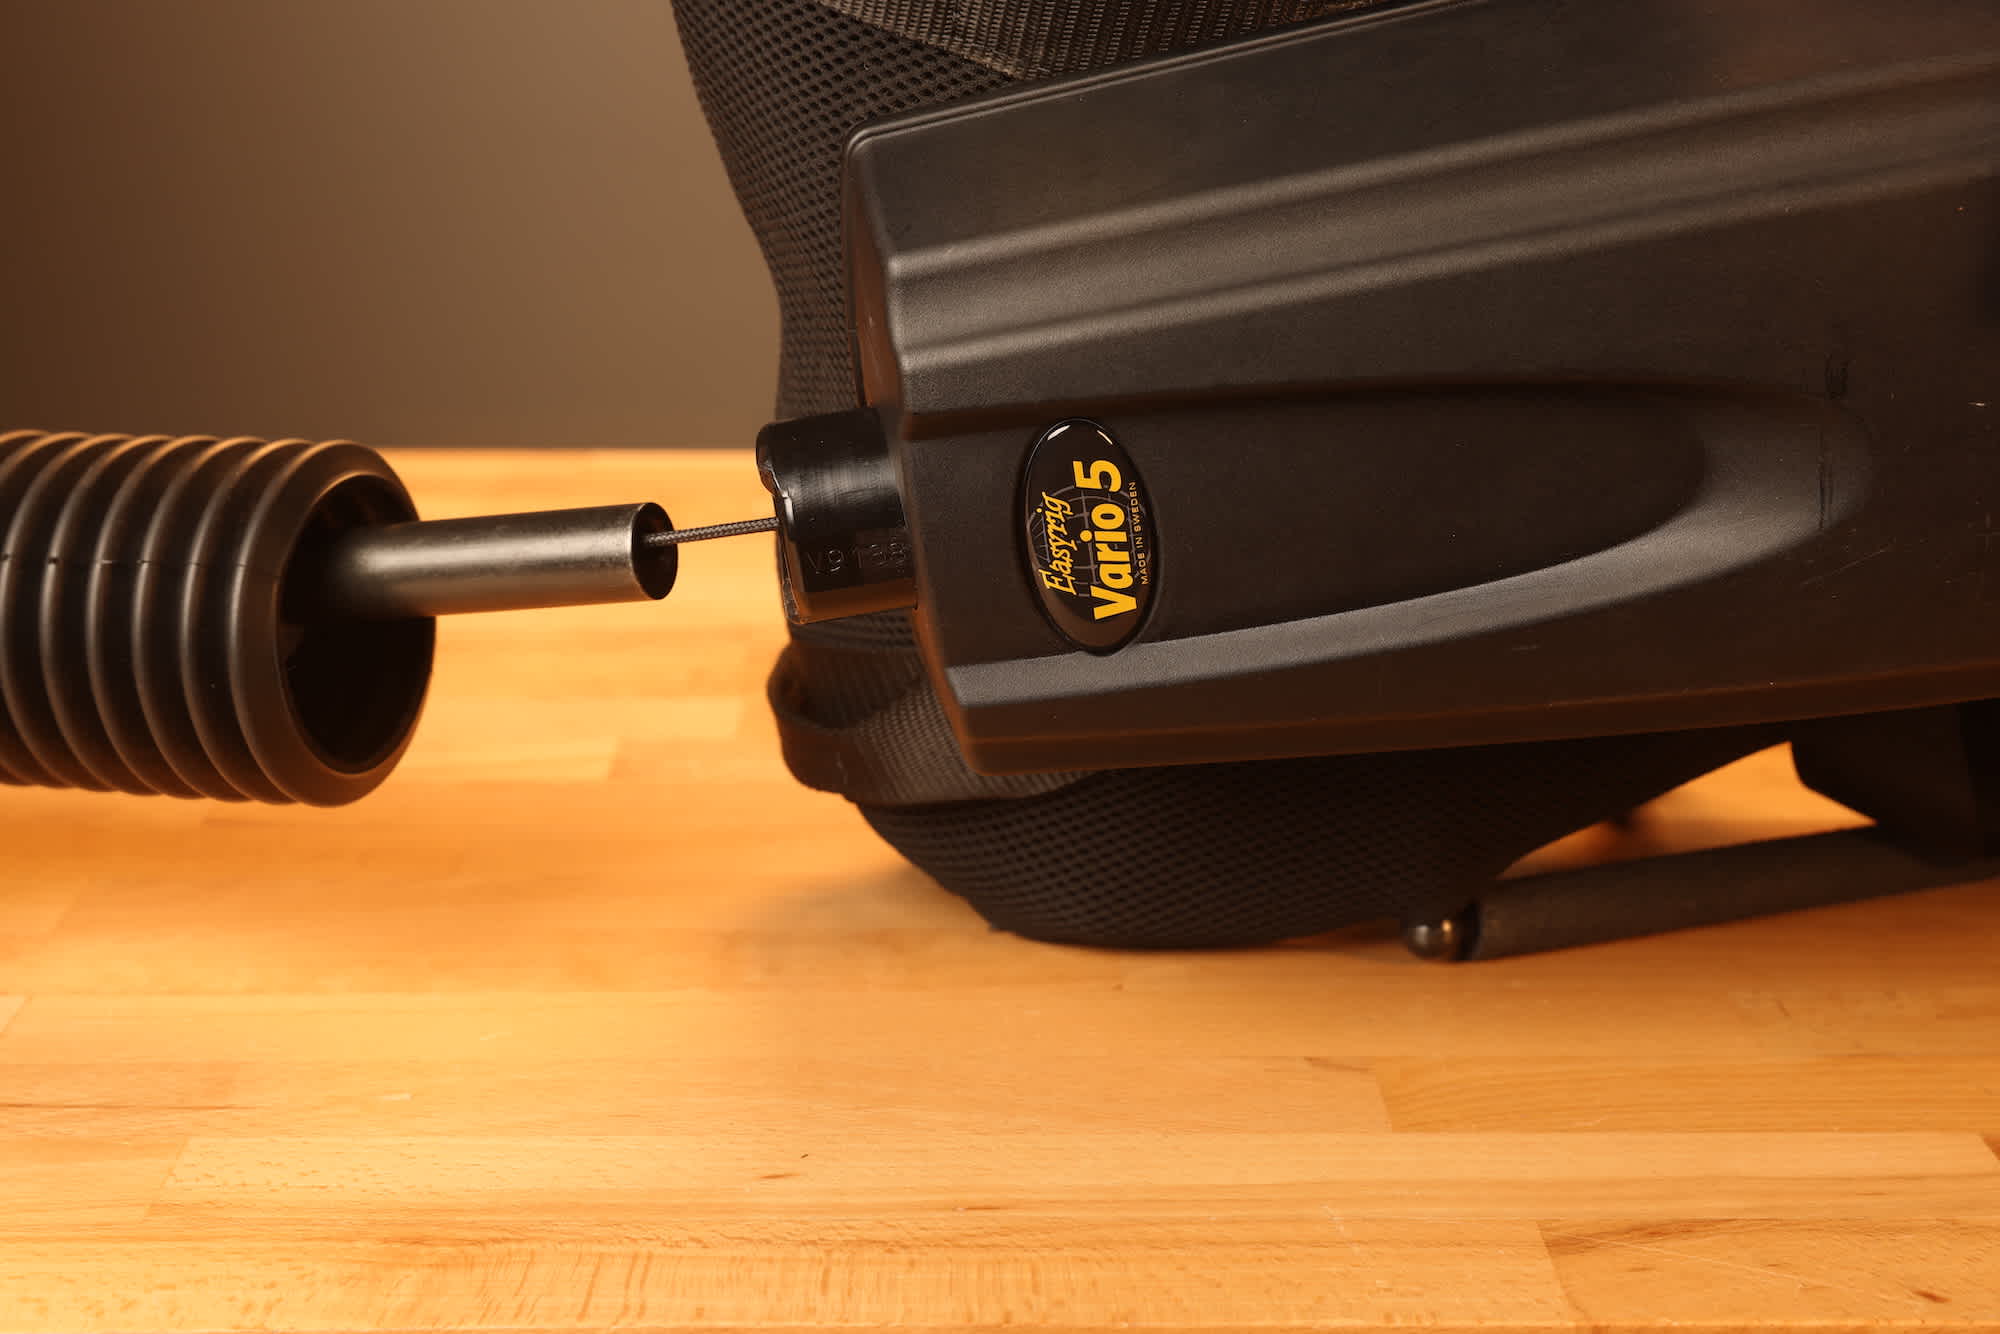
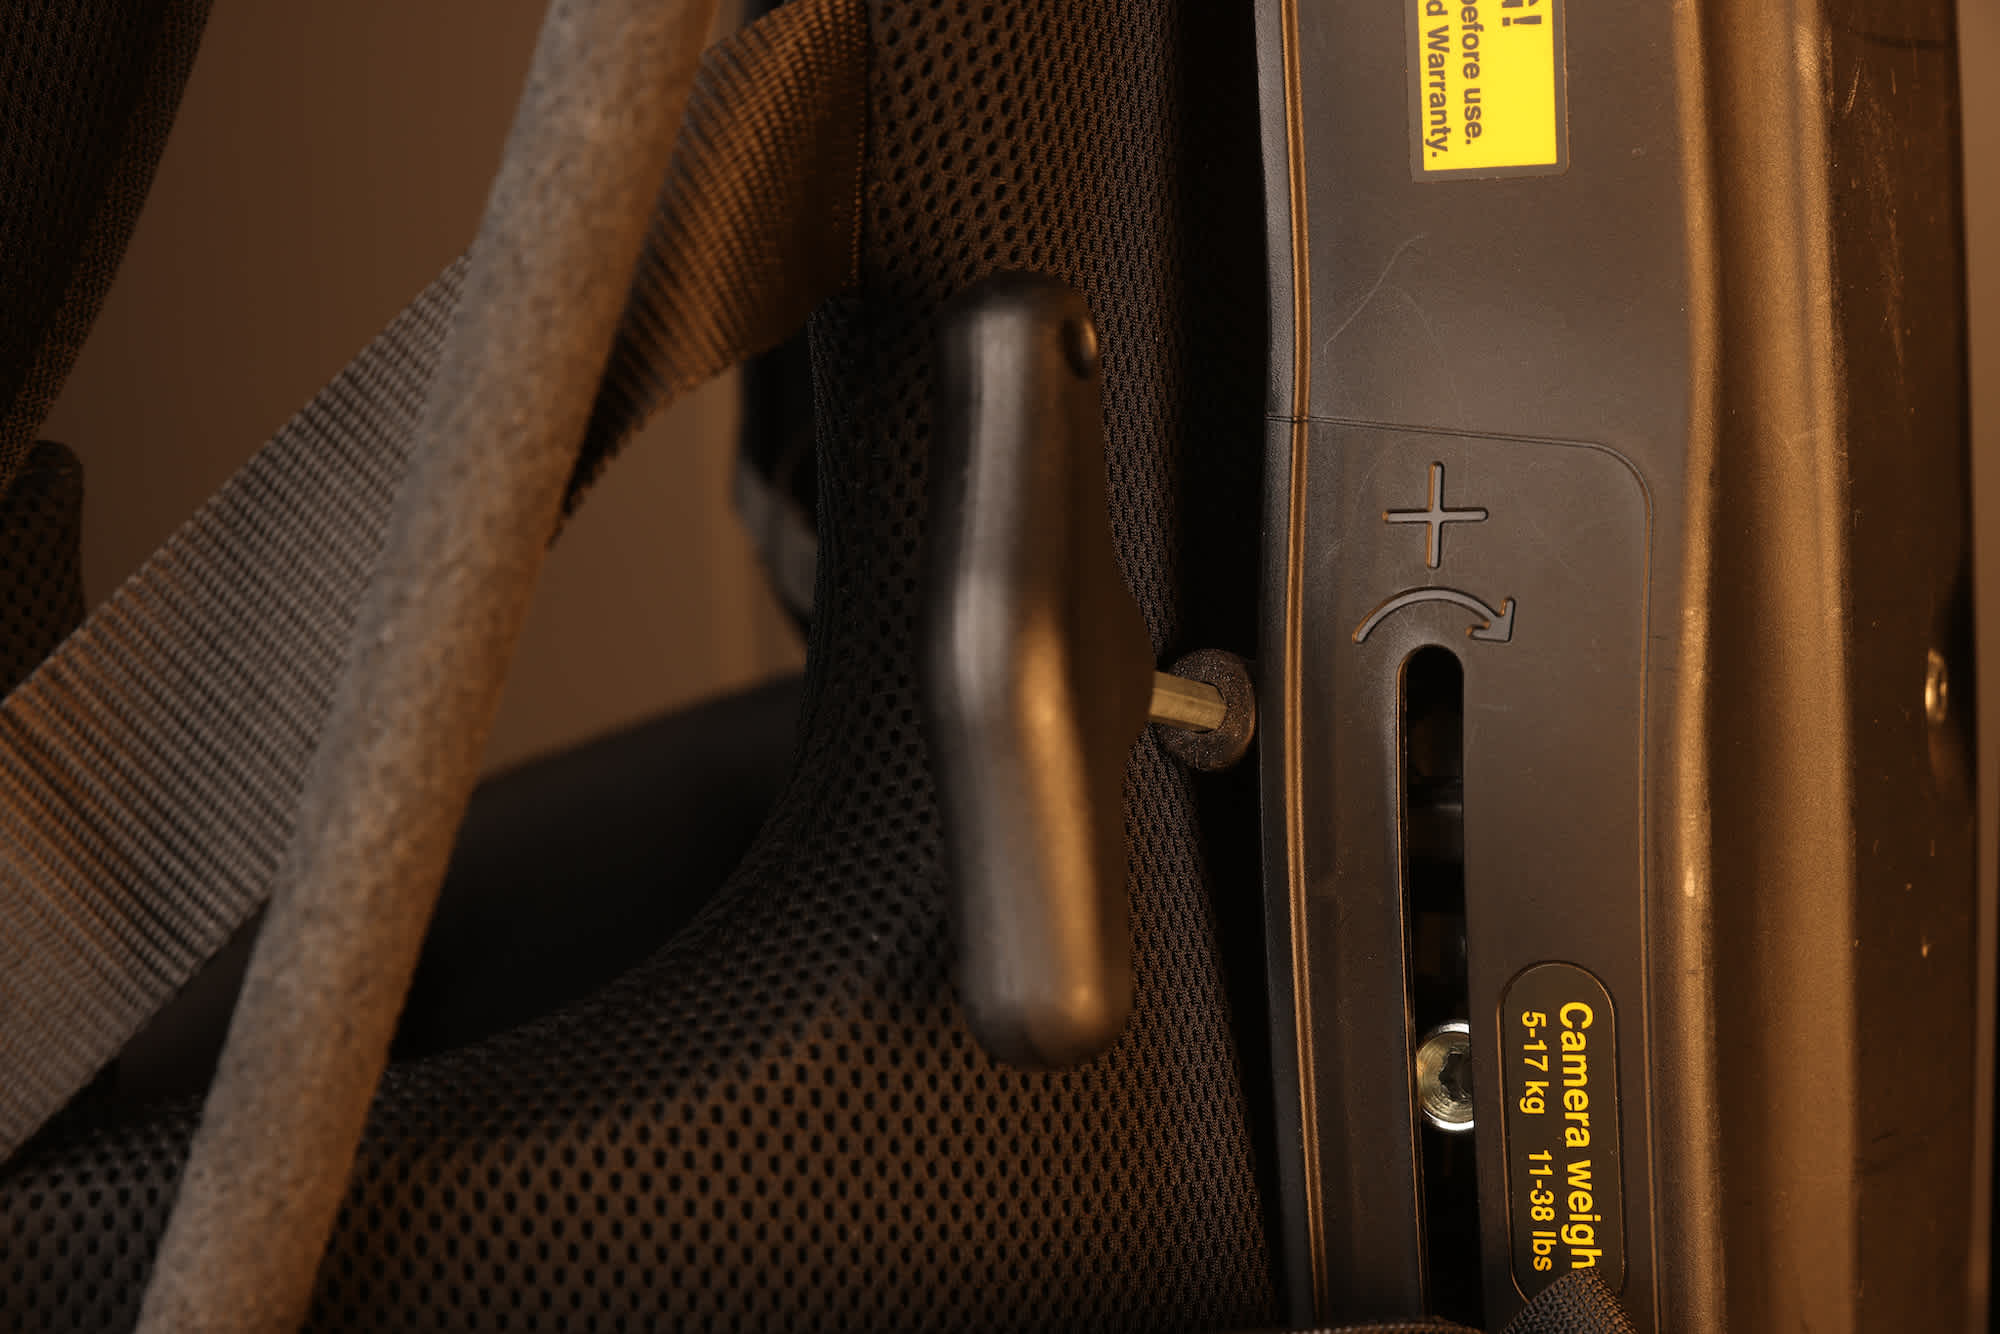
3. Adjusting The Easyrig Shock (Vario 5 Only)
This step is only for the Easyrig Vario 5. Because this Easyrig has such a large payload range, you need to adjust it to the correct setting for your particular camera set up.
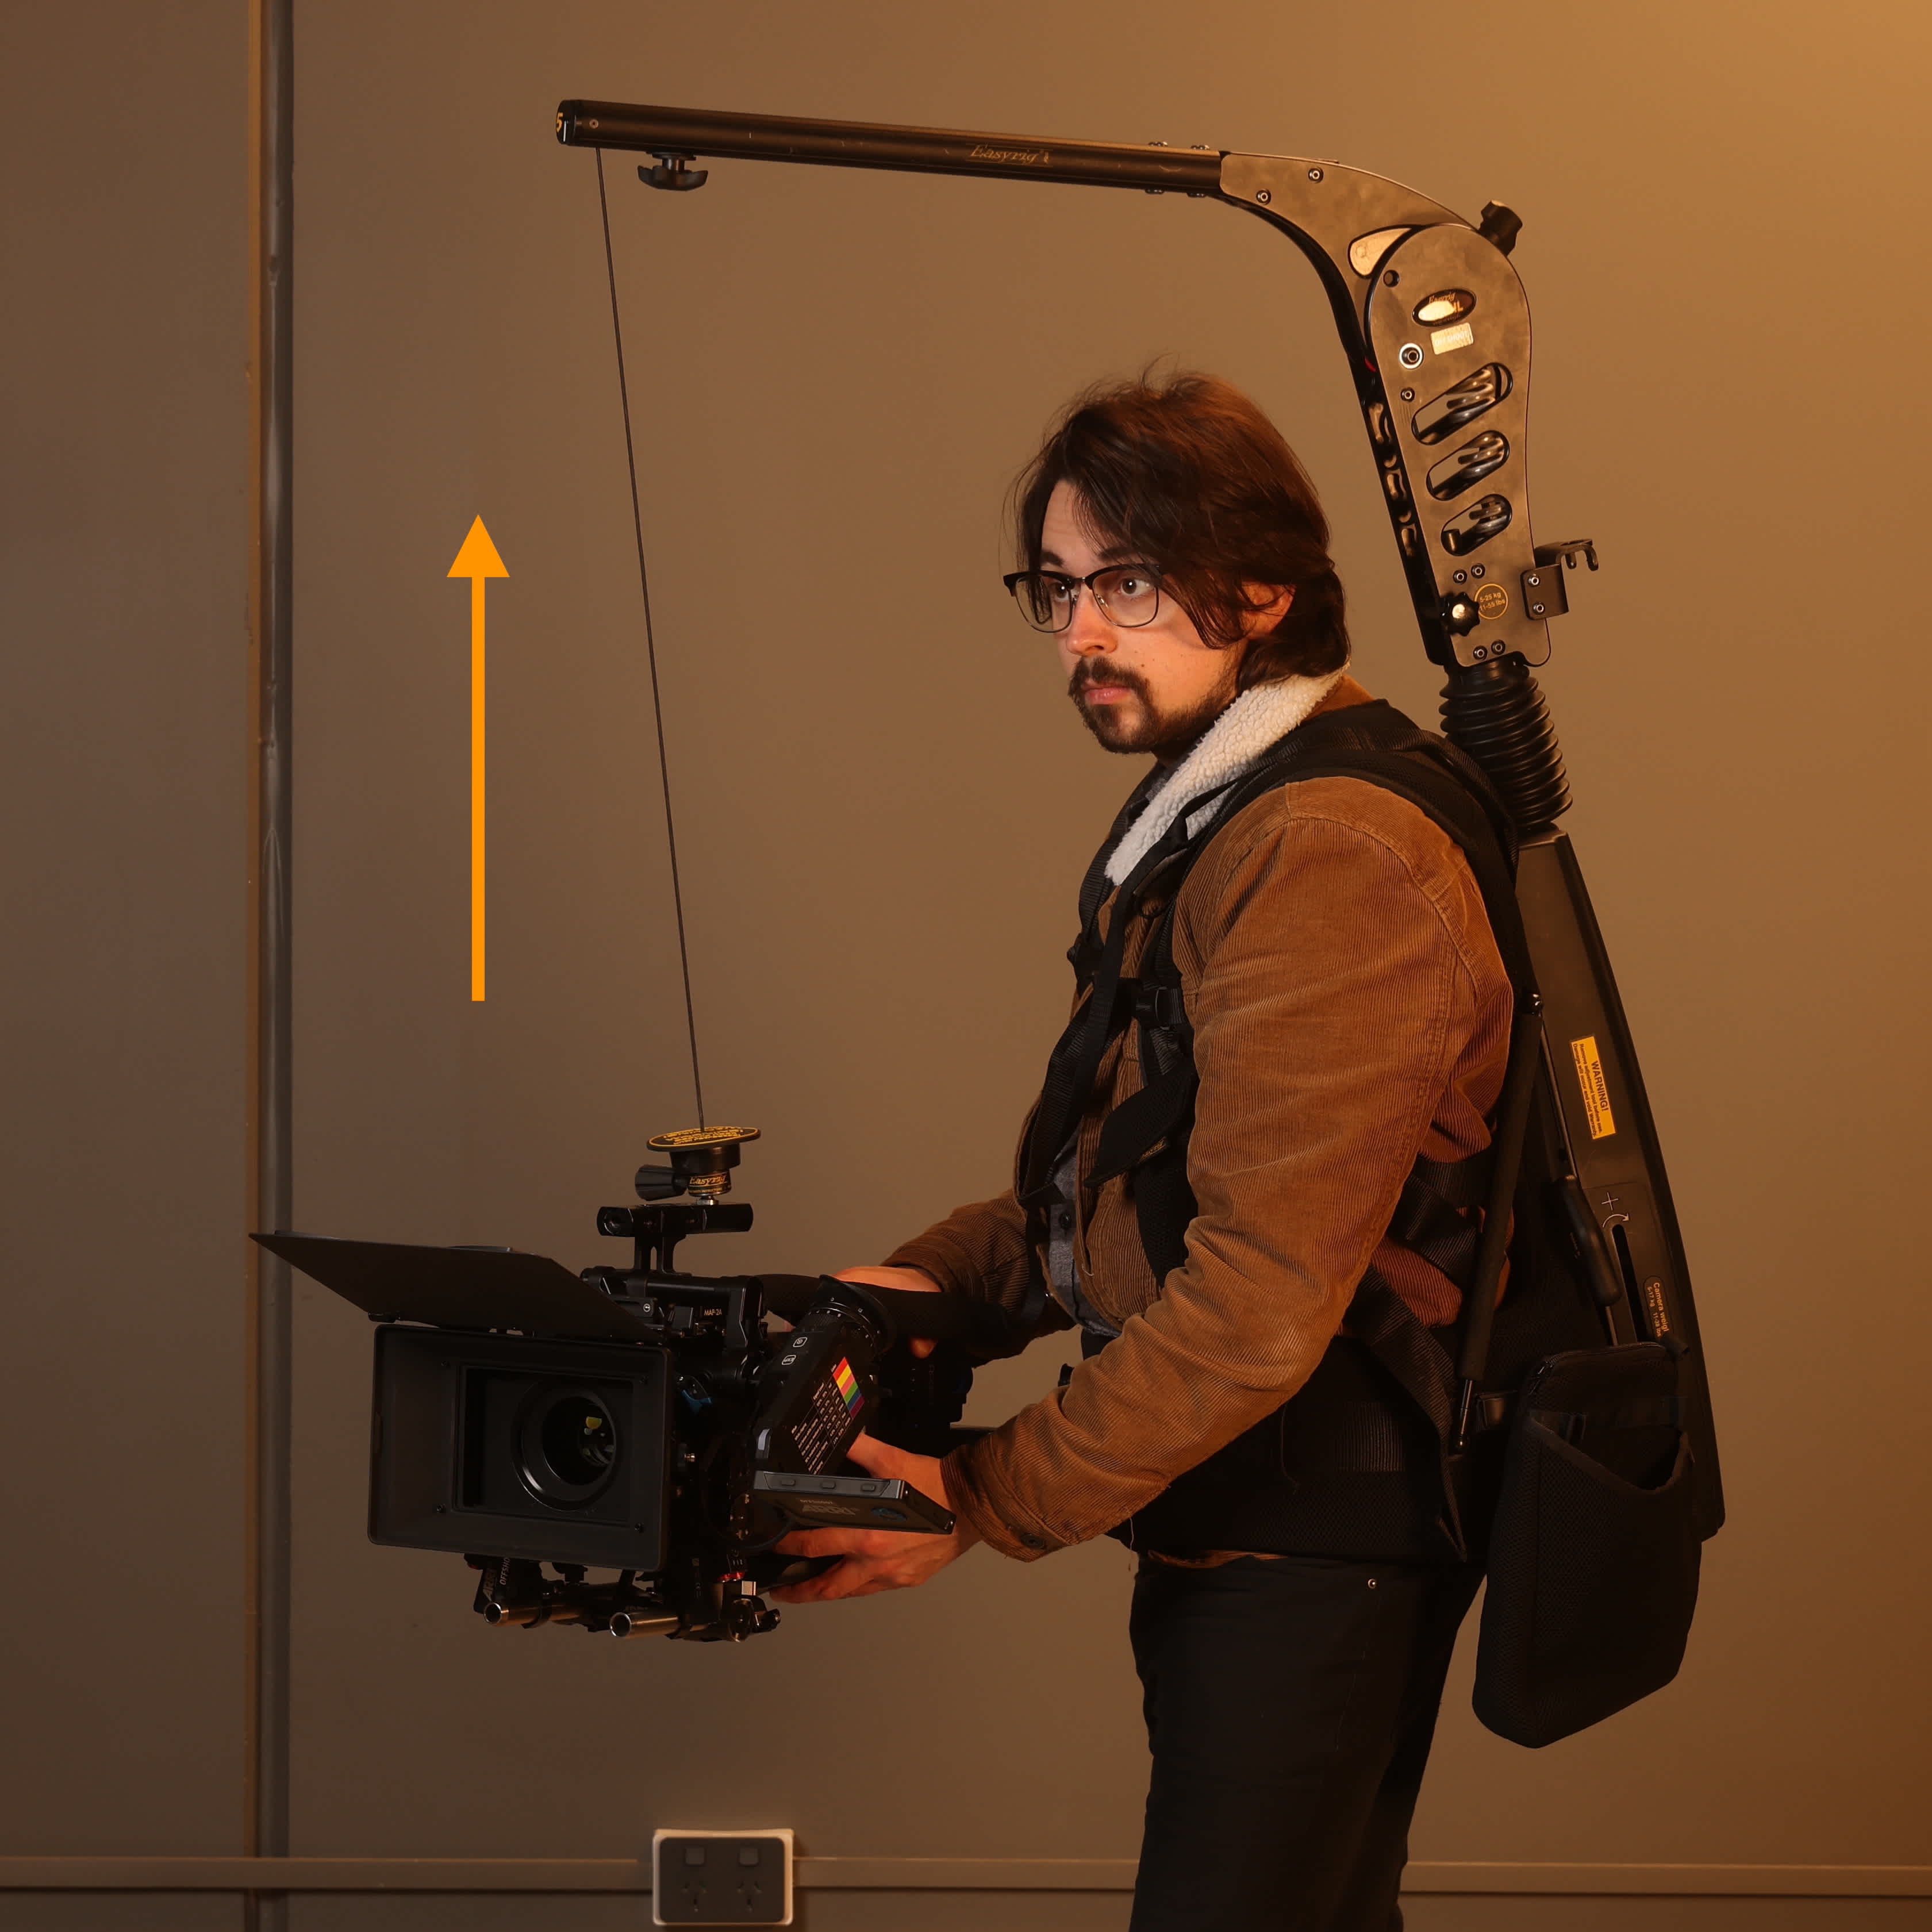
A properly adjusted Easyrig will allow you to raise or lower your camera and hold its position.
-
Attach your fully-built camera to the Easyrig. You can either use the camera hook or the included quick-release for this. As the arm has not been set yet we want to ensure that the camera is fully supported to avoid any nasty accidents!
-
While supporting the weight of the camera, your helper can remove the Allen key tool from the side of the shock cover. The adjustment point for the shock is just beside where the tool is stored.
- Slowly let the Easyrig line take up the weight of the camera and see how it feels. If the line is trying to pull the camera up to the top then the tension is too high and the shock tension needs to be reduced. If the camera wants to lower down then you need to increase the shock tension.
It is important to note that we are only focusing on whether or not the Easyig cable needs to be adjusted at the stage. Ignore the movement of the stabiliser arm for now.
Camera is trying to pull up.

Rotate counter clockwise to lower the tension on the shock.
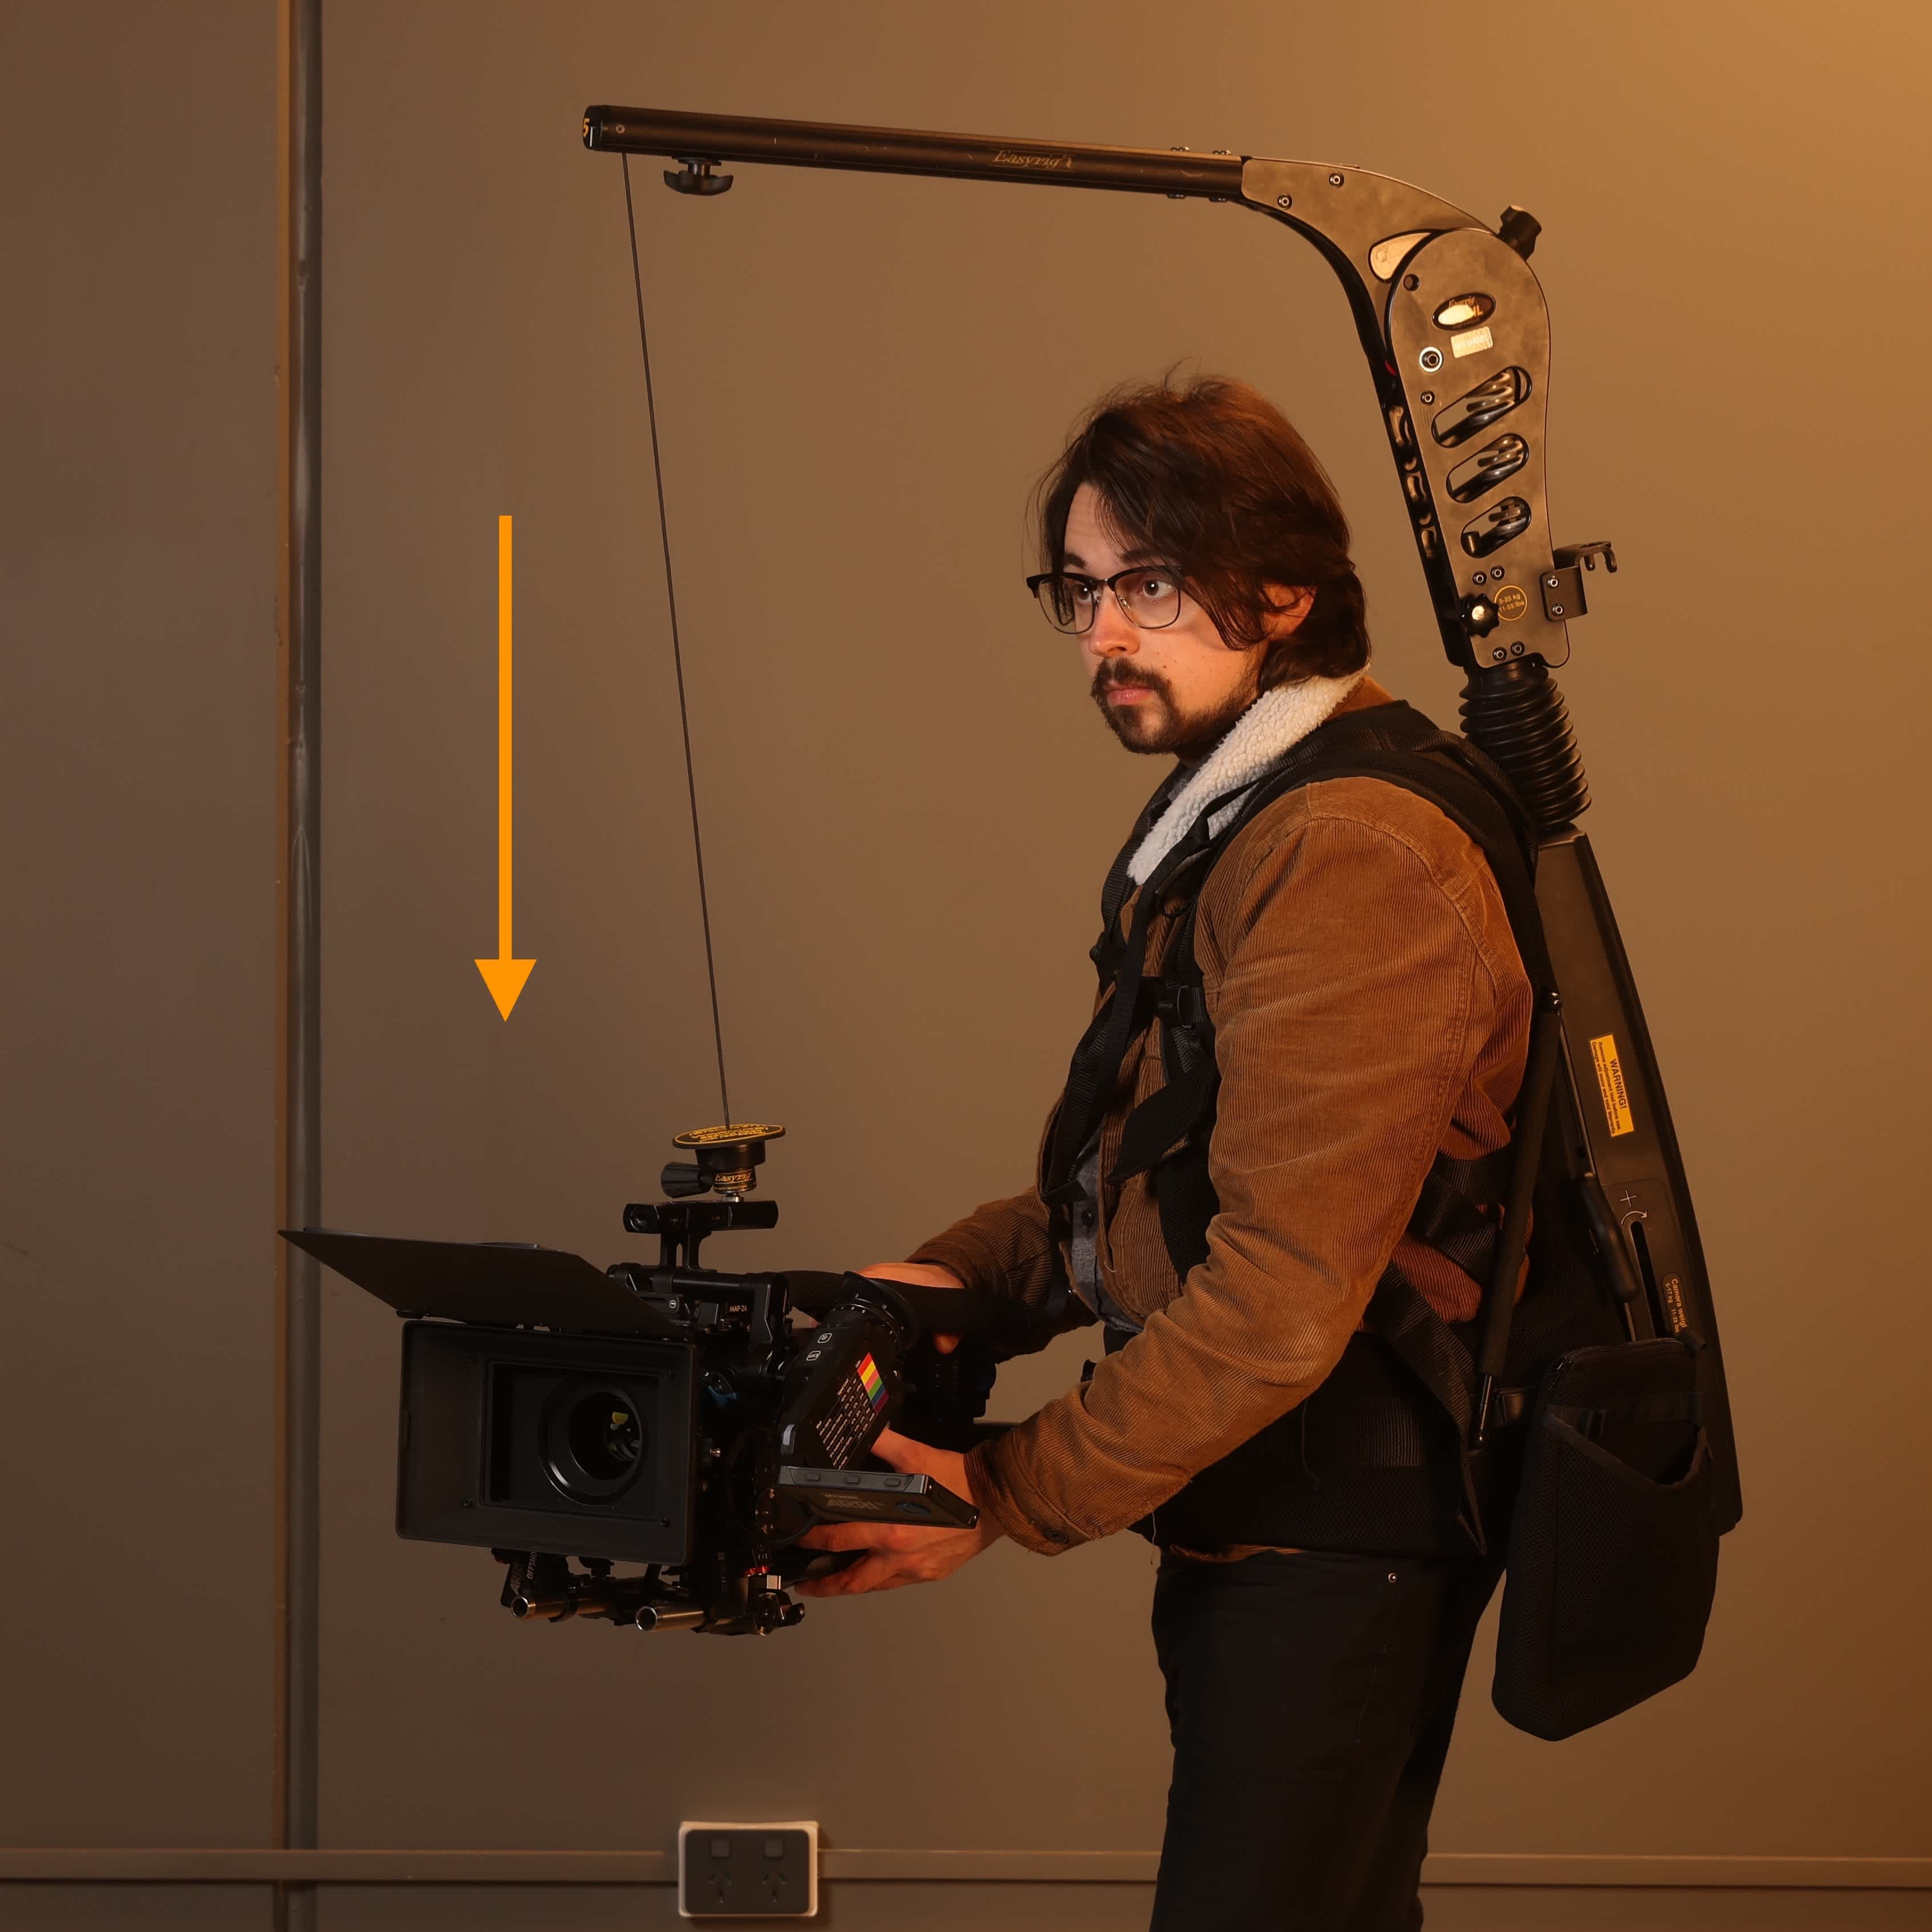
Camera is trying to drop down.

Rotate clockwise to increase the tension on the shock.
- Your shock is properly adjusted when your camera will stay in place without you needing to support it.
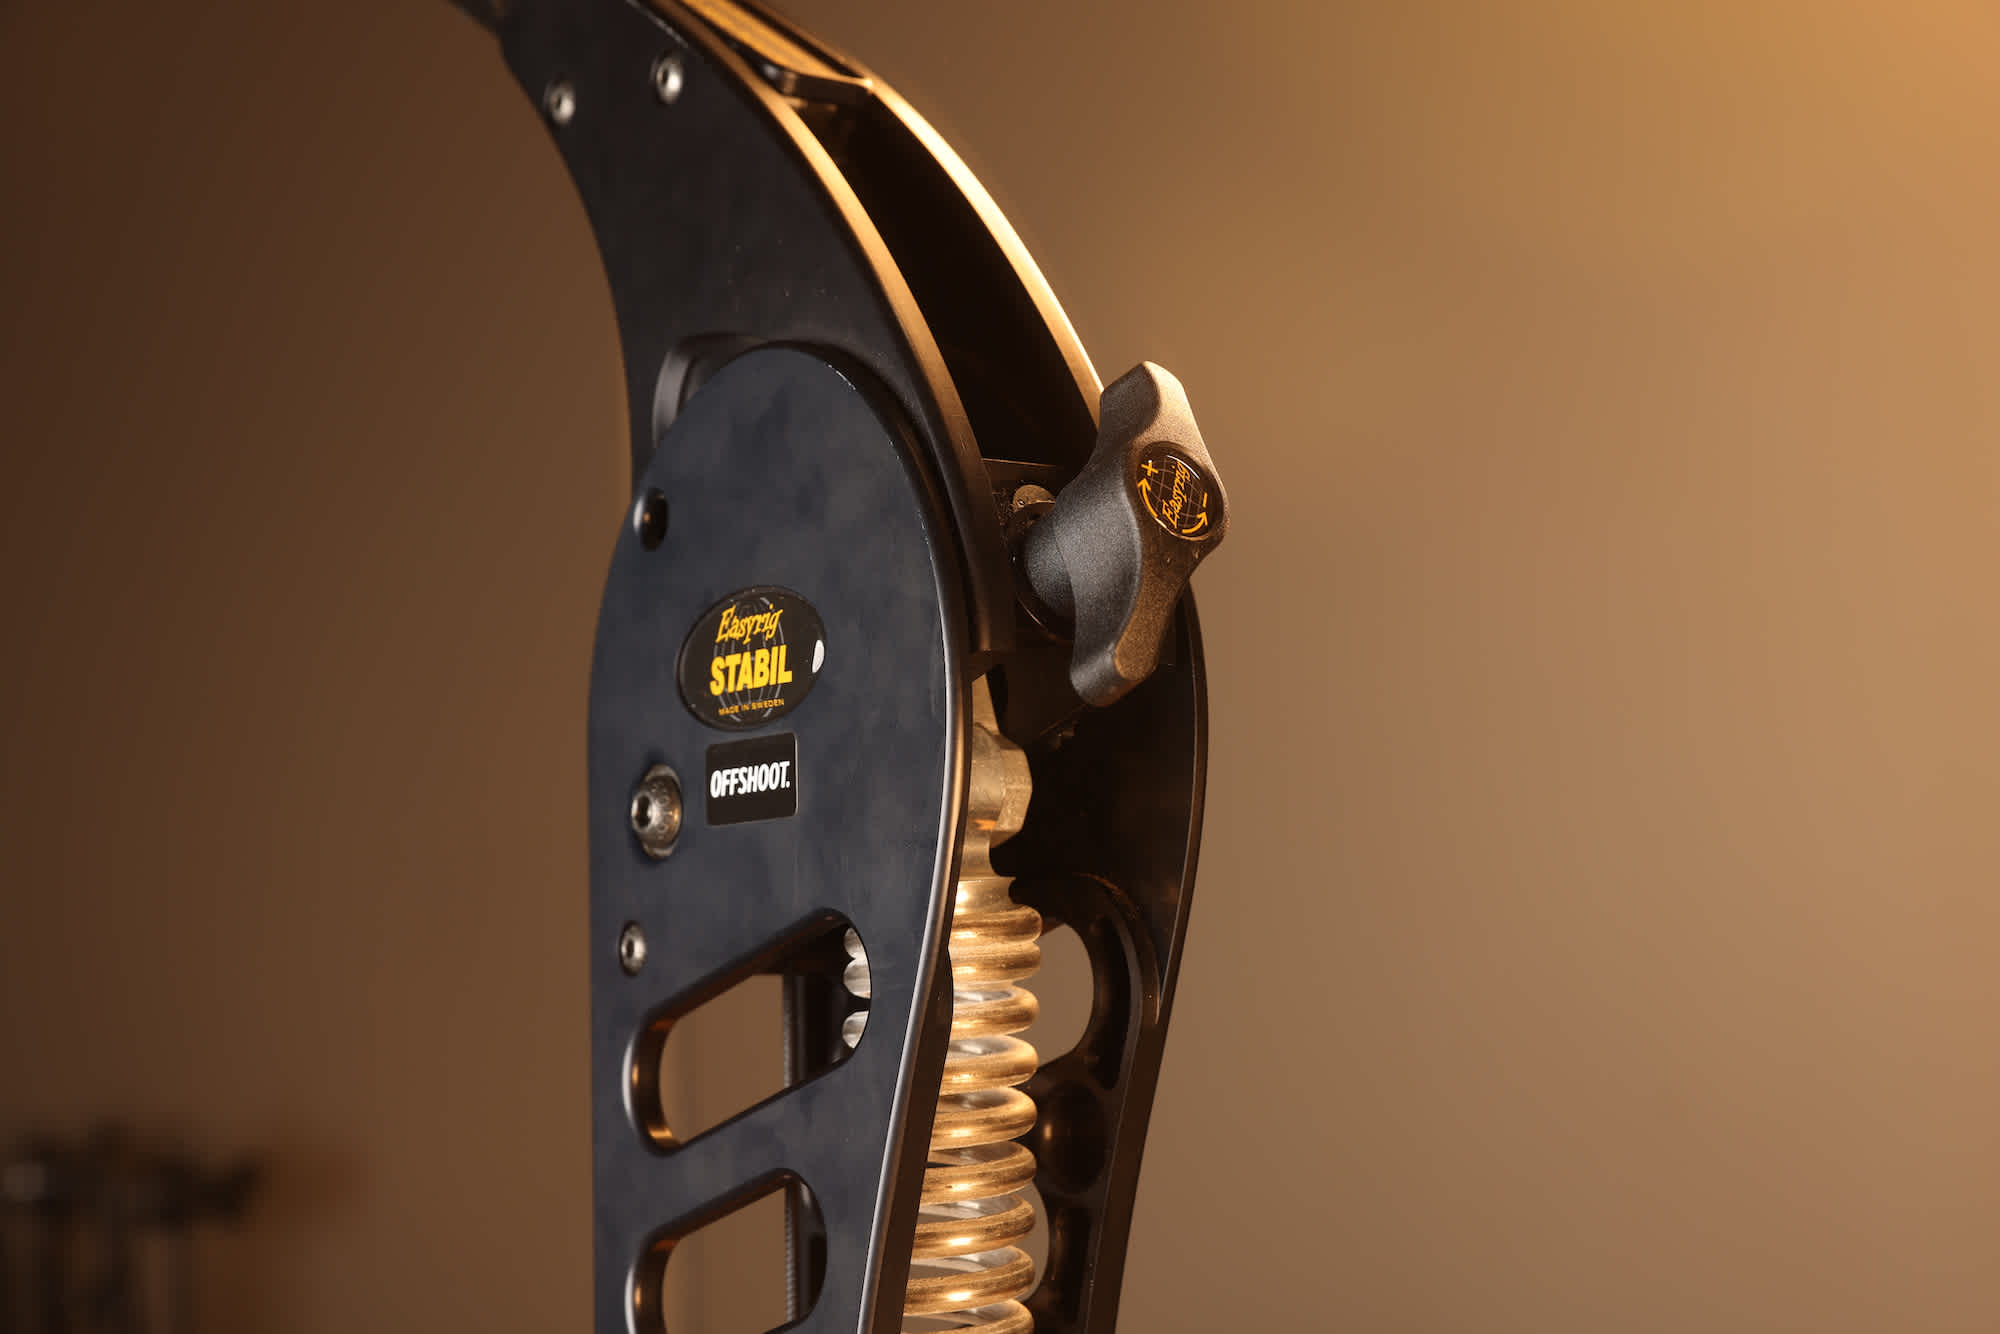
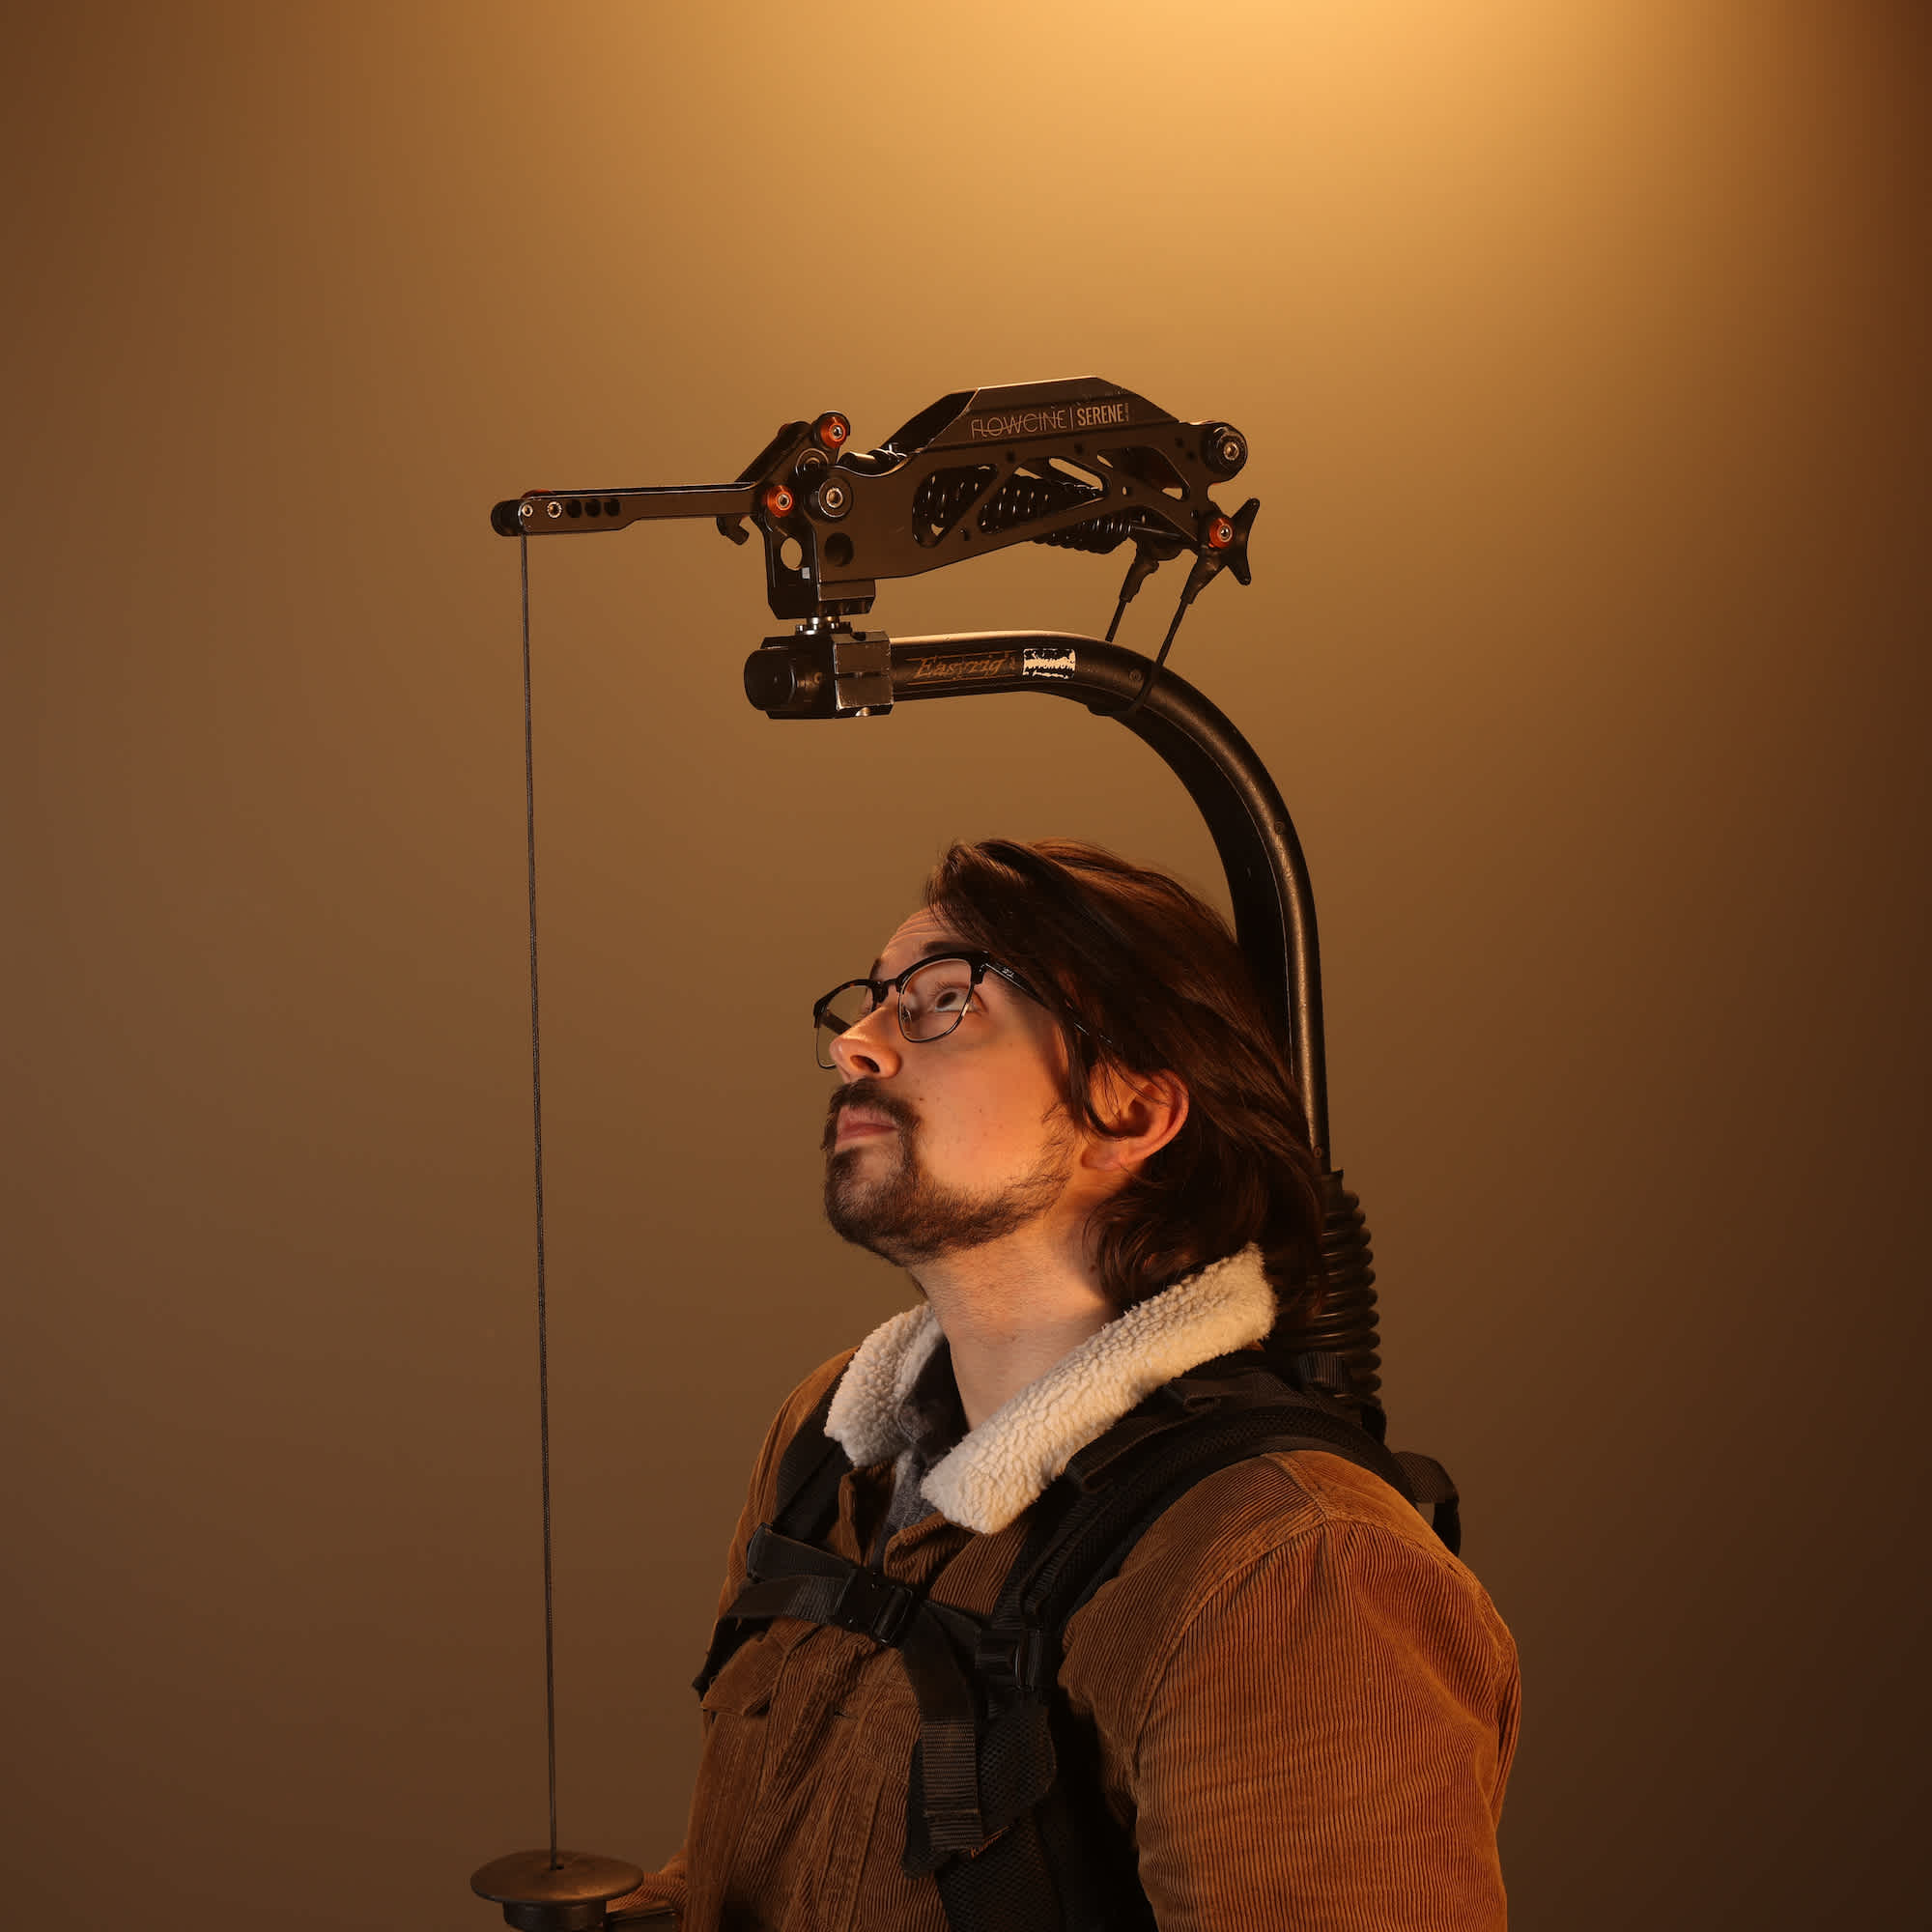
4. Adjusting The Easyrig Stabiliser Arm
Not all Easyrigs will have a stabiliser arm but if they do it is important to have it adjusted correctly so that it has the maximum amount of travel. The process is the same for the Stabil Arm G2 and for the Flowcine Serene.
- At the back of the arm, there is an adjustment screw. You want to increase or decrease the tension so that the arm is in the center of its highest and lowest position when it is supporting the weight of the camera. This will give you the maximum range of motion.
Stabil Arm
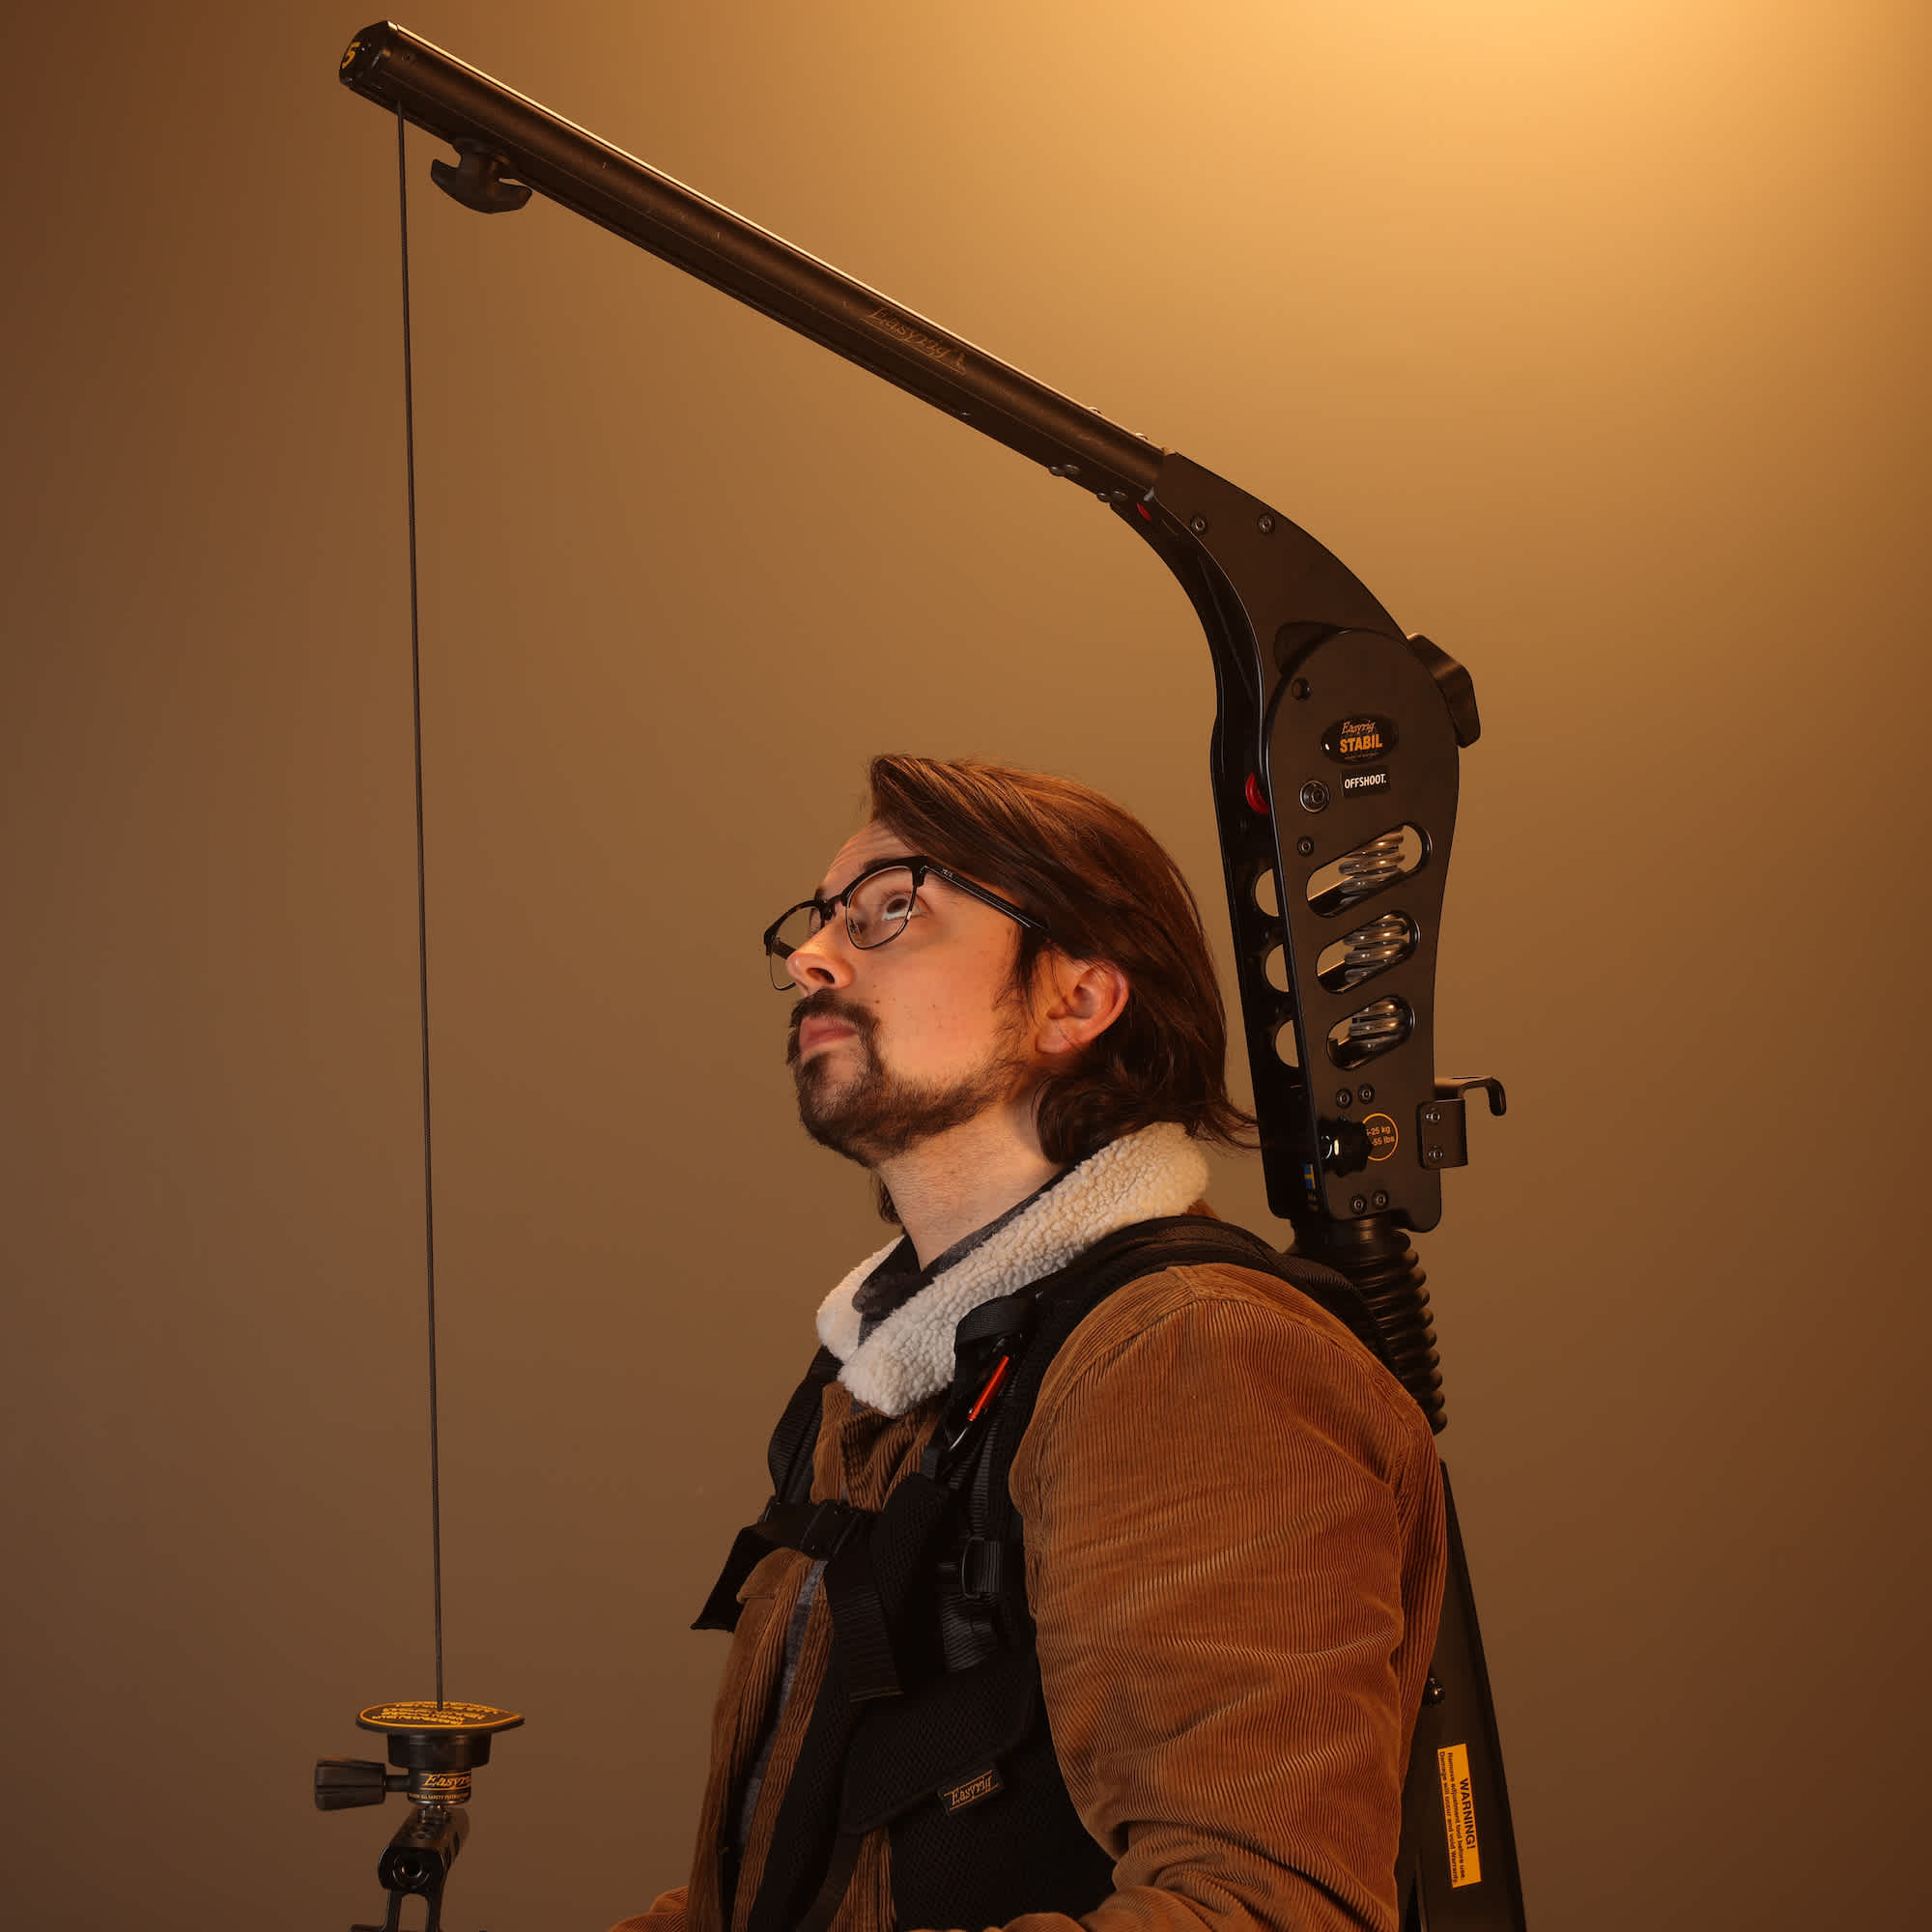
Easyrig Stabil arm is too high.
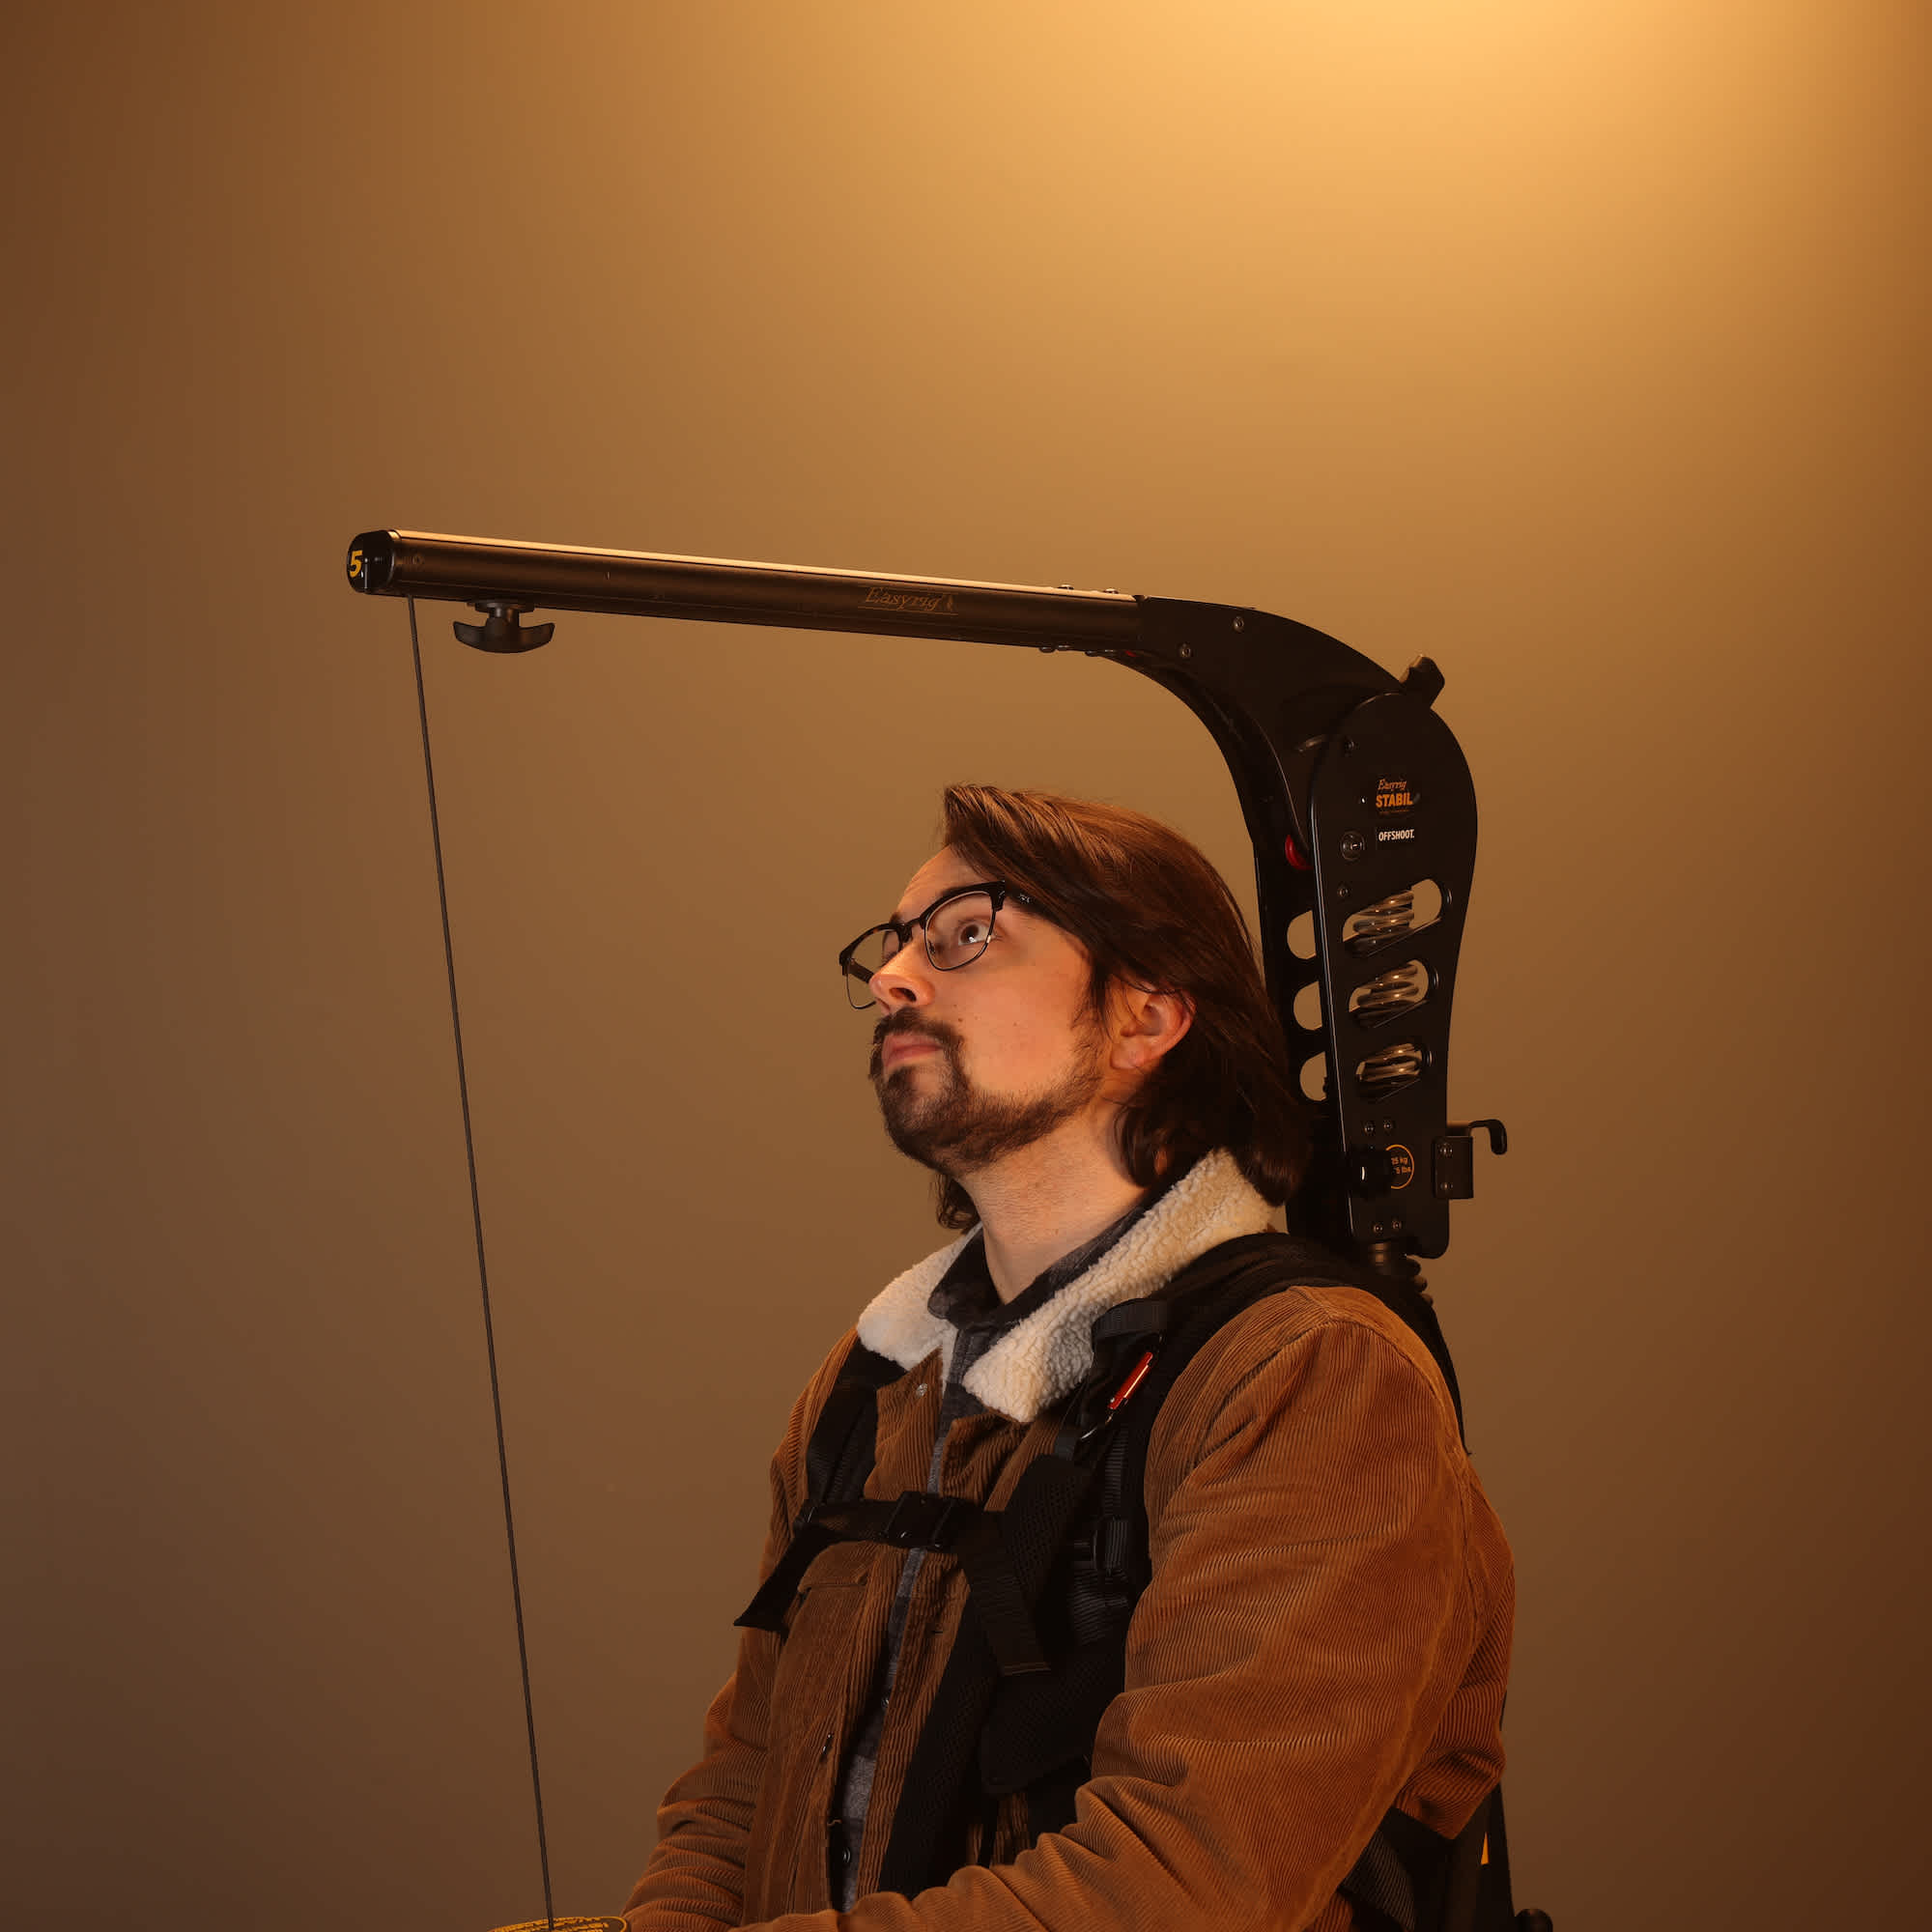
Easyrig Stabil arm is correct.
Easyrig Stabil arm is too low.
Flowcine Serene Arm
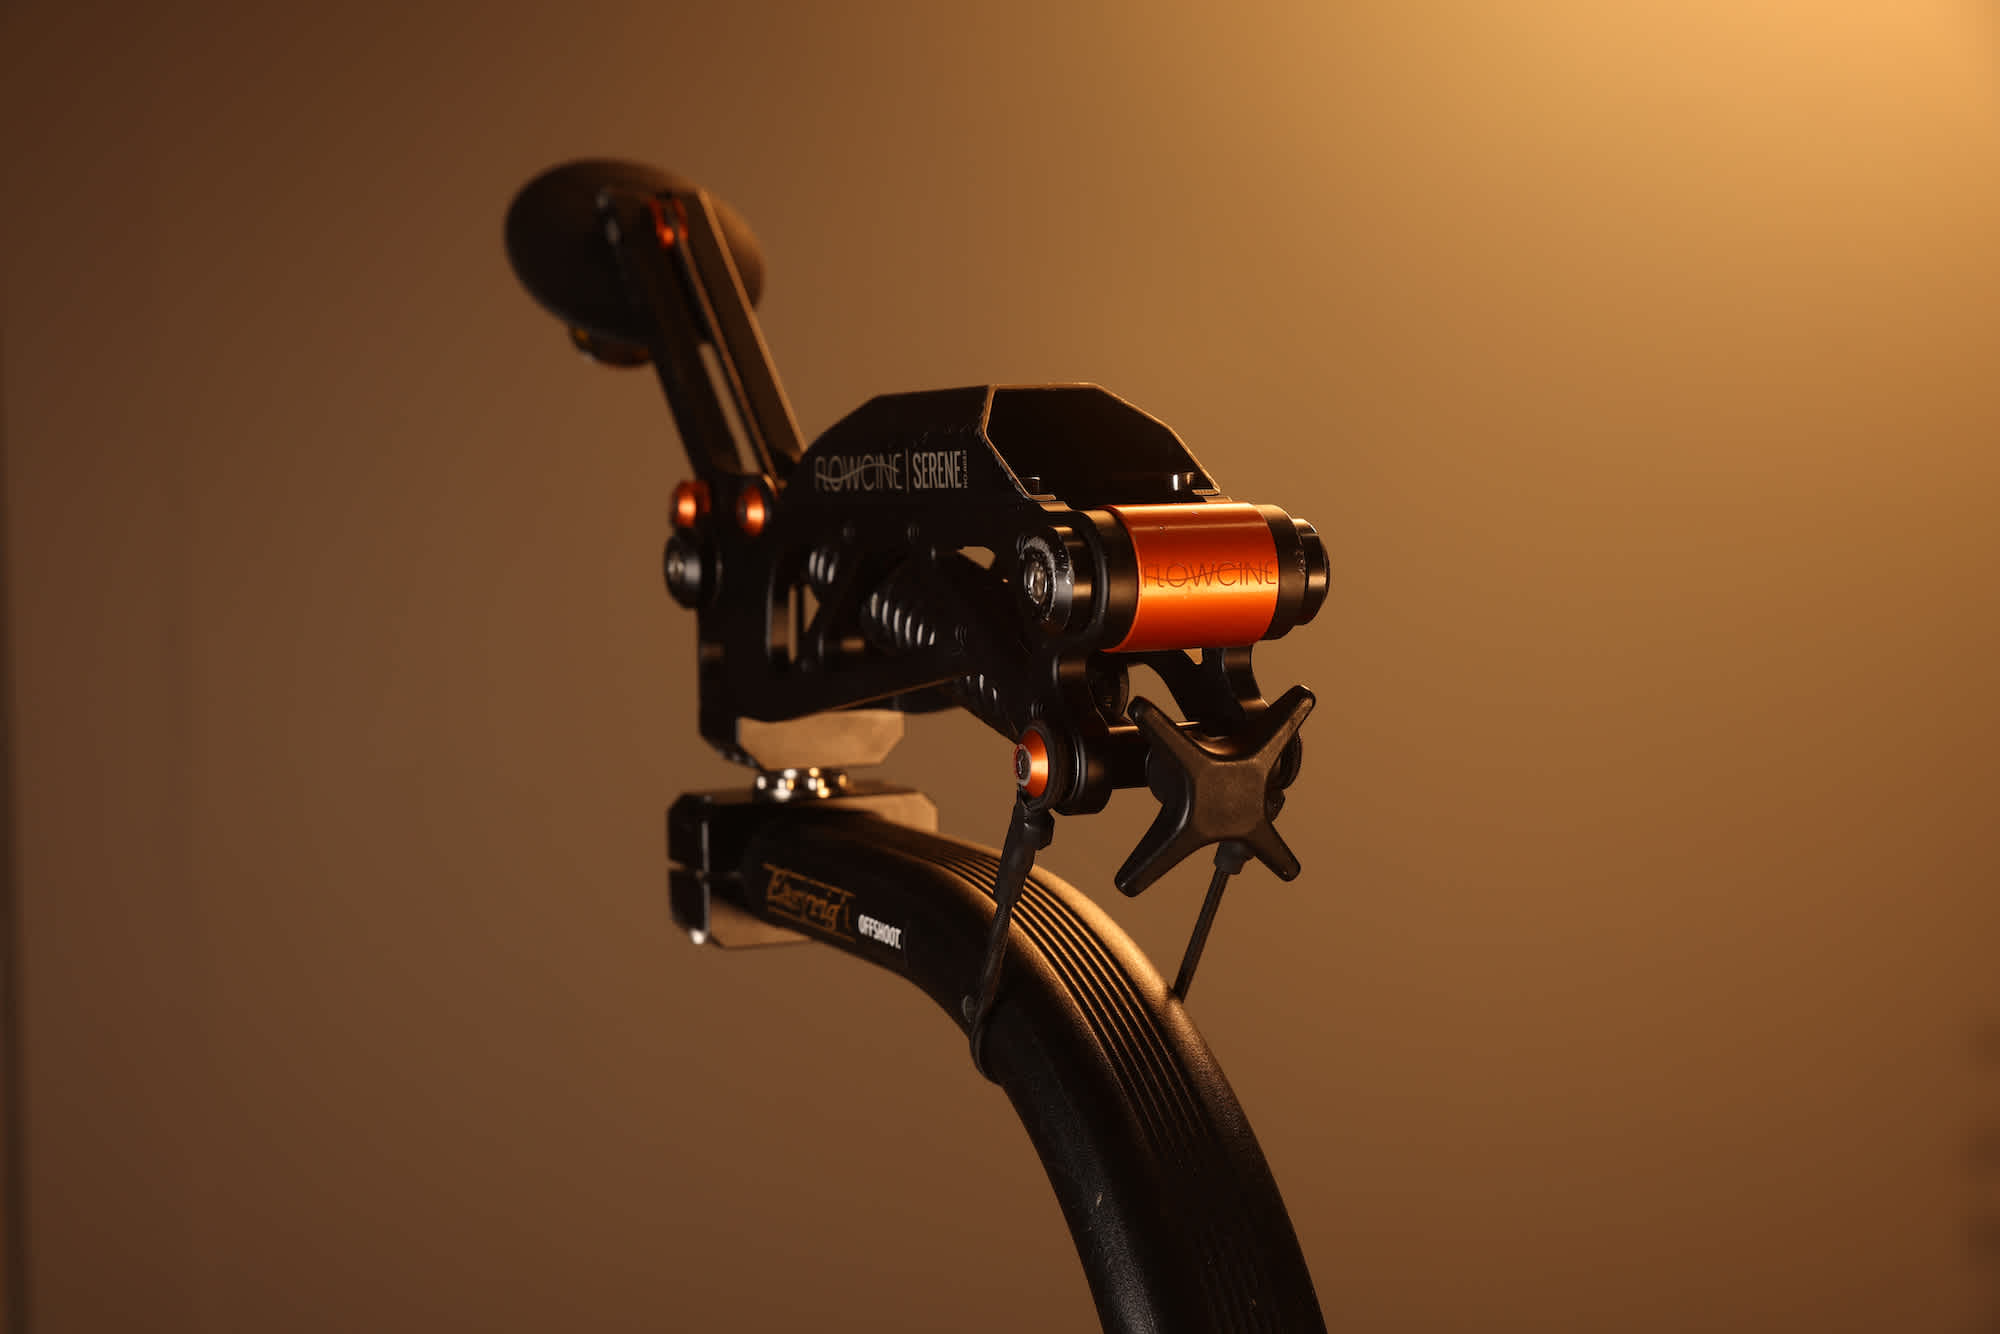
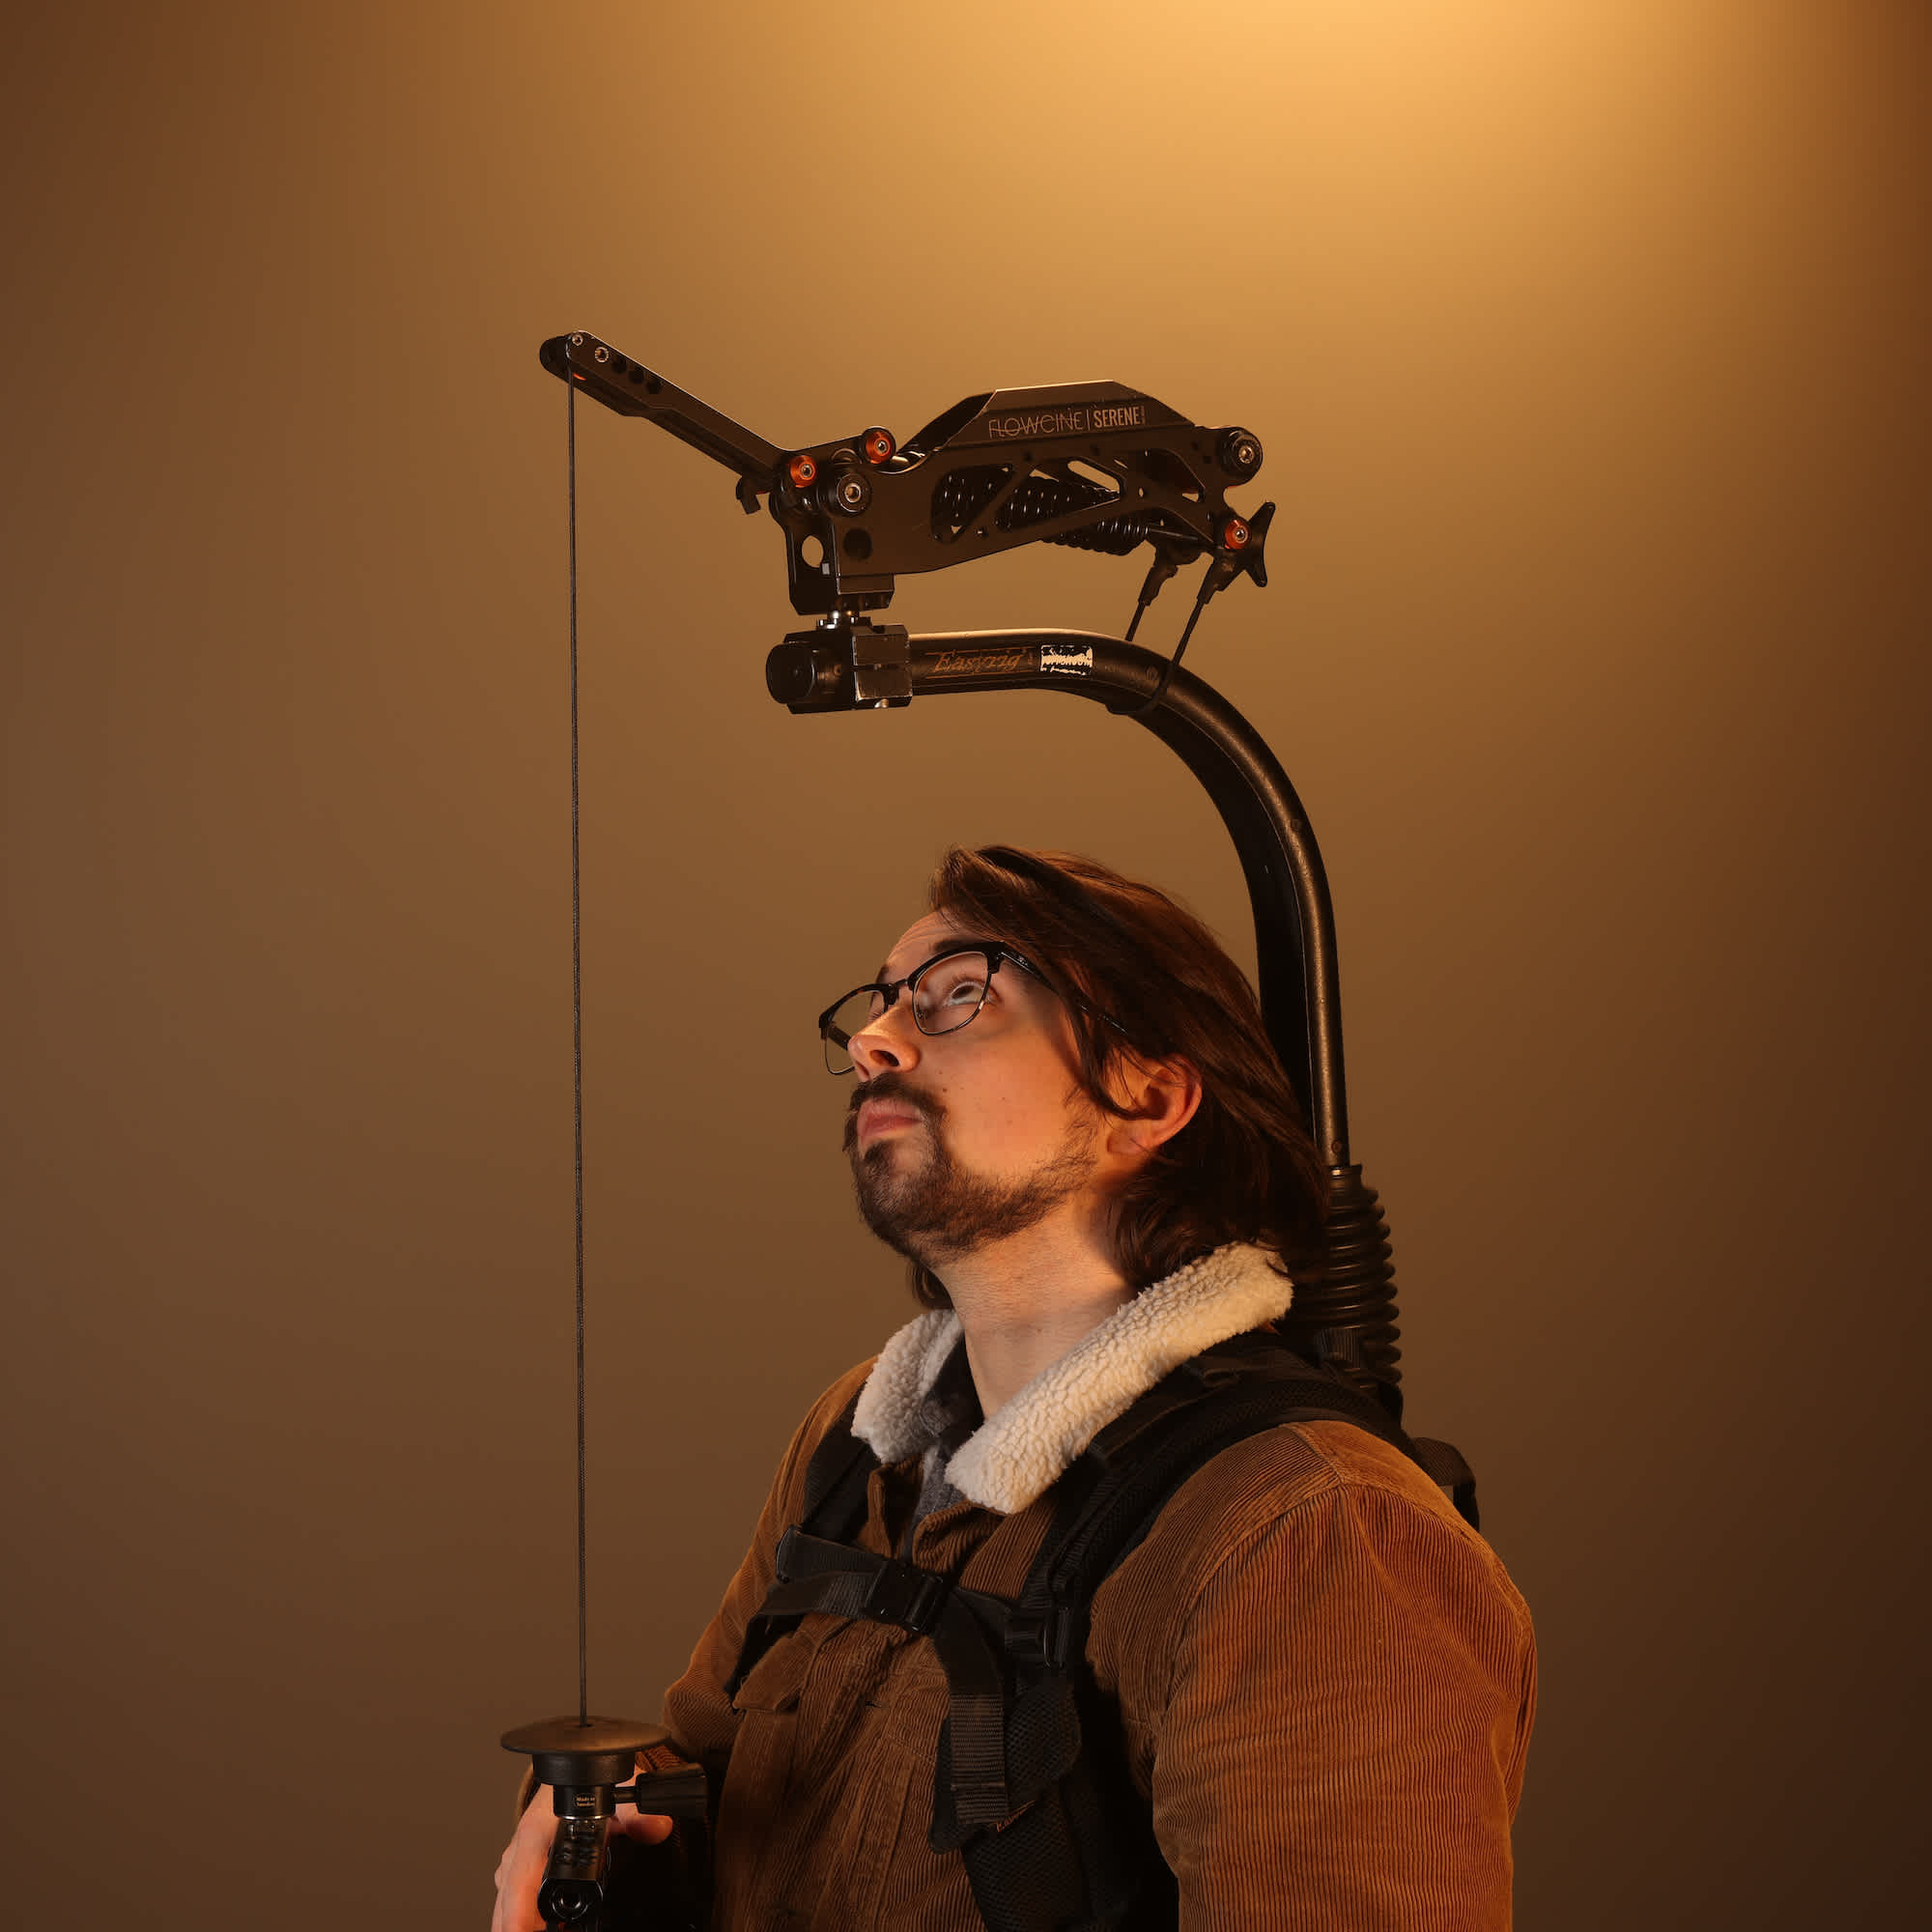
Easyrig Serene arm is too high.
Easyrig Serene arm is correct.
Easyrig Serene arm is too low.
Now that your Easyrig has been set up you can start shooting! Taking a little extra time during set up will ensure that you are comfortable and well supported so you can shoot for longer without fatiguing.
If you have any questions about Easyrig set up or think there is something we haven't covered in this article, please get in touch!