Getting Started With Three Point Lighting
A crash course on how three point lighting works and what role each light has in building a well-lit image.
Grace Harman
Updated April 20, 2022
5 min read
A three point lighting kit is a mainstay of lighting for film and video because it provides a basic structure for setting up your lighting to create a flattering and three dimensional result.
Although we refer to three point lighting, in actual fact you might be able to get away with just two lights on some jobs (or location or budget restrictions might force you to make do).
On other projects with more budget, crew, or for creative reasons, you might decide to use more than three lights to build further depth and texture into the scene. So a three point light kit is really shorthand for a lighting template that can be tweaked depending on crew size, budget, location and time factors, among other reasons.
Once you understand how a three point lighting kit works and have experimented with several variations, you’ll have a solid working knowledge of lighting that you can continue to finesse over time. Creating good lighting is fairly quick to grasp but creating beautiful award-winning lighting is the study of a lifetime!
Now let’s take a very brief look at what each light in a three point kit does, bearing in mind that as you become more experienced you will learn that there are a lot of possible variations to this standard set up.
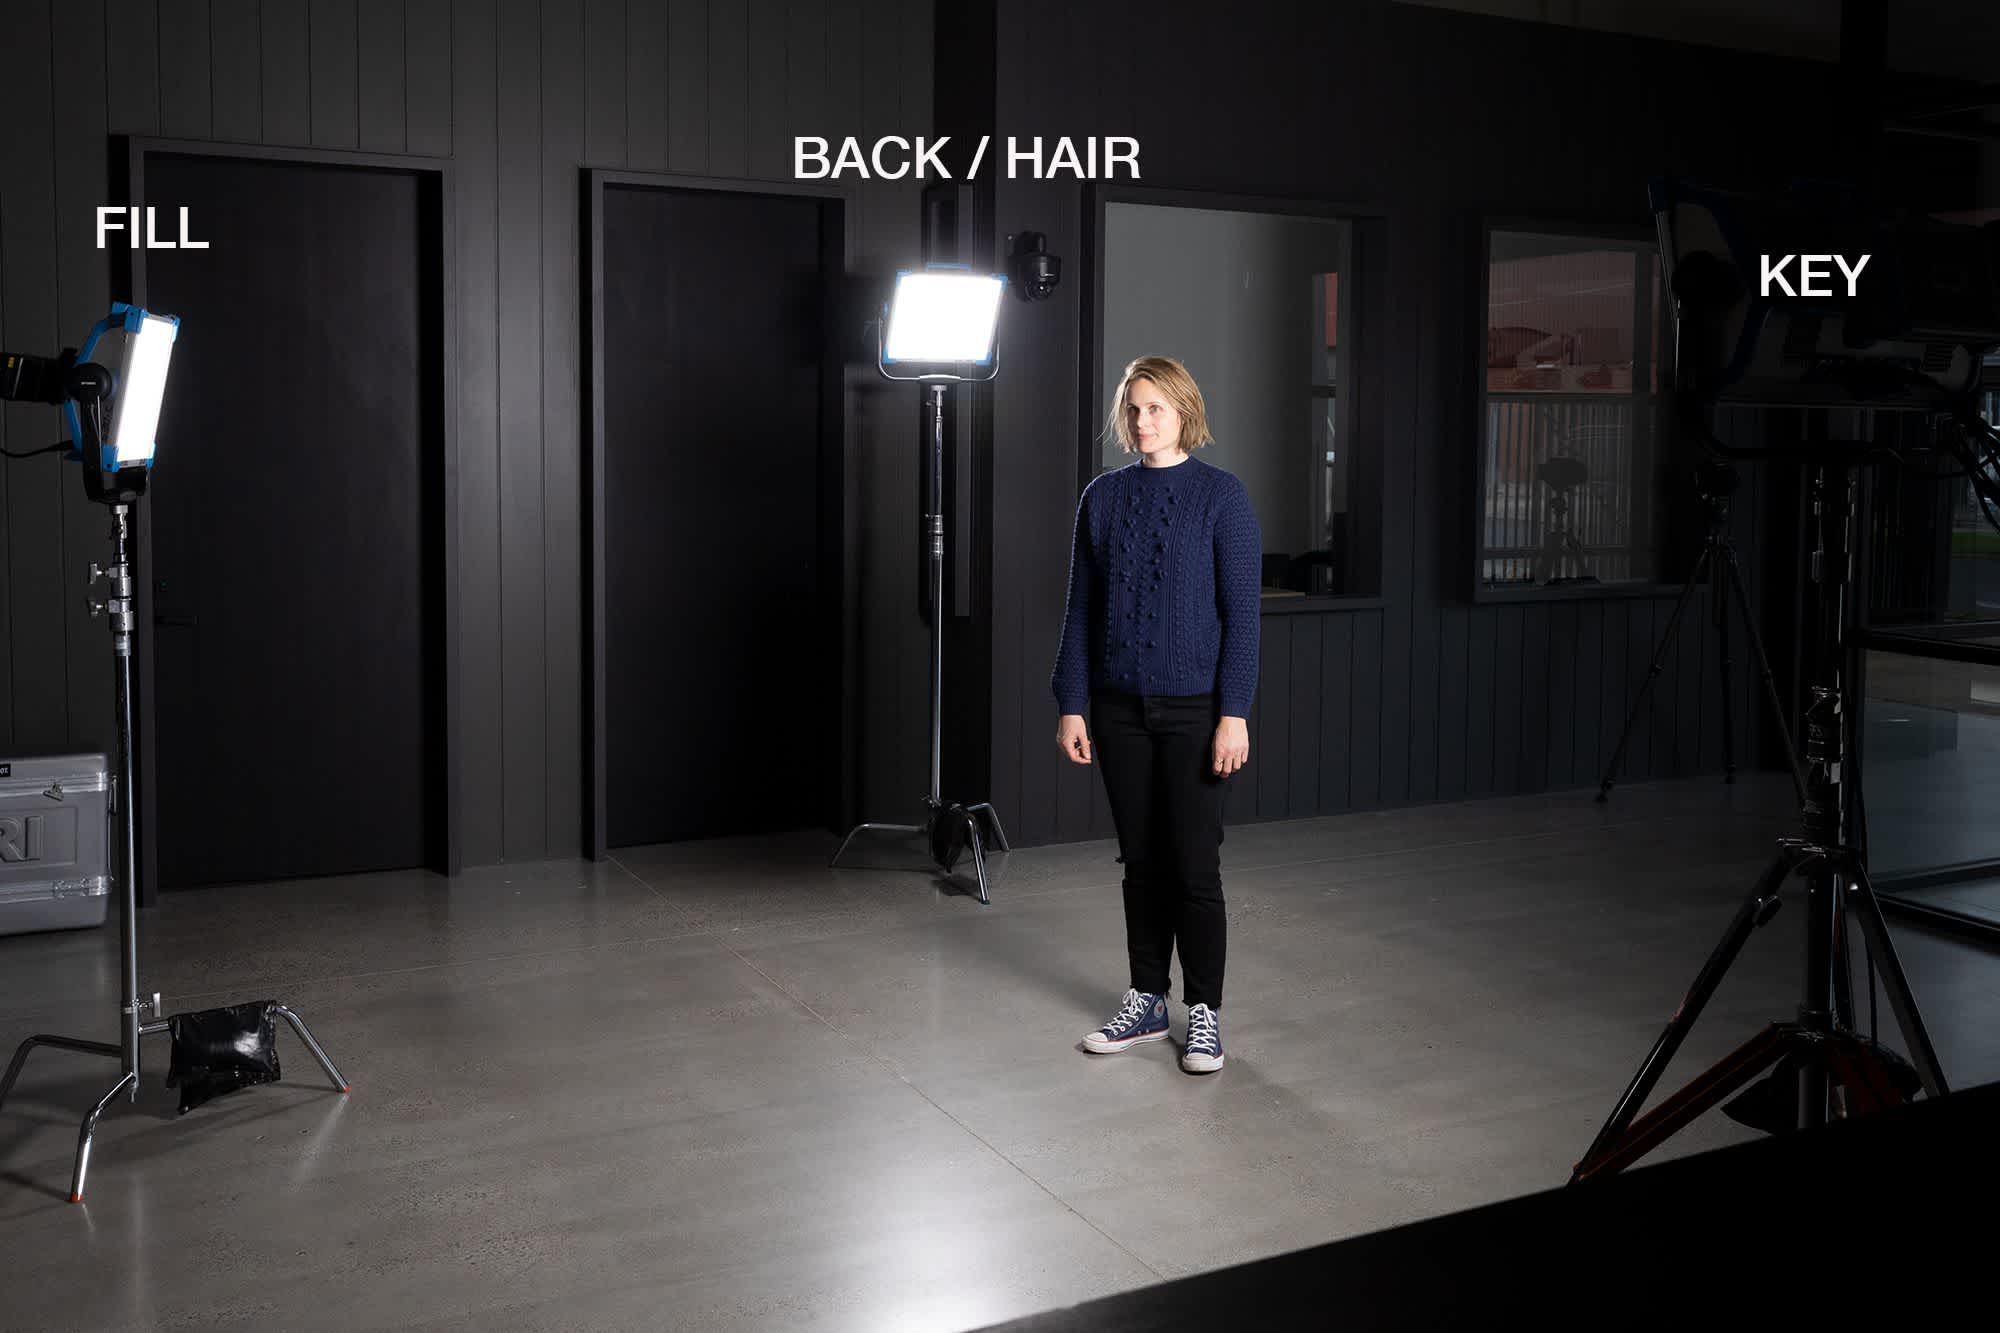
For this set up we used an Arri Skypanel S60-C as the key and two S30-Cs as the fill and back/hair lights.
First up is your main light, which is called a ‘key’ light. As the name suggests, the key light does most of the work highlighting your subject. The only time you wouldn’t use a key light is if you wanted to create a silhouette effect - but that’s a topic for another day. The key light is usually positioned in front and to the side of your subject at a 45 degree angle. This gives you maximum coverage without the light shining painfully into the subject’s eyes or getting in the way of the camera.
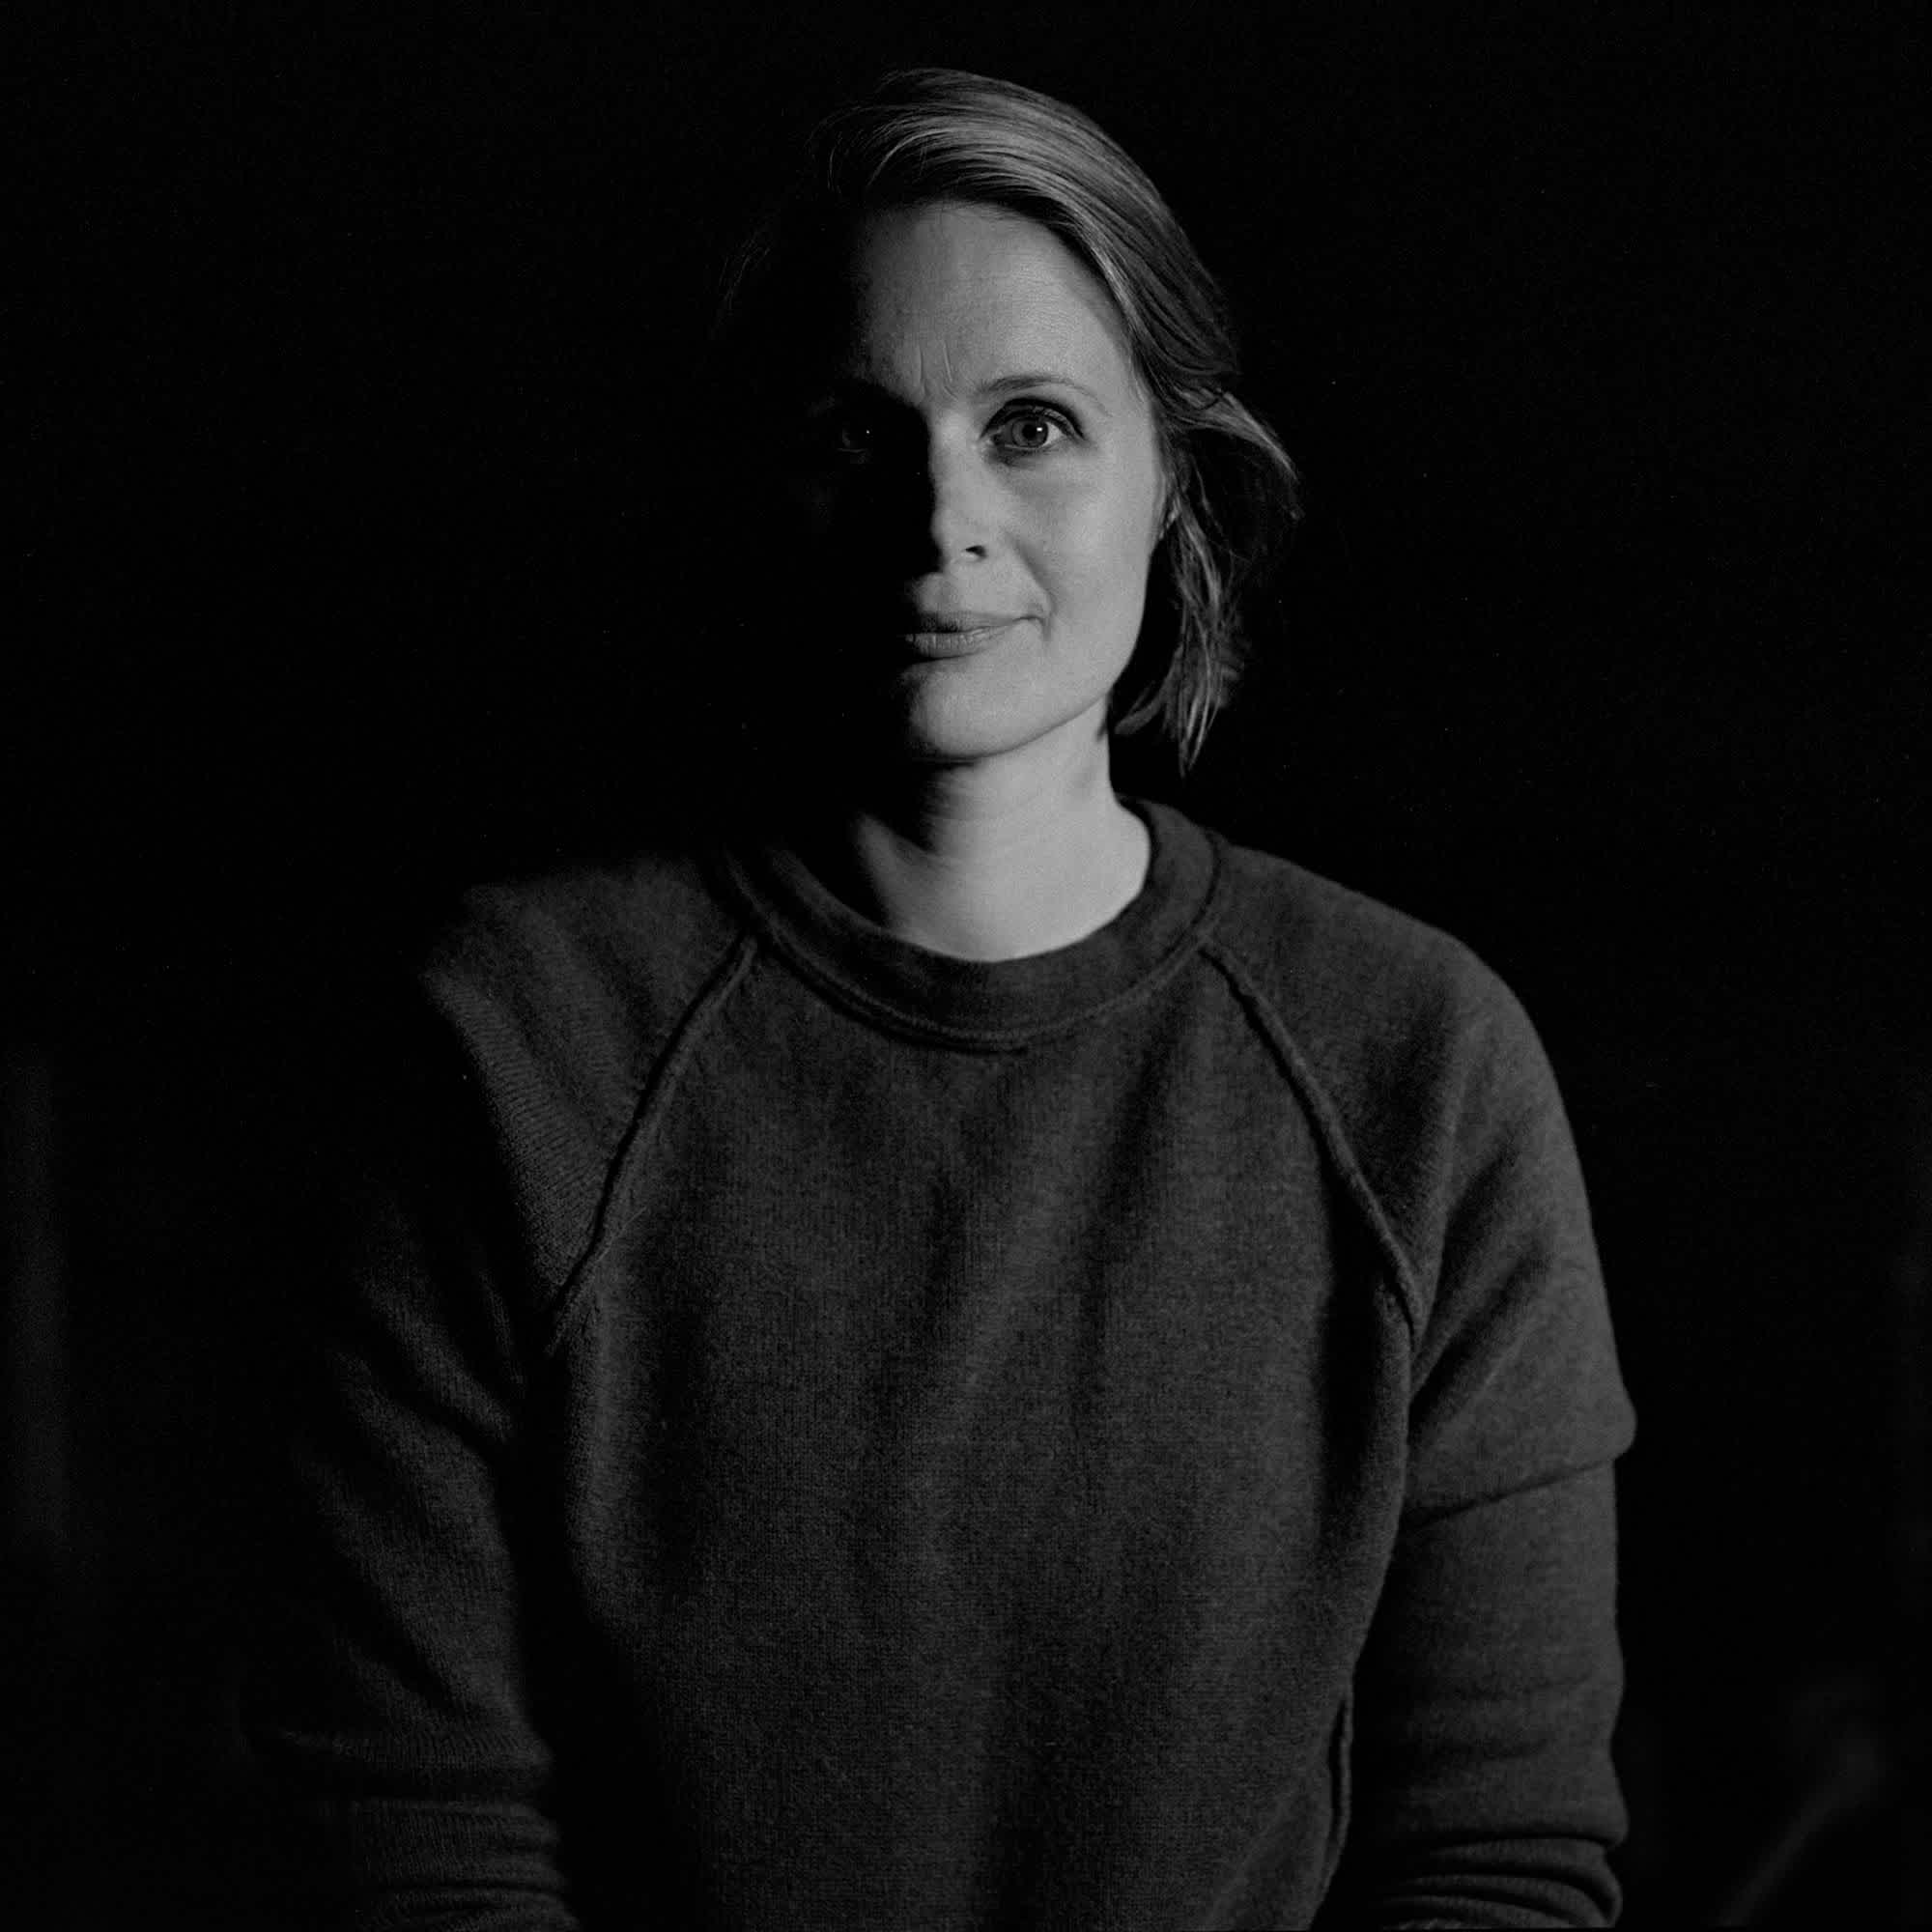
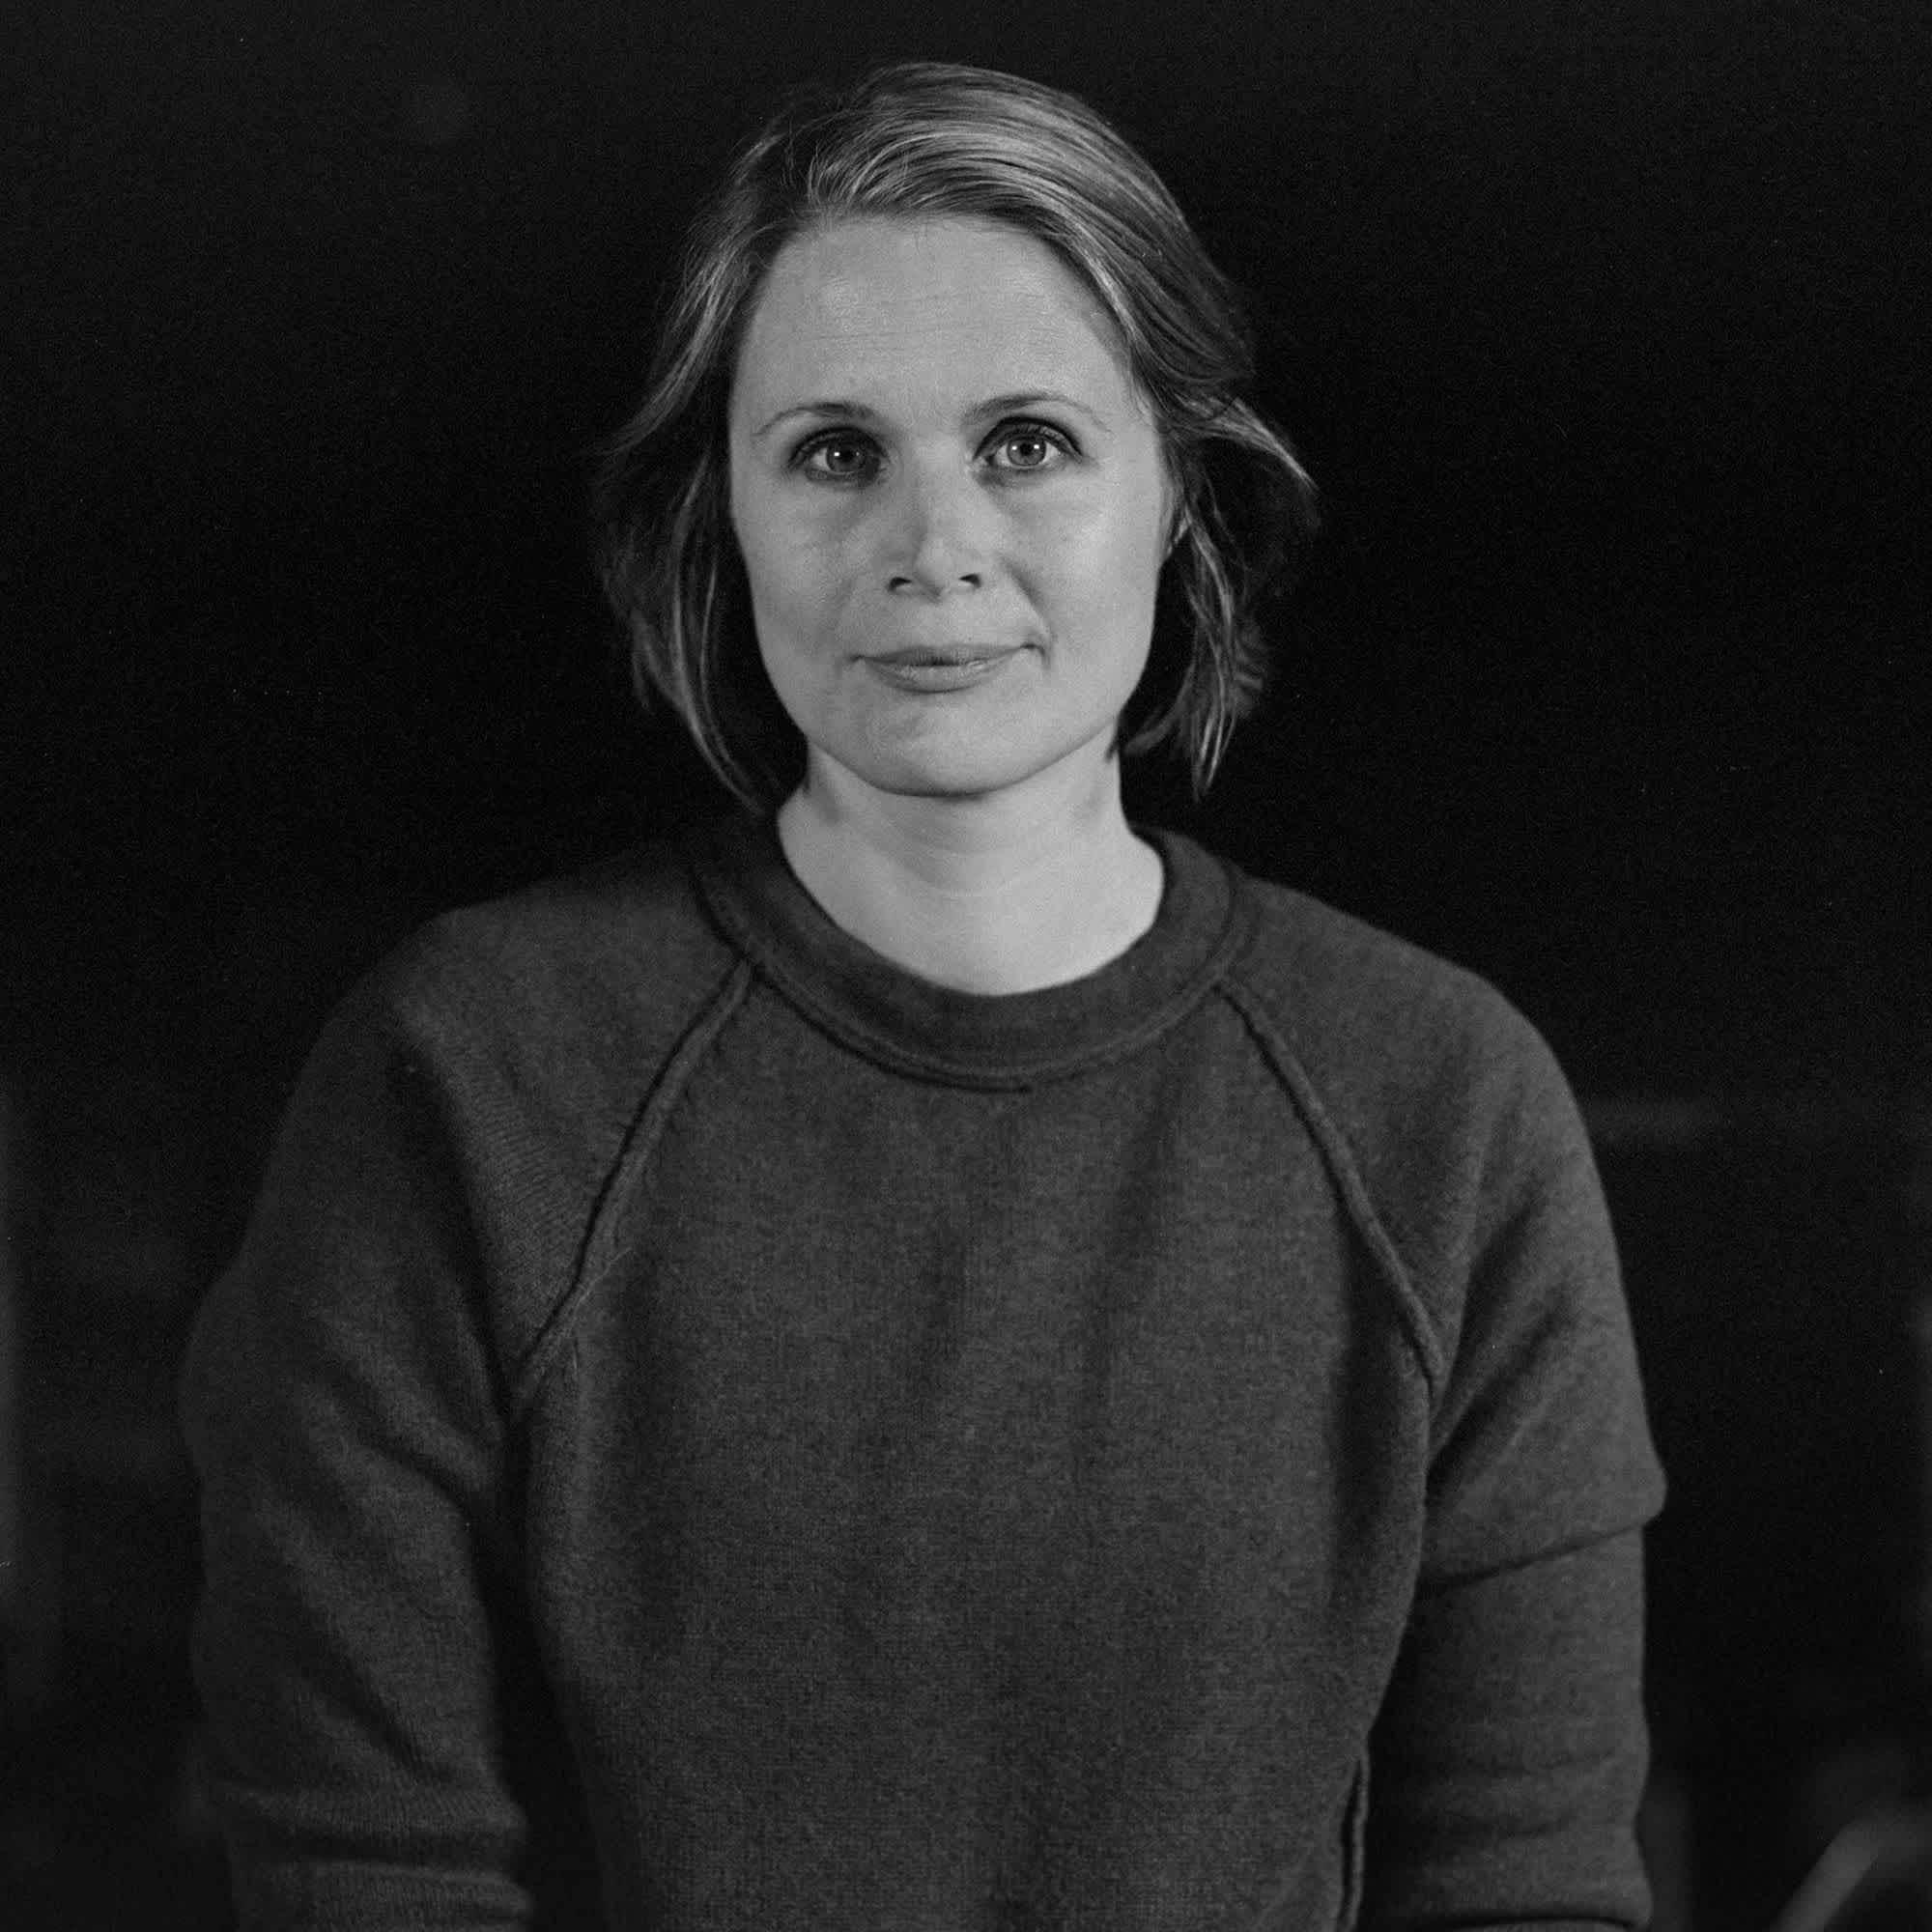
This is how the scene appears with only the key light. In some situations, this might be exactly what you want and there may be no need to use additional lights.
By itself, the key light creates a fairly dramatic look, with one side of the subject lit up and one side in shadow.
While there will be scenarios when you want the dramatic look of the single key light, often you’ll want a more balanced and natural look, so this is when you reach for your second light.
This light is called a ‘fill’ light, precisely because it fills in shadows and softens the look. The fill light is commonly set up on the opposite side of the key light and also at a 45 degree angle.
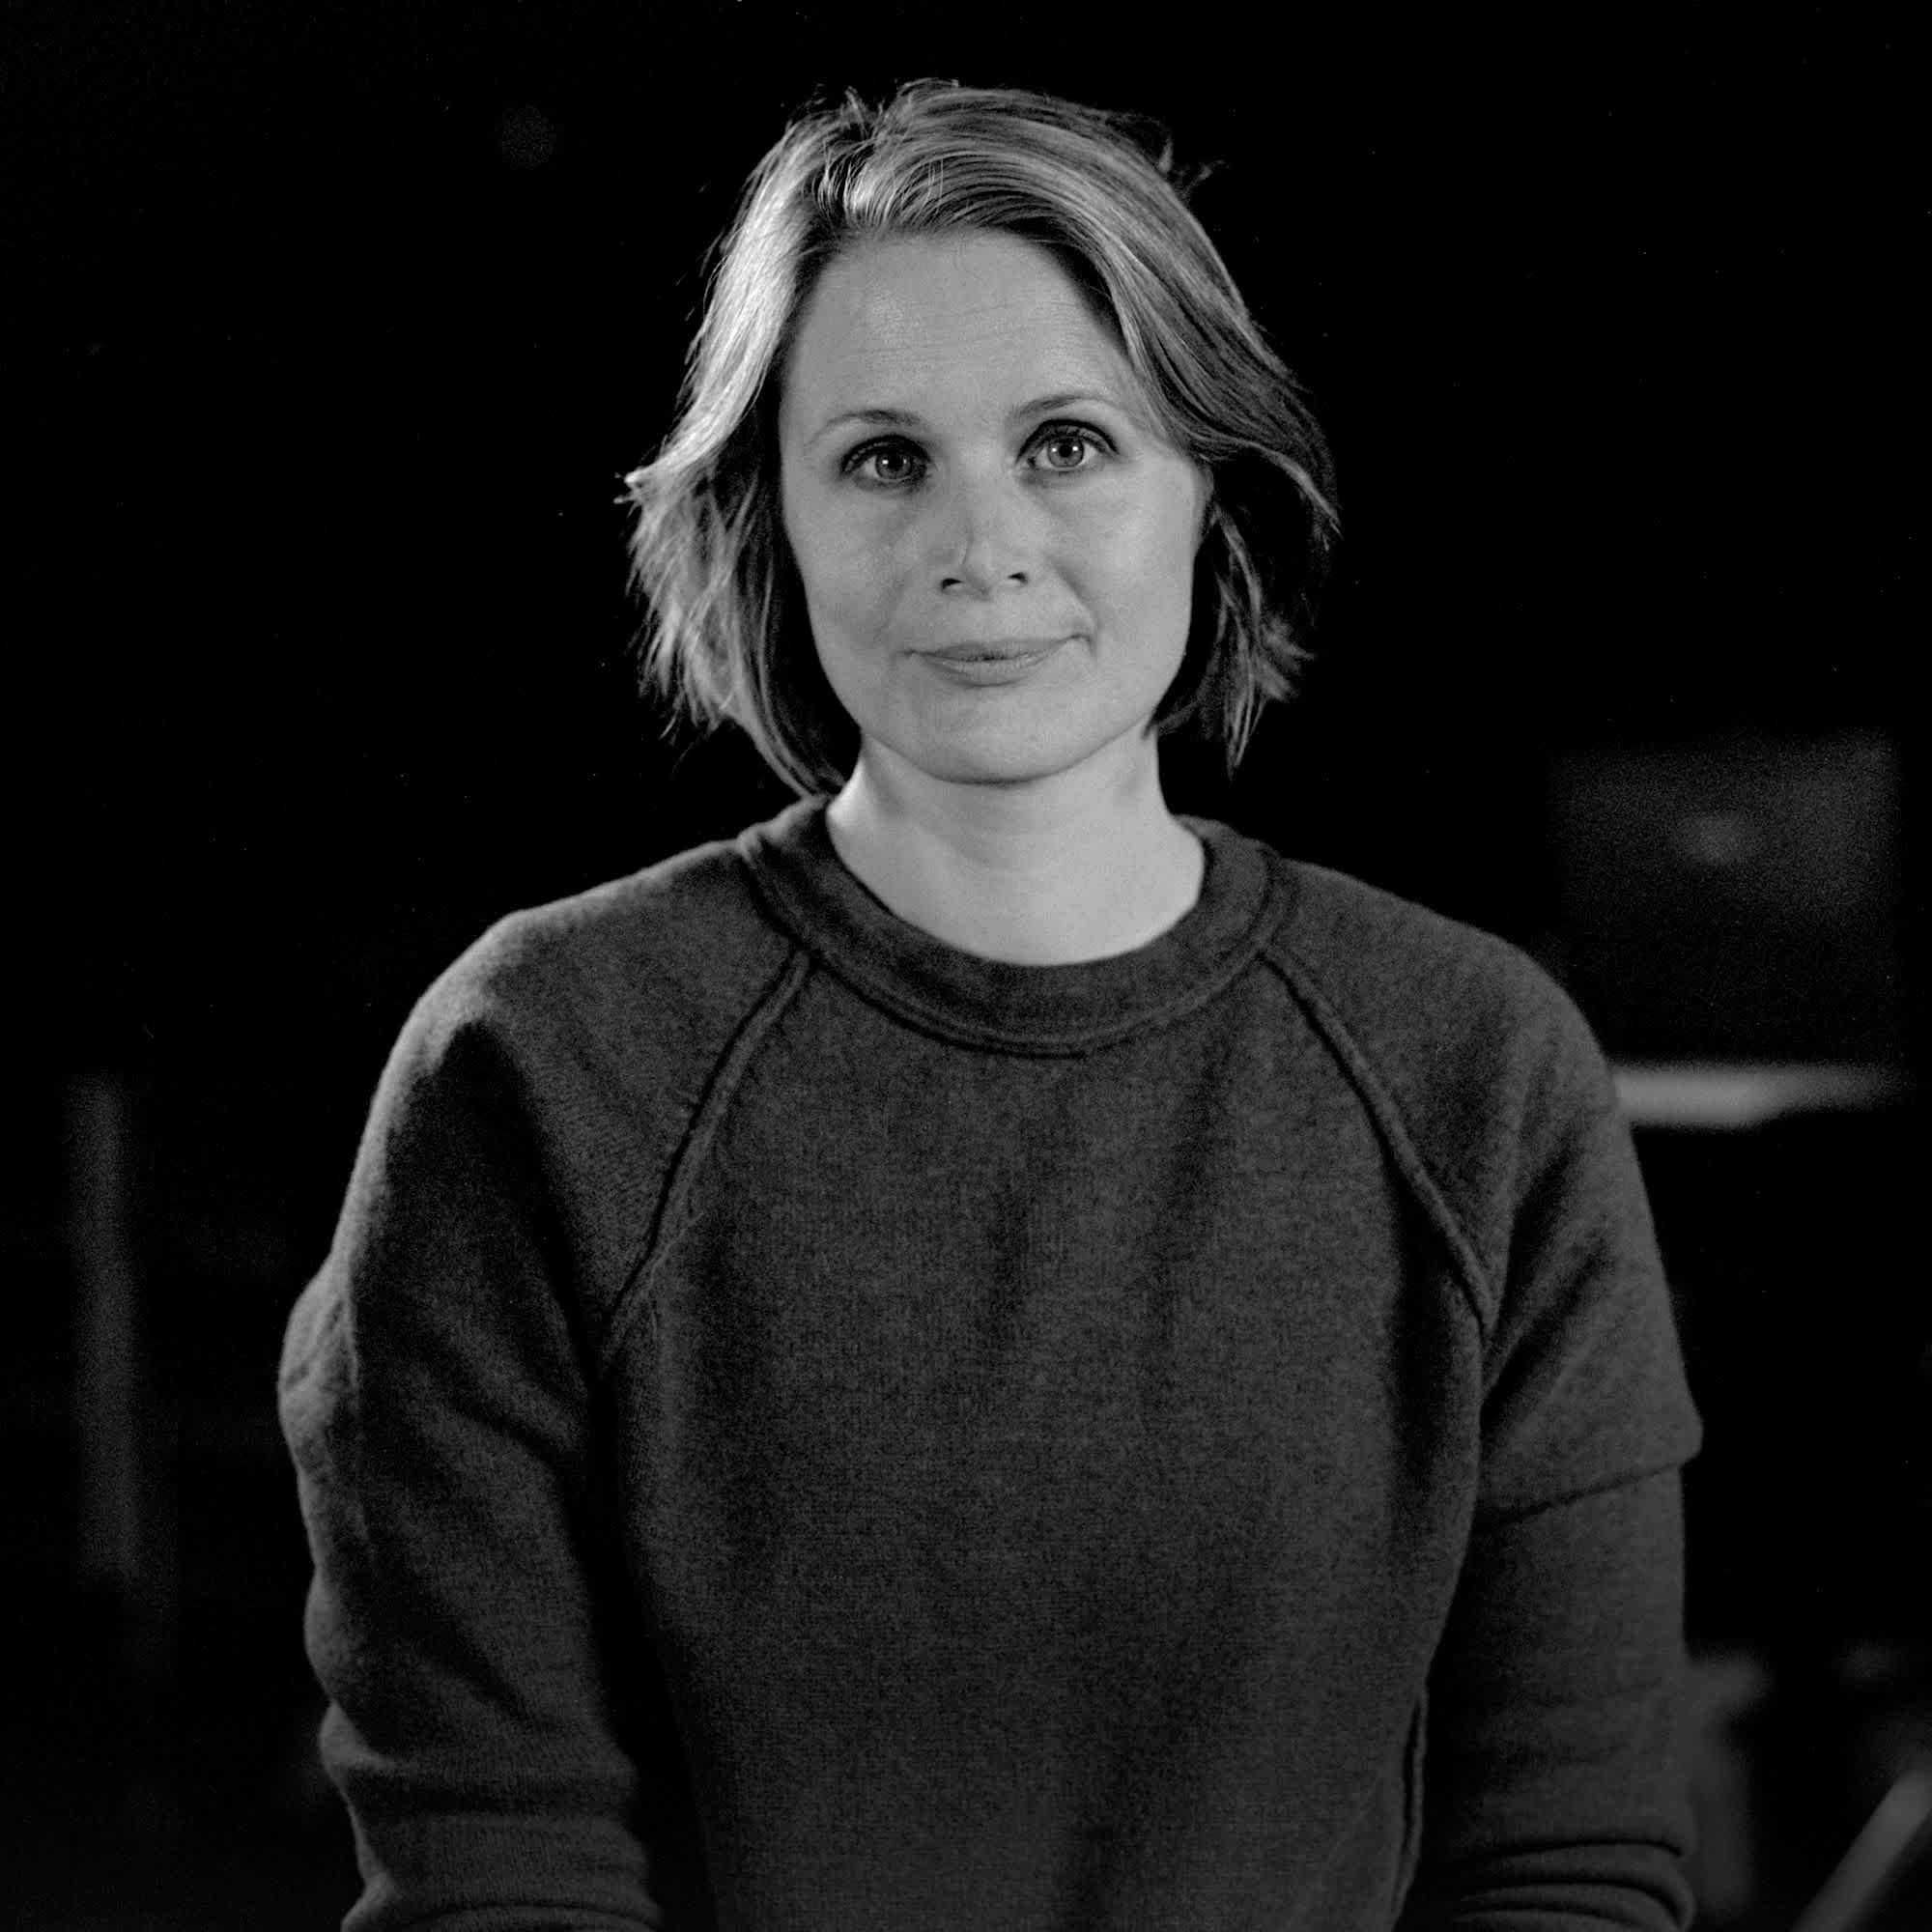
The result from adding a fill light at a 45 degree angle to the subject.
With these two lights alone you will get a nice result that seems perfectly adequate for a video, especially for a basic corporate talking head. So why add a third light?
The third light, or ‘backlight’, provides separation and helps to make your subject pop on screen. Although two lights on your subject may look perfectly alright to your naked eye, your camera can only record in two dimensions so without a third light, the result on screen will be rather flat.

With just the back light on, you can see how this light separates the subject from the background and adds a nice highlight to the hair.
In fact, adding a backlight or a hair light is often the secret to a finished video or film that has depth and looks professional over one that is acceptable but is somehow amateur-looking!
A backlight might be a punchy little light or it might be a larger soft light. There are a variety of different lights you can use as a back light depending on the look you are trying to achieve, but any of them will help create the depth in your image.
Once again the name suggests how this light is positioned. The backlight is behind the subject (it can sit directly behind or to one side) and in this example is pointing at them to create a nice halo effect around the hair. Alternatively, the backlight can illuminate the background itself to separate the subject from the background - perhaps by using a different colour to enhance the separation.
This is the final result with all three lights combined. In this example, we wanted a mostly symmetrical result but also to retain some subtle variation between the key and fill, and to use the backlight to emphasise one side only.
Side-By-Side Comparison
So that you can more easily see the differences between the number of lights used, here are the three variations side-by-side.
Left: key light only. Centre: key and fill. Right: key, fill and backlight.
So that’s a very brief crash course on three point lighting. There are many ways to vary the basic concepts presented here to achieve a wide variety of creative looks, but understanding the basics will help you get there.